Panasonic PV-GS90 Digital Video Camcorder - Page 24
Recording on a tape, On-screen display in the tape, recording mode, About the remaining tape time - dv cable
 |
UPC - 037988255849
View all Panasonic PV-GS90 manuals
Add to My Manuals
Save this manual to your list of manuals |
Page 24 highlights
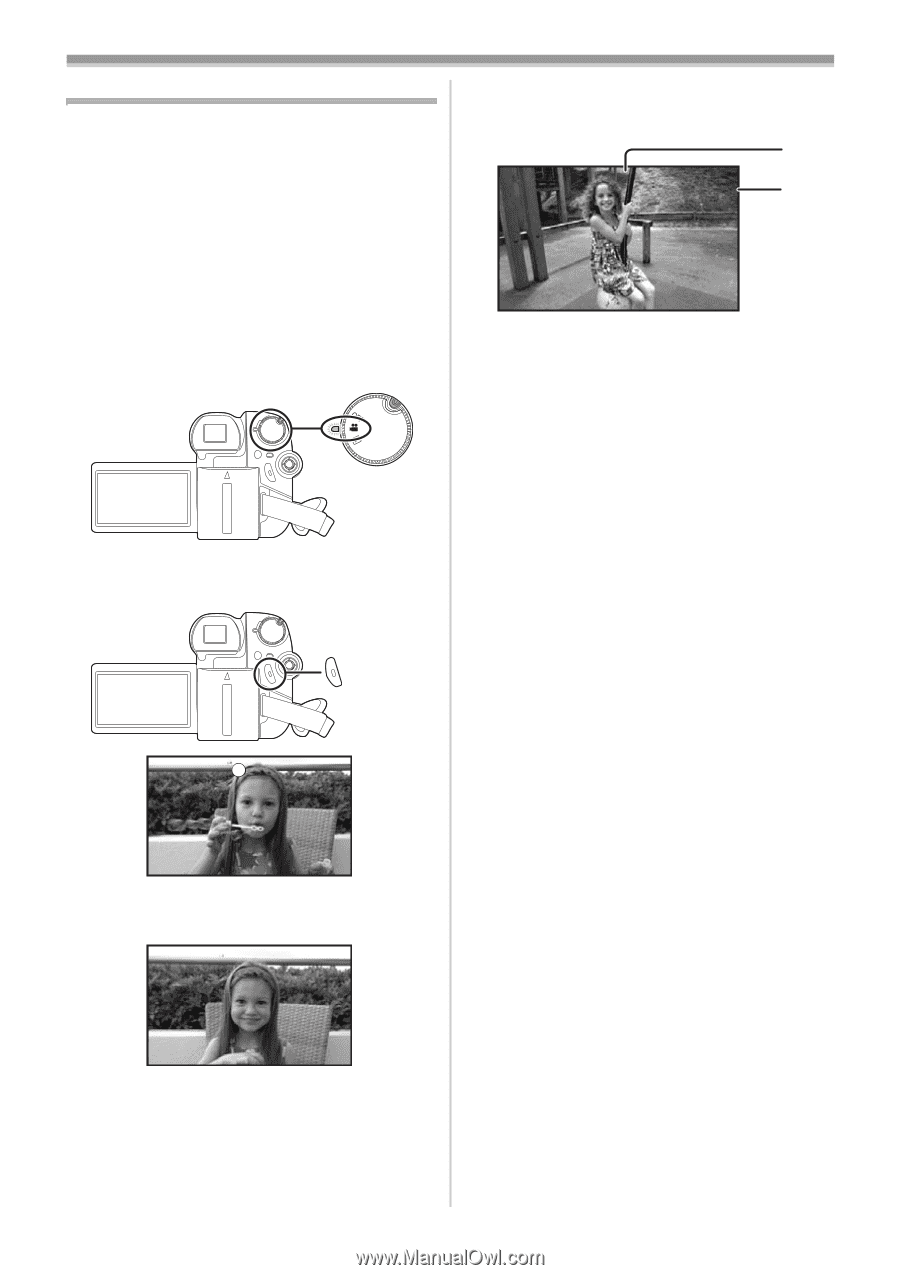
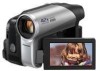
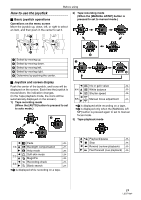
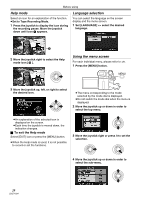
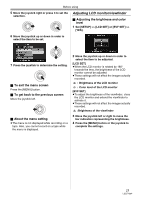
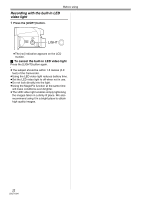
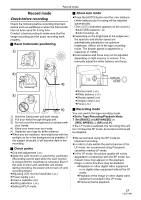
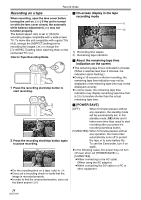
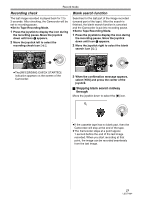
Record mode Recording on a tape When recording, open the lens cover before turning the unit on. (-12-) If the unit is turned on with the lens cover closed, the automatic white balance adjustment (-49-) may not function properly. The default aspect ratio is set to [16:9] for recording images compatible with a wide-screen TV. To make this unit compatible with regular TVs (4:3), change the [ASPECT] setting before recording the images (-30-) or change the [TV ASPECT] setting when watching them on the connected TV (-36-). ≥Set to Tape Recording Mode. 1 Press the recording start/stop button to start recording. 2 Press the recording start/stop button again to pause recording. ; ≥For the recording time on a tape, refer to -13-. ≥Carry out a recording check to verify that the image is recorded properly. ≥In order to find the unrecorded section, carry out the blank search (-25-). ª On-screen display in the tape recording mode 1) 0h00m10s00f R 0:30 2) 1) Recording time elapse 2) Remaining tape indication ª About the remaining tape time indication on the screen ≥The remaining tape time is indicated in minutes. (When it reaches less than 3 minutes, the indication starts flashing.) ≥During a 15-second or shorter recording, the remaining tape time indication may not be displayed or the remaining tape time may not be displayed correctly. ≥In some cases, the remaining tape time indication may display remaining tape time that is 2 to 3 minutes shorter than the actual remaining tape time. ª [POWER SAVE] [OFF]: When 5 minutes passes without any operation, the standby mode will be automatically set. In the standby mode, [;] blinks and it takes more time than usual to start recording after you press the recording start/stop button. [5 MINUTES]: When 5 minutes passes without any operation, the Camcorder automatically turns off to protect the tape or to save battery life. To use the Camcorder, turn it on again. ≥In the following cases, the power may not turn off even when set [POWER SAVE] >> [5 MINUTES]. ≥When connecting to the AC outlet (When using the AC adaptor) ≥When connecting the DV cable to a PC or other equipment 24 LSQT1284
-
 1
1 -
2
-
3
-
4
-
5
-
6
-
7
-
8
-
9
-
10
-
11
-
12
-
13
-
14
-
15
-
16
-
17
-
18
-
 19
19 -
 20
20 -
 21
21 -
 22
22 -
 23
23 -
 24
24 -
 25
25 -
 26
26 -
 27
27 -
 28
28 -
 29
29 -
30
-
31
-
32
-
33
-
34
-
35
-
36
-
37
-
38
-
39
-
40
-
41
-
42
-
43
-
44
-
45
-
46
-
47
-
48
-
49
-
50
-
51
-
52
-
53
-
54
-
55
-
56
-
57
-
58
-
59
-
60
 |
 |