Panasonic SAAK410 SAAK410 User Guide - Page 15
Optional Antenna Connections, External Unit Connections, Using An External Unit
 |
View all Panasonic SAAK410 manuals
Add to My Manuals
Save this manual to your list of manuals |
Page 15 highlights
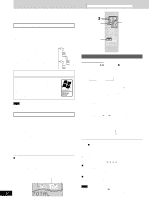
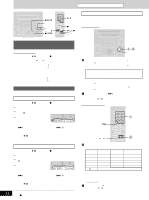
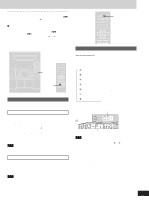
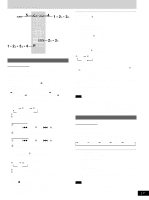
Recording To stop recording Press [L, STOP]. If the tape finishes before the CD The CD continues playing. Press [L, STOP] to stop it. To record on the other side of the tape Turn the tape over and press [a REC]. Reducing noise when recording AM Remote control only Hold down [PLAY MODE] while recording. Every time you hold down the button: BP1 ↔ BP2 Choose the setting with the least noise. Note • Changes to volume and sound/field quality do not affect recording. • You cannot open deck 1 while recording. • You cannot fast-forward or rewind one deck while recording with the other. • When recording an AM broadcast, sound is momentarily interrupted when you start and stop the recording. Erasure prevention Use a screwdriver or similar object to break out the tab. Side A Tab for side B Tab for side A To re-record on a protected cassette Cover the hole with adhesive tape. Adhesive tape To erase a tape 1. Press [:, TAPE] and then [L, STOP]. 2. Insert the recorded tape into deck 2. Ensure there is no tape in deck 1. 3. Press [a REC]. Optional antenna connections Use outdoor antenna if radio reception is poor. FM outdoor antenna FM outdoor antenna (not included) 75 Ω coaxial cable (not included) 1 30 mm (1 3/16") 1 2 ShSiehldielbdrabirdaid 15 mm 2 (19/32") Core wire Core wire 3 • Disconnect the FM indoor antenna. • The antenna should be installed by a competent technician. Optional antenna connections AM outdoor antenna AM outdoor antenna (not included) 5 -12 m (16 - 40 ft.) AM loop antenna (included) Run a piece of vinyl wire horizontally across a window or other convenient location. Leave the loop antenna connected. Note Disconnect the outdoor antenna when the unit is not in use. Do not use the outdoor antenna during an electrical storm. External unit connections Rear panel of this unit RL (R) (L) Analog player (not included) • An analog player with a built-in phono equalizer can be connected. • For details, refer to the instruction manual of the units which are to be connected. • When units other than those described above are to be connected, please consult your audio dealer. Using an external unit REC AUX (See above for external unit connection.) 1. Press [AUX]. The unit comes on. 2. For listening: Proceed to step 3. For recording: Press [a REC] (recording starts). 3. Start playback from the external source. (For details, refer to the external unit's instruction manual.) Using headphones (not included) PHONES Reduce the volume level and connect the headphones. Plug type: 3.5 mm (1/8˝) stereo Note 15 Avoid listening for prolonged periods of time to prevent hearing damage. RQT6707
-
 1
1 -
2
-
3
-
4
-
5
-
6
-
7
-
8
-
9
-
 10
10 -
 11
11 -
 12
12 -
 13
13 -
 14
14 -
 15
15 -
 16
16 -
 17
17 -
 18
18 -
 19
19 -
 20
20
 |
 |
