Panasonic SAHE75 SAHE75 User Guide - Page 16
Others, Other Settings, Making A Recording, Using Outdoor Antennas, Dr Comp, Dimmer
 |
View all Panasonic SAHE75 manuals
Add to My Manuals
Save this manual to your list of manuals |
Page 16 highlights
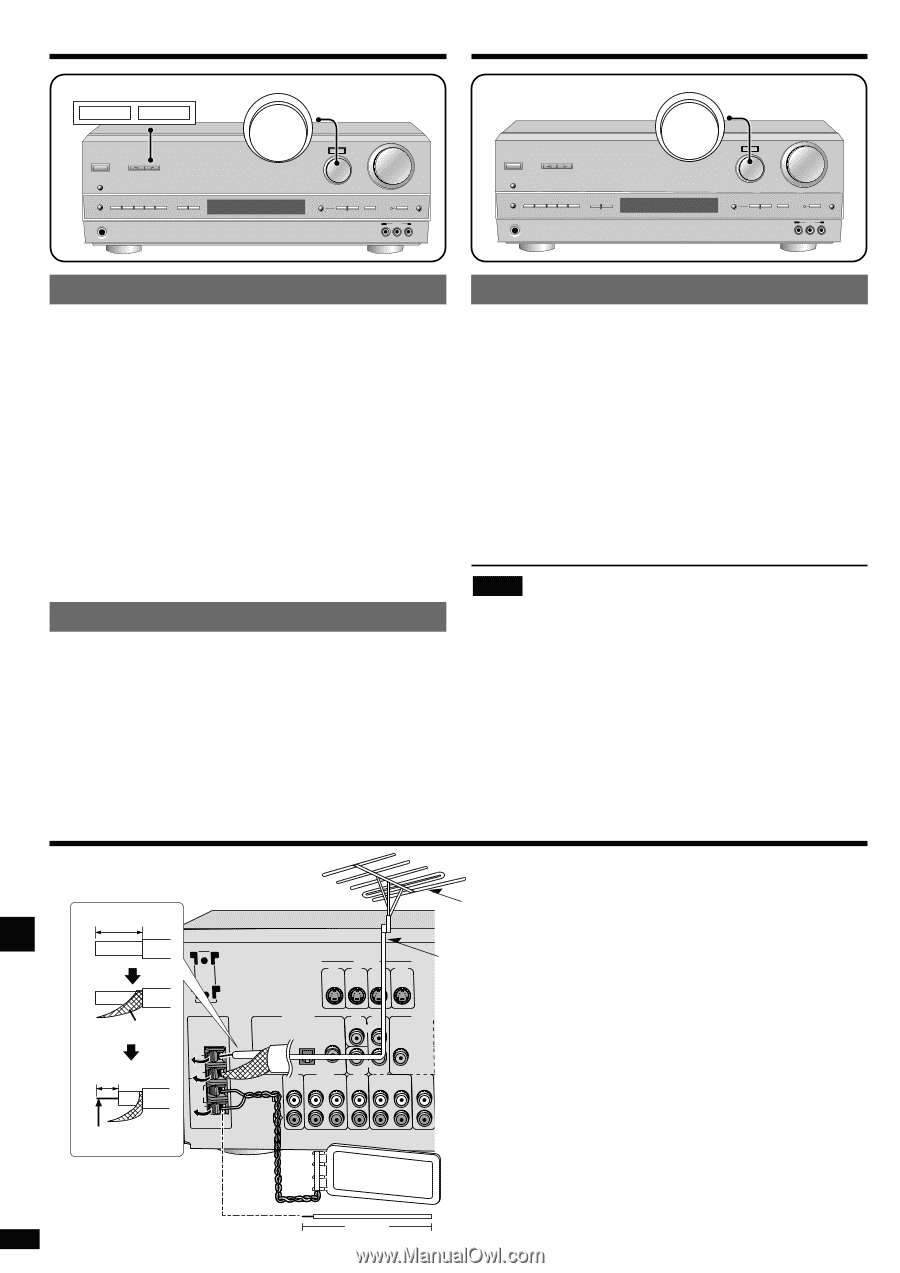
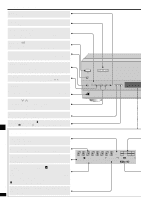
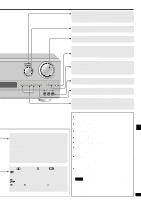
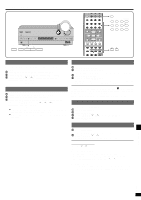
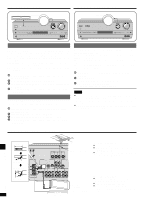
Other settings Making a recording SFC MODE < > INPUT SELECTOR POWER 8 SPEAKERS SFC MODE -HE LP -RESET -BAND -FM MODE PRESET 2 TUNING 1 MEMORY DSP DOLBY SOUND MODE PRO LOGIC2 PHONES DIGITAL INPUT INPUT SELECTOR VOLUME DOWN UP BASS/TREBLE BALANCE - + DVD 6CH INPUT L R TAPE MONITOR SUB WOOFER VCR 2 VIDEO IN L AUDIO IN R INPUT SELECTOR POWER 8 SPEAKERS SFC MODE -HE LP -RESET -BAND -FM MODE PRESET 2 TUNING 1 MEMORY DSP DOLBY SOUND MODE PRO LOGIC2 PHONES DIGITAL INPUT INPUT SELECTOR VOLUME DOWN UP BASS/TREBLE BALANCE - + DVD 6CH INPUT L R TAPE MONITOR SUB WOOFER VCR 2 VIDEO IN L AUDIO IN R DR COMP - Dynamic range compression Change this setting to listen to content recorded with Dolby Digital at low volume (such as late at night) and maintain audio clarity. It reduces the peak level in loud scenes without affecting the sound field. OFF: The software is played with the original dynamic range (factory setting). STANDARD: The level recommended by the producer of the software for household viewing. MAX: The maximum allowable compression (recommended for night viewing). 1 Press [SFC MODE < and >] at the same time to enter the setting mode. 2 Press [SFC MODE ] at the same time to exit the setting mode. DIMMER The factory setting is OFF (normal brightness). Dim the unit's display for better viewing in a darkened room 1 Press [SFC MODE < and >] at the same time to enter the setting mode. 2 Press [SFC MODE ] at the same time to exit the setting mode. Recording on a tape deck or VCR You can record to a tape deck connected to TAPE REC (OUT) or to a VCR connected to VCR 1 OUT. See the recording unit's operating instructions for details on how to prepare it for recording. When recording with a tape deck, you can record any source except TAPE. When recording with a VCR (connected VCR 1), you can record any source except TAPE or VCR 1. 1 Turn [INPUT SELECTOR] to select the source to be recorded. 2 Begin recording. Follow your recording unit's operating instructions. 3 Start the source to be recorded. Follow your equipment's operating instructions. Note ¡ You cannot record a source connected through a digital terminal. When recording CD, DVD, or TV, ensure the source is connected through the corresponding analog terminals and "ANALOG" input is selected. ¡ When you select DVD 6CH INPUT mode, only sound from the front left and right channels is recorded. Using outdoor antennas Others 20 mm (25/32") ;;; LOOPANT HOLDER ;;;;;; Shield braid FM ANT 75Ω ;; 10 mm (3/8") GND ;; ;; LOOP EXT AM ;; ANT FM outdoor antenna S-VIDEO TV TV VCR DVD MONITOR IN IN IN OUT 75 Ω coaxial cable DIGITAL IN TV VCR OPTICAL1 OPTICAL2 COAXIAL MONITOR (TV) (DVD) OUT DVD/DVD 6CH CENTER SURROUND IN L IN CD TAPE TV REC PLAY (OUT) (IN) OUT L IN R SUBWOOFER FRONT IN SUBWOOFER OUT L R R FM outdoor antenna ¡ Disconnect the FM indoor antenna. ¡ The antenna should be installed by a competent technician. ¡ Twist the coaxial cable's shield braid firmly and connect it to the GND terminal. AM outdoor antenna Core wire ¡ Run a piece of vinyl wire horizontally across a window or other convenient location. RQT6847 AM loop antenna (included) ¡ Leave the loop antenna connected. ¡ Disconnect the antenna when the unit is not in use. Do not use the antenna during an electrical Vinyl-covered wire storm. 5-12 m 16 (16-40 ft)
-
 1
1 -
2
-
3
-
4
-
5
-
6
-
7
-
8
-
9
-
10
-
 11
11 -
 12
12 -
 13
13 -
 14
14 -
 15
15 -
 16
16 -
 17
17 -
 18
18 -
 19
19 -
 20
20
 |
 |