Panasonic SC-BTT465 SC-BTT405 Owner's Manual (English) - Page 33
Speaker installation option, Attaching to a wall
 |
View all Panasonic SC-BTT465 manuals
Add to My Manuals
Save this manual to your list of manuals |
Page 33 highlights
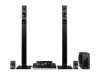
Speaker installation option Consult a qualified building contractor when attaching the speakers to a wall. Improper attachment may result in damage to the wall and speakers and personal injury. [BTT466] [BTT465] FRONT Attach to a wall without the base and the stand. ≥ Before using the speaker cable, remove it from the stand by pulling it out. Attaching to a wall You can attach all of the speakers (except subwoofer) to a wall. ≥ The wall or pillar on which the speakers are to be attached should be capable of supporting D 45 mm 10 kg (22 lbs) per screw. 1 Drive a screw (not supplied) into the wall. A At least 30 mm (1 3/16q) B ‰ 4.0 mm (5/32q) C ‰ 7.0 mm to (1 25/32q) E 53 mm (2 3/32q) F 266 mm (10 1/2q) ‰ 9.4 mm (9/32q to 3/8q) D Wall or pillar E 5.5 mm to 7.5 mm (7/32q to 5/16q) 2 Fit the speaker securely onto the screw(s) with the hole(s). e.g., Surround speaker DO NOT DO ≥ Reattaching the speaker cable to the stand Straighten the cable and run through the stand. Pull out the cable through the hole. ≥ In this position, the speaker will likely fall if moved to the left or right. ≥ Move the speaker so that the screw is in this position. Screwing positions on the wall Use the measurements indicated below. ≥ Leave at least 20 mm (25/32q) of space above the speaker and 10 mm (13/32q) on each side to allow enough space for fitting the speaker. CENTER A 14 mm (9/16q) B 65 mm (2 9/16q) C 175 mm (6 29/32q) [BTT466] [BTT465] SURROUND [BTT405] FRONT, SURROUND G 42 mm (1 21/32q) H 45 mm (1 25/32q) 160 mm (6 5/16q) Advanced operations 33 VQT5F60
-
 1
1 -
2
-
3
-
4
-
5
-
6
-
7
-
8
-
9
-
10
-
11
-
12
-
13
-
14
-
15
-
16
-
17
-
18
-
19
-
20
-
21
-
22
-
23
-
24
-
25
-
26
-
27
-
 28
28 -
 29
29 -
 30
30 -
 31
31 -
 32
32 -
 33
33 -
 34
34 -
 35
35 -
 36
36 -
 37
37 -
 38
38 -
39
-
40
-
41
-
42
-
43
-
44
-
45
-
46
-
47
-
48
 |
 |
