Panasonic SC-PM28 SAPM28 User Guide - Page 26
Timers And Others, Using The Sound Quality Settings, Enhancing The Sound Quality - cd stereo system
 |
View all Panasonic SC-PM28 manuals
Add to My Manuals
Save this manual to your list of manuals |
Page 26 highlights
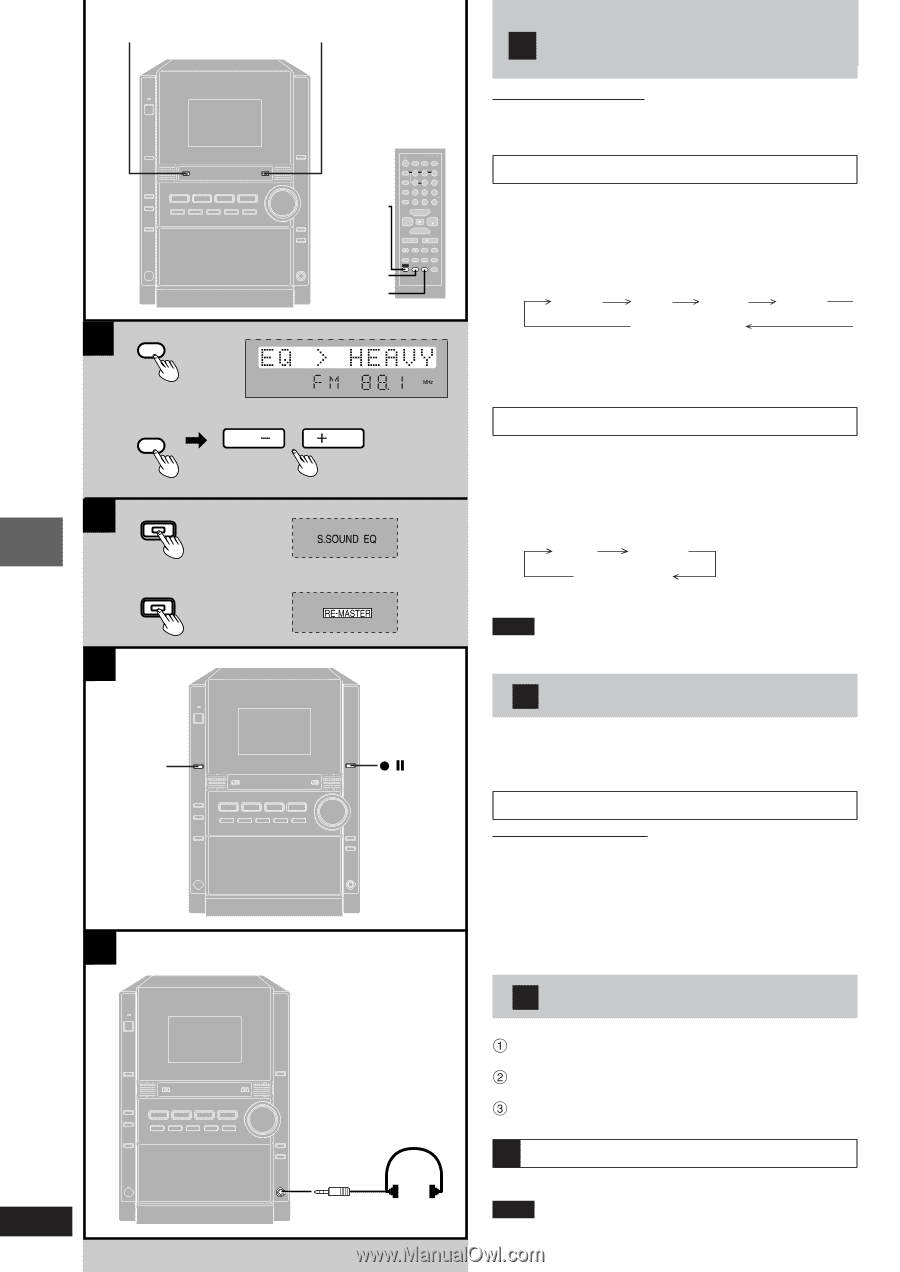
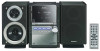
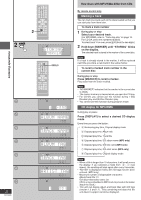
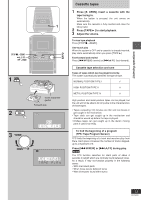
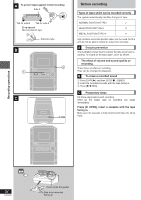
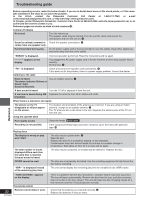
Timers and others RE-MASTER A SOUND SOUND B S.SOUND EQ RE-MASTER C AUX D 26 RQT6885 S.SOUND EQ SHIFT RE-MASTER S.SOUND EQ SOUND CLOCK AUTO OFF TIMER SLEEP DISPLAY PLAY REC DIMMER DISC 1 PROGRAM GHI 4 PLAY MODE PQRS 7 REPEAT DEL ABC DEF 23 JKL MNO 56 TUV WXYZ 89 SPACE 0 10 TUNER BAND CD CLEAR AUX TAPE VOL ALBUM VOL REW FF TITLE INTRO MARKER SEARCH ENTER SHIFT RE-MASTER S.SOUND EQ SOUND MUTING VOL VOL / REC Headphones (not included) A Using the sound quality settings By remote control onlyly You can choose one of four types of sound quality with Preset EQ or enhances the bass and treble effect of the sound with Manual EQ. Preset EQ 1 Press and hold [SOUND] to select "PRESET EQ". Each time you press and hold the button: MANUAL EQ ↔ PRESET EQ 2 Press [SOUND] to select a setting. Each time you press the button: HEAVY SOFT CLEAR VOCAL EQ-OFF (cancelled) HEAVY: Adds punch to rock SOFT: For background music CLEAR: Clarifies higher sounds VOCAL: Adds gloss to vocal Manual EQ 1 Press and hold [SOUND] to select "MANUAL EQ". Each time you press and hold the button: MANUAL EQ ↔ PRESET EQ 2 Press [SOUND] to select a setting. Each time you press the button: BASS TREBLE Original Display 3 Press [VOL -] or [+ VOL] to adjust the level. Note • Preset EQ cannot be used together with Super Sound EQ. • Changes to sound quality do not affect recordings. B Enhancing the sound quality Press [S.SOUND EQ]. The button light is on. Press the button again to cancel. The button light goes out. Re-master - Enjoying more natural sound For WMA and MP3 only Disc recorded at 32kHz, 44.1kHz or 48kHz This feature reproduces the frequencies lost during recording to give you a sound closer to the original. Press [RE-MASTER]. Remote control: Press [SHIFT] + [RE-MASTER]. The button light is on. Press the button again to cancel. The button light goes out. C Using an external unit 1(See page 7 for external unit connection.) Press [AUX]. 2 The unit comes on. For listening: Proceed to step 3. 3 For recording: Press [[/ J REC] (recording starts). Start playback from the external source. (For details, refer to the external unit's instruction manual.) D Listening with headphones Reduce the volume level, and connect the headphones. Plug type: 3.5 mm (1/8˝) stereo. Note Avoid listening for prolonged periods of time to prevent hearing damage.
-
 1
1 -
2
-
3
-
4
-
5
-
6
-
7
-
8
-
9
-
10
-
11
-
12
-
13
-
14
-
15
-
16
-
17
-
18
-
19
-
20
-
 21
21 -
 22
22 -
 23
23 -
 24
24 -
 25
25 -
 26
26 -
 27
27 -
 28
28 -
 29
29 -
 30
30 -
 31
31 -
32
 |
 |