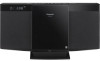
Panasonic SCHC25 SCHC25 User Guide - Page 8
Radio, Clock and timers - manual
 |
UPC - 885170039339
View all Panasonic SCHC25 manuals
Add to My Manuals
Save this manual to your list of manuals |
Page 8 highlights
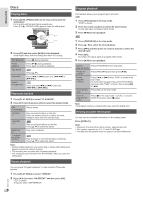
ENGLISH Radio Clock and timers Manual tuning 1 Press [RADIO, EXT-IN] to select "FM" or "AM". 2 Press [3] or [5] to select the frequency of the required station. To tune automatically, press and hold the button until the frequency starts changing quickly. To improve the sound quality When "FM" is selected 1 Press [RADIO MENU] to select "FM MODE". 2 Press [Y, U] to select "MONO" and then press [OK]. To cancel, select "STEREO". • "MONO" is also canceled when you change the frequency. • Turn off "MONO" for normal listening. When "AM" is selected 1 Press [RADIO MENU] to select "B.PROOF". 2 Press [Y, U] to select "BP 1" or "BP 2" and then press [OK]. Memory presetting 30 FM and 15 AM stations can be preset. Preparation Press [RADIO, EXT-IN] to select "FM" or "AM". Automatic presetting 1 Press [OK] to select "LOWEST" or "CURRENT" frequency. 2 Press [RADIO MENU] to select "A.PRESET" and then press [OK]. "START?" is shown. 3 Press [OK] to start presetting. Manual presetting 1 Press [3] or [5] to tune in to the station. 2 Press [PROGRAM]. 3 Press the numeric buttons to select a preset number. Do steps 1 through 3 again to preset more stations. The new station replaces any station that occupies the same preset number. Selecting a preset station Press the numeric buttons, [2] or [6] (main unit: [2/3] or [5/6]) to select the preset station. FM or AM allocation setting (by main unit only) This system can also receive FM broadcasts allocated in 0.1 MHz steps or AM broadcasts allocated in 9 kHz steps. 1 Press [RADIO, EXT-IN] to select "FM" or "AM". 2 Press and hold [RADIO, EXT-IN]. After a few seconds, the display panel shows the current minimum radio frequency. Release the button when the minimum frequency changes. • To go back to the initial setting, do the above steps again. • After you change the setting, preset frequencies are erased. Setting the clock This is a 12-hour clock. 1 Press [CLOCK/TIMER] to select "CLOCK". 2 Within 10 seconds, press [R, T] to set the time. 3 Press [OK]. Press [CLOCK/TIMER] to show the clock for a few seconds. Note: Reset the clock regularly to maintain accuracy. Sleep timer The sleep timer switches off the system after the set time. Press [SLEEP] to select the setting (in minutes). To cancel, select "OFF". 30 MIN → 60 MIN → 90 MIN → 120 MIN → OFF To show the remaining time Press [SLEEP]. Note: • The sleep timer can be used together with the play timer. • The sleep timer always comes first. Be sure not to set an overlap of timers. Play timer You can set the timer to come on at a certain time to wake you up. Switch on the system and set the clock. Prepare the music source you want to listen to (disc, radio, iPod, iPhone or AUX) and set the volume. 1 Press [CLOCK/TIMER] to select "#PLAY 1", "#PLAY 2" or "#PLAY 3". 2 Within 10 seconds, press [R, T] to set the start time. 3 Press [OK]. 4 Do steps 2 and 3 again to set the end time. To start the timer 5 Press [#, PLAY] to start "#PLAY 1", "#PLAY 2" or "#PLAY 3". 6 Press [`] to switch off the system. The system must be switched off for the timer to operate. Change the Do steps 1 through 4 and 6 again (Z above). settings Change the source or volume 1) Press [#, PLAY] two times to remove the timer indicator on the display panel. 2) Change the source or volume. 3) Do steps 5 and 6 (Z above). Check the settings Cancel Press [CLOCK/TIMER] to select "#PLAY 1", "#PLAY 2" or "#PLAY 3". Press [#, PLAY] two times to remove the timer indicator on the display panel. Note: • The play timer starts at a low volume and increases gradually to the preset level. • The timer comes on at the set time every day if the timer is on. • If you switch off the system and switch on again while a timer is in operation, the timer will not stop at the end time. RQTX1249 8
-
 1
1 -
2
-
 3
3 -
 4
4 -
 5
5 -
 6
6 -
 7
7 -
 8
8 -
 9
9 -
 10
10 -
 11
11 -
 12
12 -
 13
13 -
14
-
15
-
16
 |
 |
