Panasonic SVAV50 Sd Movie - Page 58
Inserting a Memory Card, Using the LCD Monitor, Using the Menu Screen, Setting Date and Time
 |
UPC - 037988251193
View all Panasonic SVAV50 manuals
Add to My Manuals
Save this manual to your list of manuals |
Page 58 highlights
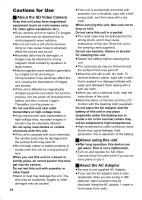
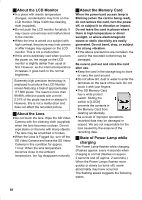
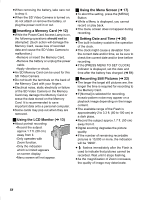
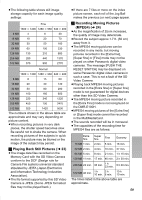
≥When removing the battery, take care not to drop it. ≥When the SD Video Camera is turned on, do not attach or remove the battery, or plug the power cord in or out. ª Inserting a Memory Card (l 12) ≥While the Power/Card Access Lamp is on, the following operations should not be attempted: (Such action will damage the Memory Card, cause loss of recorded data and cause the SD Video Camera to malfunction.) -Remove or insert the Memory Card. -Remove the battery or unplug the power cable. -Apply vibration or shock. ≥An SD Memory Card can be used for this SD Video Camera. ≥Do not touch the terminals on the back of the Memory Card with your fingers. ≥Electrical noise, static electricity or failure of the SD Video Camera or the Memory Card may damage the Memory Card or erase the data stored on the Memory Card. It is recommended to save important data onto a personal computer. ≥Some cards may pop out when they are removed. ª Using the LCD Monitor (l 13) ≥About portrait recording: -Record the subject approx.1.7 ft. (50 cm) away from it. -Only operates with Zoom function. -Only the indication which is limited appears on screen display. -Menu screen will not appear. ª Using the Menu Screen (l 17) ≥To abort the setting, press the [MENU] Button. ≥While a Menu is displayed, you cannot record or play back. ≥The menu screen does not appear during recording. ª Setting Date and Time (l 20) ≥The built-in battery sustains the operation of the clock. ≥The clock might cause a deviation from the correct date and/or time, so be sure to check the current date and/or time before recording. ≥If the [PRESS MENU TO SET CLOCK] indicator is displayed, set the date and time after the battery has charged. (l 51) ª Recording Still Pictures (l 22) ≥The larger the target still pictures are, the longer the time is required for recording to the Memory Card. ≥If [Normal] is selected for recording, mosaic-pattern noise may appear on a playback image depending on the image content. ≥The available range of the Flash is approximately 2 to 3.3 ft. (60 to 100 cm) in a dark place. ≥Record the subject approx.1.7 ft. (50 cm) away from it. ≥Digital zooming degrades the picture quality. ≥If the number of remaining recordable pictures is 10,000 or more, the indication will be "9999". ≥ flashes immediately after the Flash is used to indicate that pictures cannot be recorded. Wait until it stops flashing. ≥As the magnification of Zoom increases, the quality of image may deteriorate. 58
-
 1
1 -
2
-
3
-
4
-
5
-
6
-
7
-
8
-
9
-
10
-
11
-
12
-
13
-
14
-
15
-
16
-
17
-
18
-
19
-
20
-
21
-
22
-
23
-
24
-
25
-
26
-
27
-
28
-
29
-
30
-
31
-
32
-
33
-
34
-
35
-
36
-
37
-
38
-
39
-
40
-
41
-
42
-
43
-
44
-
45
-
46
-
47
-
48
-
49
-
50
-
51
-
52
-
 53
53 -
 54
54 -
 55
55 -
 56
56 -
 57
57 -
 58
58 -
 59
59 -
 60
60 -
 61
61 -
 62
62 -
 63
63 -
64
-
65
-
66
-
67
-
68
-
69
-
70
-
71
-
72
-
73
-
74
-
75
-
76
-
77
-
78
-
79
-
80
 |
 |
