Panasonic TH-42PX75 Operating Instructions - Page 23
Technical Information
 |
View all Panasonic TH-42PX75 manuals
Add to My Manuals
Save this manual to your list of manuals |
Page 23 highlights
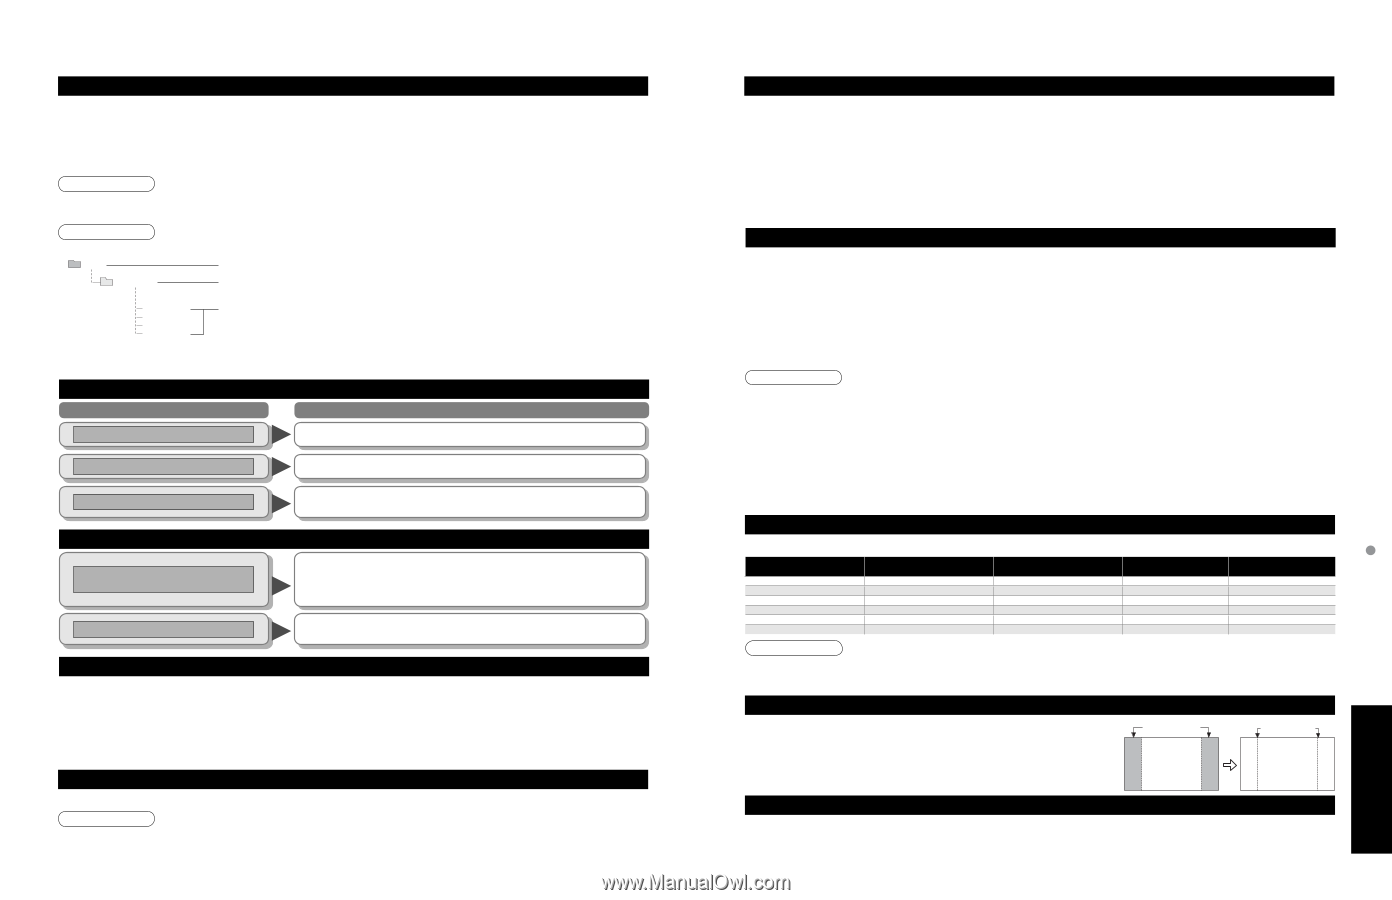
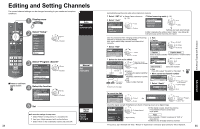
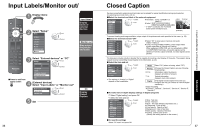
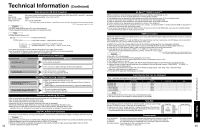
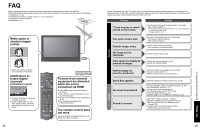
Technical Information (Continued) Data format for SD Card browsing Photo: Data format: Max. number of files: Image resolution: Still images recorded with digital still cameras compatible with JPEG files of DCF* and EXIF** standards Baseline JPEG (Sub-sampling: 4:4:4, 4:2:2 or 4:2:0) 9,999 160 x 120 to 10,000,000 * DCF (Design rule for camera file system): A Japan Electronics and Information Technology Industries Association's standard Caution •• A JPEG image modified with a PC may not be displayed. Partly degraded files might be displayed at a reduced resolution. ** EXIF (Exchangeable Image File Format) Note • Folder structure viewed in PC DCIM Created automatically 100_PANA 3-digit folder number + 5-digit arbitrary characters P1000001.JPG P1000002.JPG P1000003.JPG •4-digit arbitrary characters + 4-digit file number Usable characters: 1-byte "a to z", "A to Z", "0 to 9," and "_" P1000004.JPG •• The folder and file names may be different depending on the digital camera used. For the suitable SD Memory Cards, please confirm the latest information on the following website. http://panasonic.co.jp/pavc/global/cs (This site is in English only) SD Card warning messages Message Meaning Is memory card in? • The card is not inserted. No file Cannot read file • The card has no data or this type of data is not supported. •• The file is broken or unreadable. The TV does not support the format. Cannot display image due to incorrect ID data. GalleryPlayer warning messages ••There is a problem with decoder of your TV. If this message appears, please contact Panasonic Service Center for assistance. Refer to page 51 (Customer Services Directory), page 52 (Limited Warranty) Cannot display image on SD card. • There is a probrem with the data. Check the data inside the SD card. Cautions in handling SD Card: Do not remove the card while the unit is accessing data (this can damage card or unit). Do not touch the terminals on the back of the card. Do not subject the card to a high pressure or impact. Insert the card in the correct direction (otherwise, card may be damaged). Electrical interference, static electricity, or erroneous operation may damage the data or card. Back up the recorded data at regular intervals in case of deteriorated or damaged data or erratic operation of the unit. (Panasonic is not liable for any deterioration or damage of recorded data.) DIGITAL AUDIO OUT terminals You can enjoy your home theater by connecting a Dolby Digital (5.1 channel) decoder and "Multi Channel" amplifier to the DIGITAL AUDIO OUT terminals. Caution 44 ••• Depending on your DVD player and DVD-Audio software the copyright protection function may operate and disable optical output. External speakers cannot be connected directly to PROG OUT terminals. When an ATSC channel is selected, the output from the DIGITAL AUDIO OUT jack will be Dolby Digital. When an NTSC channel is selected, the output will be PCM. EZ SyncTM "HDAVI ControlTM" HDMI connections to some Panasonic equipment allow you to interface automatically. (p. 30) This function may not work normally depending on the equipment condition. • The equipment can be operated by other remote controls with this function on even if TV is in Standby mode. • Image or sound may not be available for the first few seconds when the playback starts. • Image or sound may not be available for the first few seconds when Input mode is switched. • Volume function will be displayed when adjusting the volume of the equipment. • If you connect the same kind of equipment at once (for example: one DIGA to HDMI 1 / another DIGA to HDMI 2), EZ SyncTM is • available for the terminal with the smaller number. If you connect the equipment that has "HDAVI Control 2" function to the TV with HDMI cable, the sound from DIGITAL AUDIO • OUT terminal can be output as multi channel surround. HDMI connection HDMI (high-definition multimedia interface) allows you to enjoy high-definition digital images and high-quality sound by connecting the TV unit and the devices. HDMI-compatible equipment (*1) with an HDMI or DVI output terminal, such as a set-top box or a DVD player, can be connected to the HDMI connector using an HDMI compliant (fully wired) cable. HDMI is the world's first complete digital consumer AV interface complying with a non-compression standard. If the external equipment has only a DVI output, connect to the HDMI terminal via a DVI to HDMI adapter cable (*2). When the DVI to HDMI adapter cable is used, connect the audio cable to the audio input terminal. Audio settings can be made on the "HDMI 1 in" or "HDMI 2 in" menu screen. (p. 26) Applicable audio signal sampling frequencies (L.PCM): 48 kHz, 44.1 kHz, 32 kHz (*1): The HDMI logo is displayed on an HDMI-compliant device. Caution (*2): Enquire at your local digital equipment retailer shop. Use with a PC is not assumed. • All signals are reformatted before being displayed on the screen. • If the connected device has an aspect adjustment function, set the aspect ratio to "16:9". • This HDMI connector is "type A". • These HDMI connectors are compatible with HDCP (High-Bandwidth Digital Content Protection) copyright protection. • A device having no digital output terminal may be connected to the input terminal of either "COMPONENT", "S VIDEO", or • "VIDEO" to receive analog signals. The HDMI input terminal can be used with only the following image signals: 480i, 480p, 720p, 1080i and 1080p. • Match the output setting of the digital device. • For details of the applicable HDMI signals, see below. Input signals that can be displayed * Mark: Applicable input signal for Component (Y, PB, PR) and HDMI 525 (480) / 60i 525 (480) /60p 750 (720) /60p 1,125 (1,080) /60i 1,125 (1,080)/60p 1,125 (1,080)/60p horizontal frequency (kHz) 15.73 31.47 45.00 33.75 67.43 67.50 vertical frequency (Hz) 59.94 59.94 59.94 59.94 59.94 60.00 Note •• Signals other than those shown above may not be displayed properly. The above signals are reformatted for optimal viewing on your display. COMPONENT * * * * HDMI * * * * * * Side Bar Do not display a picture in 4:3 mode for an extended period, as this can cause "Image retention" to remain on either or both sides of the display field. •To reduce the risk of such "Image retention", change the brightness of the side bars. The side bar may flash (alternate black/white) depending on the picture. Using Cinema mode will reduce such flashing (See below). Side Bar 4:3 Screen Display Image retention Picture mode Vivid (default): Provides enhanced picture contrast and sharpness for viewing in a well-lit room. Standard: Recommended for normal viewing conditions with subdued room lighting. Cinema: For watching movies in a darkened room. It provides a soft, film-like picture. Custom (Photo): Customizes each item according to your taste. Photo is displayed in Jpeg menu. 45 Technical Information FAQs, etc.
-
 1
1 -
2
-
3
-
4
-
5
-
6
-
7
-
8
-
9
-
10
-
11
-
12
-
13
-
14
-
15
-
16
-
17
-
 18
18 -
 19
19 -
 20
20 -
 21
21 -
 22
22 -
 23
23 -
 24
24 -
 25
25 -
 26
26 -
 27
27
 |
 |