Panasonic WJ-ND300A/10000V Operating Instructions - Page 10
Recording
 |
View all Panasonic WJ-ND300A/10000V manuals
Add to My Manuals
Save this manual to your list of manuals |
Page 10 highlights
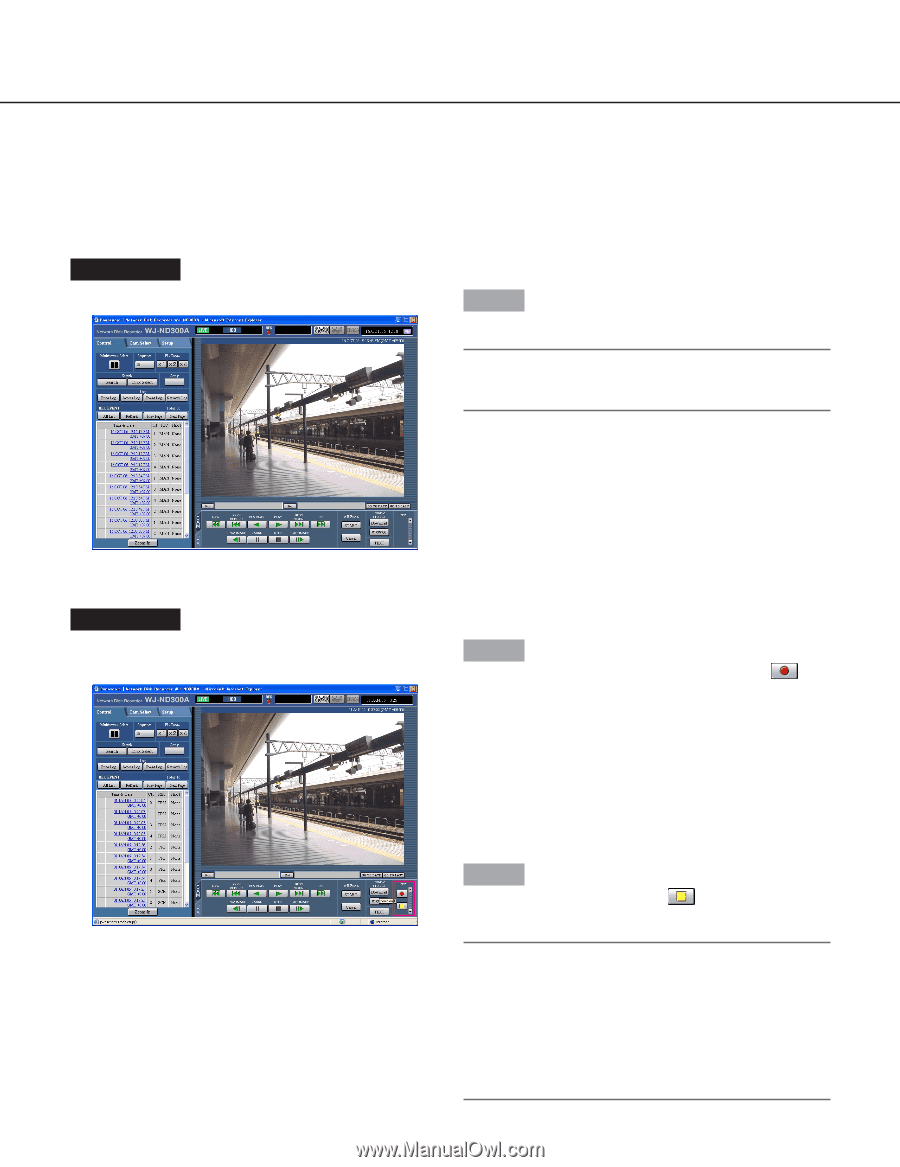
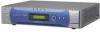
Recording Start/stop recording manually. Refer to a system administrator for the required settings for manual recording. Refer to the Setup Instructions (PDF) for descriptions of how to turn on the unit and how to display the operation window. Screenshot 1 Display the [HDD] tab. Step 1 Click the [D] button of the [Recording] box. Note: Hold down the [D] button until the recording button and the recording stop button are displayed. Screenshot 2 The recording button will be displayed in the [Recording] box. Step 2 Start recording by clicking the recording button . • The [REC] indicator in the status display area will be lit red when recording has started. • When images from cameras are currently recorded with higher priority than manual recording, manual recording will be suspended until that recording finishes. Refer to the following for further information about each recording mode. Step 3 Click the recording stop button → The [REC] indicator will go off. to stop recording. Notes: • When stopping manual recording while another recording with a different recording mode (ex. event recording → next page) is being performed, the [REC] indicator will remain lit and the other recording will continue. • It is impossible to record images when images are not being received from cameras. 10
-
 1
1 -
2
-
3
-
4
-
 5
5 -
 6
6 -
 7
7 -
 8
8 -
 9
9 -
 10
10 -
 11
11 -
 12
12 -
 13
13 -
 14
14 -
 15
15 -
16
-
17
-
18
-
19
-
20
-
21
-
22
-
23
-
24
-
25
-
26
-
27
-
28
-
29
-
30
-
31
-
32
-
33
-
34
-
35
-
36
-
37
-
38
-
39
-
40
-
41
-
42
-
43
-
44
-
45
-
46
-
47
-
48
-
49
-
50
-
51
-
52
-
53
-
54
-
55
-
56
-
57
-
58
-
59
-
60
-
61
-
62
-
63
-
64
-
65
-
66
 |
 |