Panasonic WJ-ND300A/10000V Operating Instructions - Page 33
Deletion of Recorded Images Saved on the Hard Disk Manually
 |
View all Panasonic WJ-ND300A/10000V manuals
Add to My Manuals
Save this manual to your list of manuals |
Page 33 highlights
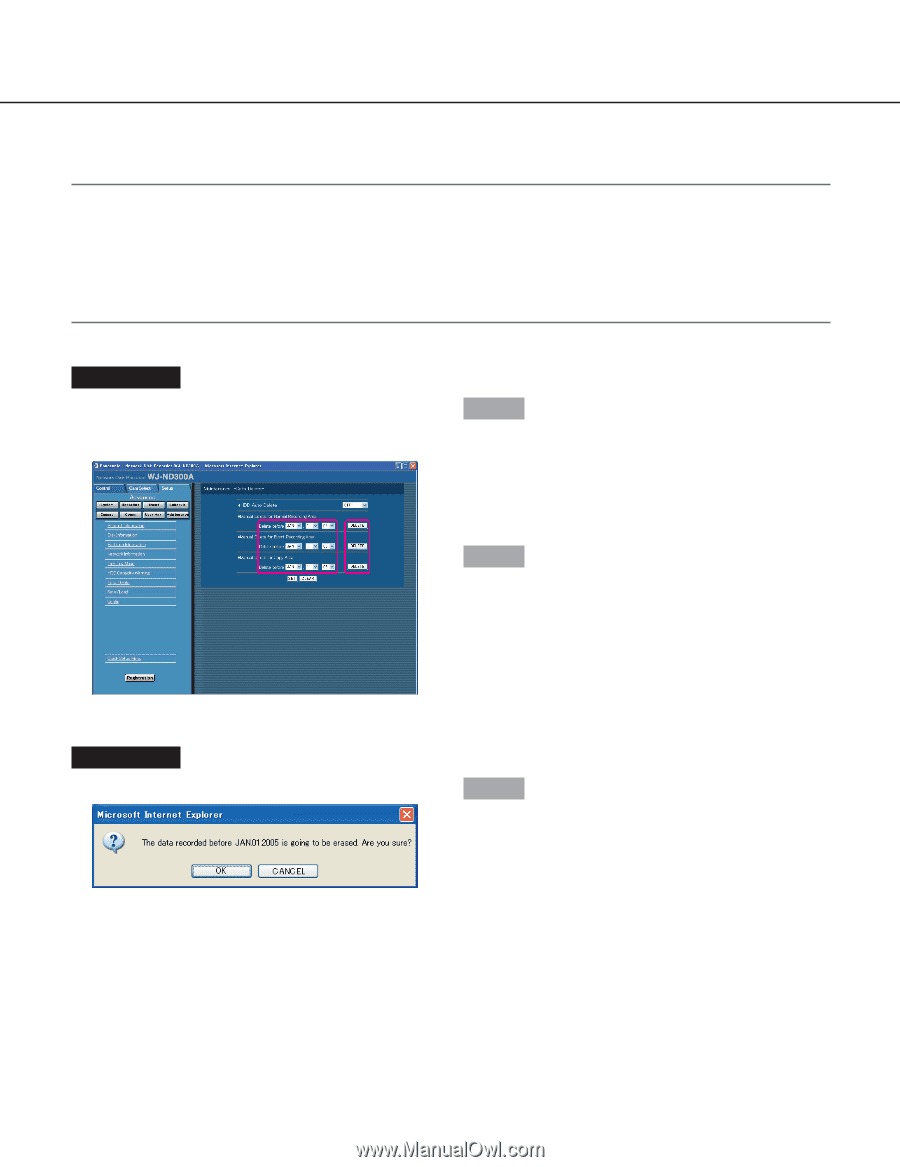
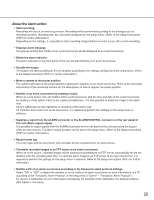
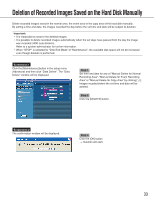
Deletion of Recorded Images Saved on the Hard Disk Manually Delete recorded images saved in the normal area, the event area or the copy area of the hard disk manually. By setting a time and date, the images recorded the day before the set time and date will be subject to deletion. Important: • It is impossible to recover the deleted images. • It is possible to delete recorded images automatically when the set days have passed from the day the image was recorded (HDD auto deletion). Refer to a system administrator for further information. • When "STOP" is selected for "Disk End Mode" of "Maintenance", the available disk space will not be increased even though deletion is performed. Screenshot 1 Click the [Maintenance] button in the setup menu (Advanced) and then click "Data Delete". The "Data Delete" window will be displayed. Step 1 Set time and date for any of "Manual Delete for Normal Recording Area", "Manual Delete for Event Recording Area" or "Manual Delete for Copy Area" by clicking [i]. Images recoded before the set time and date will be deleted. Step 2 Click the [DELETE] button. Screenshot 2 The confirmation window will be displayed. Step 3 Click the [OK] button. → Deletion will start. 33
-
 1
1 -
2
-
3
-
4
-
5
-
6
-
7
-
8
-
9
-
10
-
11
-
12
-
13
-
14
-
15
-
16
-
17
-
18
-
19
-
20
-
21
-
22
-
23
-
24
-
25
-
26
-
27
-
 28
28 -
 29
29 -
 30
30 -
 31
31 -
 32
32 -
 33
33 -
 34
34 -
 35
35 -
 36
36 -
 37
37 -
 38
38 -
39
-
40
-
41
-
42
-
43
-
44
-
45
-
46
-
47
-
48
-
49
-
50
-
51
-
52
-
53
-
54
-
55
-
56
-
57
-
58
-
59
-
60
-
61
-
62
-
63
-
64
-
65
-
66
 |
 |