Pentax MX MX Manual
Pentax MX Manual
 |
View all Pentax MX manuals
Add to My Manuals
Save this manual to your list of manuals |
Pentax MX manual content summary:
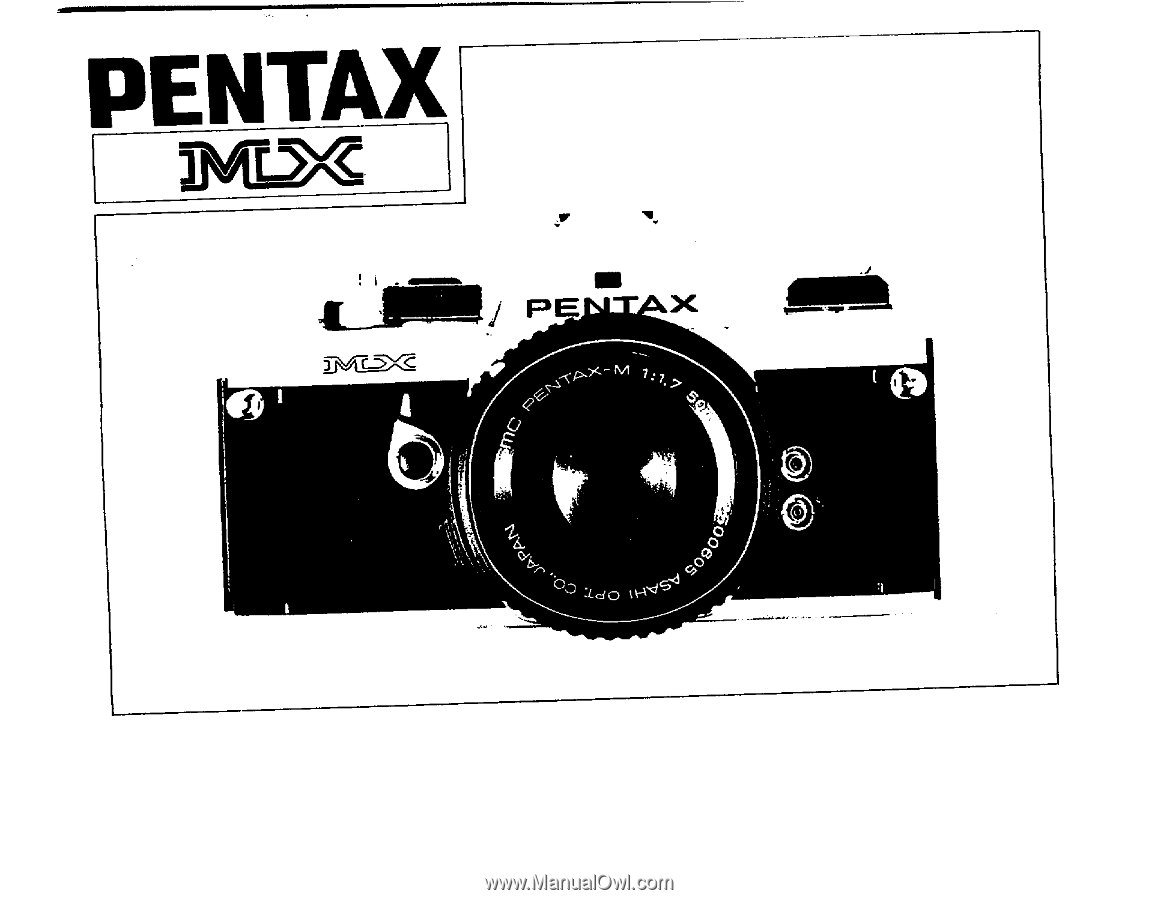
- Pentax MX | MX Manual - Page 1
PENTAX PE 7 •• 7. > 4. d 0 t 04'15.6 - Pentax MX | MX Manual - Page 2
to precise Pentax specifications. Lenses and accessories from other manufacturers are not produced to these precise specifications and, therefore, may cause difficulties with -or actual damage to -a Pentax camera. Pentax cannot assume any responsibility for difficulties resulting from the use of any - Pentax MX | MX Manual - Page 3
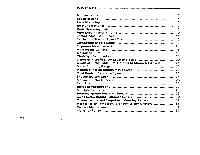
24 Manual Shutter Operation 25 Self-timer 26 Infra-red Photography 27 Multiple Exposure 28 Interchangeable Focusing Screens 29 Using Screw-mount Takumar Lenses 30 Open-aperture and Stop-down Metering Lenses 32 Resistance to Temperature Extremes and Changes 33 Camera Maintenance - Pentax MX | MX Manual - Page 4
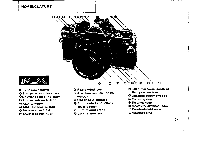
O Rapid-wind lever O Aperture read-out prism window al Hot shoe X contact Film rewind knob/Back cover opener 0 Film rewind crank O Lens release lever e 'O Ef Self-timer lever/Depth-offield preview lever O Upraised alignment dot 0 Focusing ring 0 Distance scale ,r; Aperture/Distance index O Depth-of - Pentax MX | MX Manual - Page 5
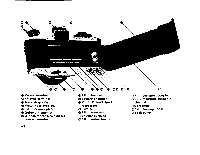
0 Neck strap ring 8o Viewfinder eyepiece O Film pressure plate € Guide pin channel 0 Winder/Motor Drive direct contact terminal .3 30 33 32 33 34 35 J 0 Film chamber O Battery chamber e Motor Drive/Tripod receptacle € Film rail e Film guide rail ®Shutter curtains e Film rewind button 38 39 - Pentax MX | MX Manual - Page 6
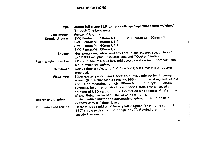
Type Lens mount Standard lenses Shutter Flash synchronization Self-timer Viewfinder Mirror and diaphragm Film wind and rewind 35mm full-frame SLR camera with open-aperture center weighted Through-The-Lens meter. Pentax K bayonet. SMC Pentax 50mm f/1.2 SMC Pentax-M 40mm f/2.8 SMC Pentax-M 50mm - Pentax MX | MX Manual - Page 7
Film loading Automatic winder Exposure counter Exposure meter Power source Back cover Body size Body weight Magic-needle quick/sure loading. MX camera body accepts Winder MX for up to 2 frames-per-second (single-frame and consecutive exposure operation possible) and Motor Drive MX for up to 5 - Pentax MX | MX Manual - Page 8
LENS MOUNTING 1. Remove the rear lens and body mount covers 2. Match the red dot 0 on the camera body with the red dot 0 on the lens. Insert the lens into the body and turn it clockwise until the lens locks with a click. 3. In the dark, when the red dots are difficult to see, align the upraised - Pentax MX | MX Manual - Page 9
by skin acids. Handle by the edges with a dry cloth before insertion into the camera. Also be especially sure to wipe off the battery with a cloth when they are salted. The battery is not rechargeable. Do not throw a dead battery into a fire, as it may explode. Also, keep it beyond the reach of - Pentax MX | MX Manual - Page 10
BASIC OPERATING INSTRUCTIONS 1. Set Film Speed While depressing the tiny button atop the shutter dial, turn the rim of the shutter dial until the ASA number of the film you are '300 using is centered in the ASA window. 2. Cock Rapid-Wind Lever Cock the rapid-wind lever all the way until it - Pentax MX | MX Manual - Page 11
you have selected is also visible in the small window above the focusing 'z: screen). If the central green dot does not glow no matter how far you turn the aperture ring, change the shutter speed. 6. Release Shutter Hold your camera firmly and trip the shutter. Then cock the rapid-wind lever - Pentax MX | MX Manual - Page 12
the rewind knob until the back opens. 2. Place the film cartridge in the film chamber, and push down the rewind knob. Insert the film leader in between any of the white plastic pins surrounding the film take-up spool. 3. Advance the film by alternately advancing the rapid wind lever and depressing - Pentax MX | MX Manual - Page 13
film in your camera, tear off the top of the film box and insert it into the Memo Holder on the back cover of the camera. innn The ASA film speed rating of all 35mm films your film is aligned with the index mark. Be sure to set the ASA film speed because it is coupled to the exposure meter system. - Pentax MX | MX Manual - Page 14
visible) while depressing the shutter button. Alternately, use a cable release with a locking device for a time exposure. it rn...r.K.M.y., CAUTION At long speeds, longer than 1/30 (1/15 - 1 sec., B), support your camera rigidly to prevent camera movement. To protect the shutter mechanism, trip the - Pentax MX | MX Manual - Page 15
• 13 COMPOSING AND FOCUSING The standard focusing screen of your MX has a central split-image circle surrounded by a microprism collar. While looking through the viewfinder, turn the focusing ring until your subject comes into sharp focus. If your subject is not in focus, the image in the split- - Pentax MX | MX Manual - Page 16
a proper LED exposure read-out in the viewfinder. On the right-hand side of the viewfinder, appear the preselected shutter speed plus two adjacent speeds (e.g. "60" and "250" in the case of "125") on a transparent disk which protrudes slightly into the focusing screen area. On the right-hand side of - Pentax MX | MX Manual - Page 17
firmly with your left hand, and draw your arms close to your body. Vertical position B. Hold your camera tightly to your forehead with your left hand, and draw your right arm close to your body. Vertical position C. Hold your camera tightly to your forehead with your left hand, raise your right - Pentax MX | MX Manual - Page 18
been taken, the rapid-wind lever will not advance further, indicating that the film must be rewound. Lift up the rewind crank. Depress the film rewind button and turn the rewind crank as indicated to rewind the film into its cartridge. Rewind until the tension on the crank lessens, indicating that - Pentax MX | MX Manual - Page 19
ry • • • 17 - Pentax MX | MX Manual - Page 20
BO SINAI The MX has FP and X terminals on the front of the camera body, and a separate X contact on the built-in hot shoe. The table body. The hot shoe flash contact turns to "hot" (switched on) only when you insert a shoe! mount electronic flash. It remains "cold" (disconnected) even when using - Pentax MX | MX Manual - Page 21
flash bulb attachments on the market: clip-on types and ri bracket types. Either can be used with your camera. The clip-on types are attached to the hot shoe and the bracket types are attached via the tripod socket. Use one of these three bulb types: M, MF or FP. The correct terminal and the - Pentax MX | MX Manual - Page 22
through the viewfinder while moving the Self-timer lever toward the lens, and you will be able to preview the depth of field. Or, after focusing, look at the depth-of-field scale on the lens. In the photograph below, the distance scale is set at 5 meters; that is, the a lens is focused on a subject - Pentax MX | MX Manual - Page 23
DEPTH-OF -FIELD TABLE: SMC PENTAX-M 50mm f/1.4 LENS O.215O. soma 01.4 f/2 1/2.8 1/4 1/5.6 1/8 1/11 1/16 1/22 0,stanc• soap. 1/1.4 f/2 1/2.8 1/4 f/5.6 1/8 011 1/16 f/22 •21. 0.4500 0.447 -8:1t7 0.445 "00.4.45483 0.440 0.461 0.436 ^0.466 - 0.430 -00.4.48222 - - Pentax MX | MX Manual - Page 24
you have focused your subject on the ground glass. The green area in the table indicates the coupling range of the meter, and should not be interpreted as the camera's total range of f/stop-shutter speed comb'nations. As you will note from the table below with ASA100 film, you may use any shutter - Pentax MX | MX Manual - Page 25
meter built into your MX takes a center-weighted reading from the entire scene as seen through the viewfinder. Sometimes, however, there is a great difference between the light reflected from the background and the light reflected from the subject. In such a case, to achieve a really good photo - Pentax MX | MX Manual - Page 26
lock lever is for your convenience while you are making a particularly long exposure using the B shutter speed setting. After depressing the shutter button, turn the lock lever lock lever is also used to turn off the meter circuit and simultaneously prevent accidental release of the shutter. 24• - Pentax MX | MX Manual - Page 27
The two alkaline or silver oxide batteries in your MX are used only for powering the exposure meter; the shutter mechanism is a totally manual operation. • Therefore, your camera can still be operated even if the batteries have worn out. If the batteries have worn out and the exposure - Pentax MX | MX Manual - Page 28
SELF-TIMER The Self-timer delays the shutter release by 4-12 seconds, depending upon how far counterclockwise (when camera faces you) the lever is advanced. When using the Self-timer, do not depress the shutter button .. . it will immediately release the shutter without delayed action. After cocking - Pentax MX | MX Manual - Page 29
-red photographs, remember to use the infra-red mark indicated with an orange line on the depth-of-field scale. First, bring your subject into sharp focus. Then determine the subject-to-camera distance from the distance scale on the lens. Then match your subject-to-camera distance to the infra-red - Pentax MX | MX Manual - Page 30
MULTIPLE EXPOSURE For deliberate multiple exposures, make the first exposure in the normal way. Then tighten the film by turning the rewind knob a , and keep hold of the rewind knob. Depress the film rewind release button and advance the rapid-wind lever. This cocks the shutter without advancing the - Pentax MX | MX Manual - Page 31
standard split-image + microprism focusing screen, there are 7 other interchangeable focusing screens available for your MX. To remove the standard focusing screen, pull the screen retainer pin toward you with the pincette supplied with the interchangeable focusing screen. The focusing screen will - Pentax MX | MX Manual - Page 32
the automatic diaphragm will not function. . Full-aperture metering lenses will function as stop-down metering lenses. a How to Use Mount Adaptor K Screw the conventional Takumar lens into the Mount Adaptor K. 2 Attach the Adaptor/lens unit to the camera body by aligning the red dots f and © , and - Pentax MX | MX Manual - Page 33
spring pin 2. Turn the Mount Adaptor K counterclockwise until you feel it release, and take it out. 3. Since the mechanism for locking in the Mount Adaptor K is totally different from that which locks in an SMC Pentax bayonet-mount lens, the lens release lever C) on the camera body plays no part at - Pentax MX | MX Manual - Page 34
K permits open-aperture metering. USe of other K Series accessories - standard Extension Tube Set K, Helicoid Extension Tube K, Auto-Bellows M • and Bellows Unit III - requires stop-down metering. Whenever any one of these is used between the camera body and an SMC Pentax lens, the stop- st - Pentax MX | MX Manual - Page 35
changes should be avoided as much as possible. As a guide, a temperature change of 10°C should be allowed to take battery. Therefore, the camera should be protected against low temperature. Put the batteries into the camera right before shooting. For extremely low temperature, use new batteries - Pentax MX | MX Manual - Page 36
peNTAx' 6 i CAMERA MAINTENANCE 1. Always keep the viewfinder eyepiece, lens and filters as clean as possible. To remove loose dust and dirt, first use the blower and then the brush of a lens brush. Do not try to wipe off granular dirt or dust - it's an excellent way of scratching the glass. Smudges - Pentax MX | MX Manual - Page 37
camera as soon as possible to an authorized Pentax Service Center. Where to keep your camera while you are not using it lenses from interfering with proper mounting of the camera to the tripod, attach the Spacer Ring (packed with the camera) between camera and tripod. 6. When mounting your camera - Pentax MX | MX Manual - Page 38
the equipment has not been abused, altered, or operated contrary to instruction. Because the tolerances, quality, and design compatibility of lenses other than Pentax lenses are beyond our control, damage caused by use of such lenses will not be covered by this warranty policy. The manufacturer or - Pentax MX | MX Manual - Page 39
accredited repair shops, unless you are sending it directly to the manufacturer. Always obtain a quotation of the service charge, and only after you accept the quoted service charge, instruct the service station to proceed with the servicing. This warranty policy does not apply to Pentex cameras - Pentax MX | MX Manual - Page 40
3rd Avenue, Vancouver, B.C. V6J 1K5, CANADA Pentax U.K. Limited Pentax House, South Hill Avenue, South Harrow, Middlesex HA2 OLT, U.K. Pentax France S.A. 72-76 Rue Paul, Vaillent Couturier, 92300 Levallois Perret, FRANCE Asahi Optical Brasileire Ind. e Com. Ltda. Rua Estados Unidos, 1053, Sao Paulo
-
 1
1 -
 2
2 -
 3
3 -
 4
4 -
 5
5 -
 6
6 -
 7
7 -
8
-
9
-
10
-
11
-
12
-
13
-
14
-
15
-
16
-
17
-
18
-
19
-
20
-
21
-
22
-
23
-
24
-
25
-
26
-
27
-
28
-
29
-
30
-
31
-
32
-
33
-
34
-
35
-
36
-
37
-
38
-
39
-
40
 |
 |
PENTAX
PE
7
•
•
7.
>
4.
d 0
t
04'15.6