Pfaff 1221 Owner's Manual - Page 61
variation
 |
View all Pfaff 1221 manuals
Add to My Manuals
Save this manual to your list of manuals |
Page 61 highlights
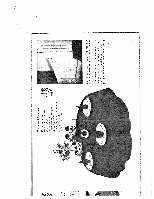
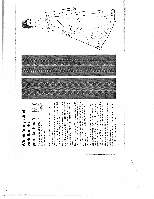
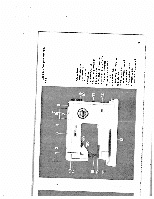
Which fancy-stitch variation do you like best? [\1 jt; For ornamental stitching, use clear-view sewing foot No. 93-040 920-91. I i) The two borders shown on this page are made as follows: Always begin with the pattern in the middle. First border: Sew the center strip of the border with over-edge stitches. Then push the button marked €I and sew along the nght and left edges of the center stnp, turning knob D on the stitch selector to the right and left needle positions respec tively. The outer pattern ''t is again sewn with the needle at its left position. Make sure the scallops match the pattern sewn pieviously (see II.) Before you start sewing the second row of scalloping, turn the tabmic clockwise. Second border: To sew the center strip, push the button marked Next, combine the blind stitch with the zigzag stitch (turning the stitch selector to a dense zigzag stitch in stitch range 6) and sew along one side of the center strip, turn the material, and stitch along the other side as well. Sew the outer pattern with the built-in hem stitching design. Additional ornamental effects are obtained by using van-colored threads. 58
-
 1
1 -
2
-
3
-
4
-
5
-
6
-
7
-
8
-
9
-
10
-
11
-
12
-
13
-
14
-
15
-
16
-
17
-
18
-
19
-
20
-
21
-
22
-
23
-
24
-
25
-
26
-
27
-
28
-
29
-
30
-
31
-
32
-
33
-
34
-
35
-
36
-
37
-
38
-
39
-
40
-
41
-
42
-
43
-
44
-
45
-
46
-
47
-
48
-
49
-
50
-
51
-
52
-
53
-
54
-
55
-
 56
56 -
 57
57 -
 58
58 -
 59
59 -
 60
60 -
 61
61 -
 62
62 -
 63
63 -
 64
64 -
 65
65 -
 66
66 -
67
-
68
-
69
-
70
-
71
 |
 |
