Pfaff coverlock 3.0 Owner's Manual - Page 29
Rolled edge sewing, Coverstitch sewing
 |
View all Pfaff coverlock 3.0 manuals
Add to My Manuals
Save this manual to your list of manuals |
Page 29 highlights
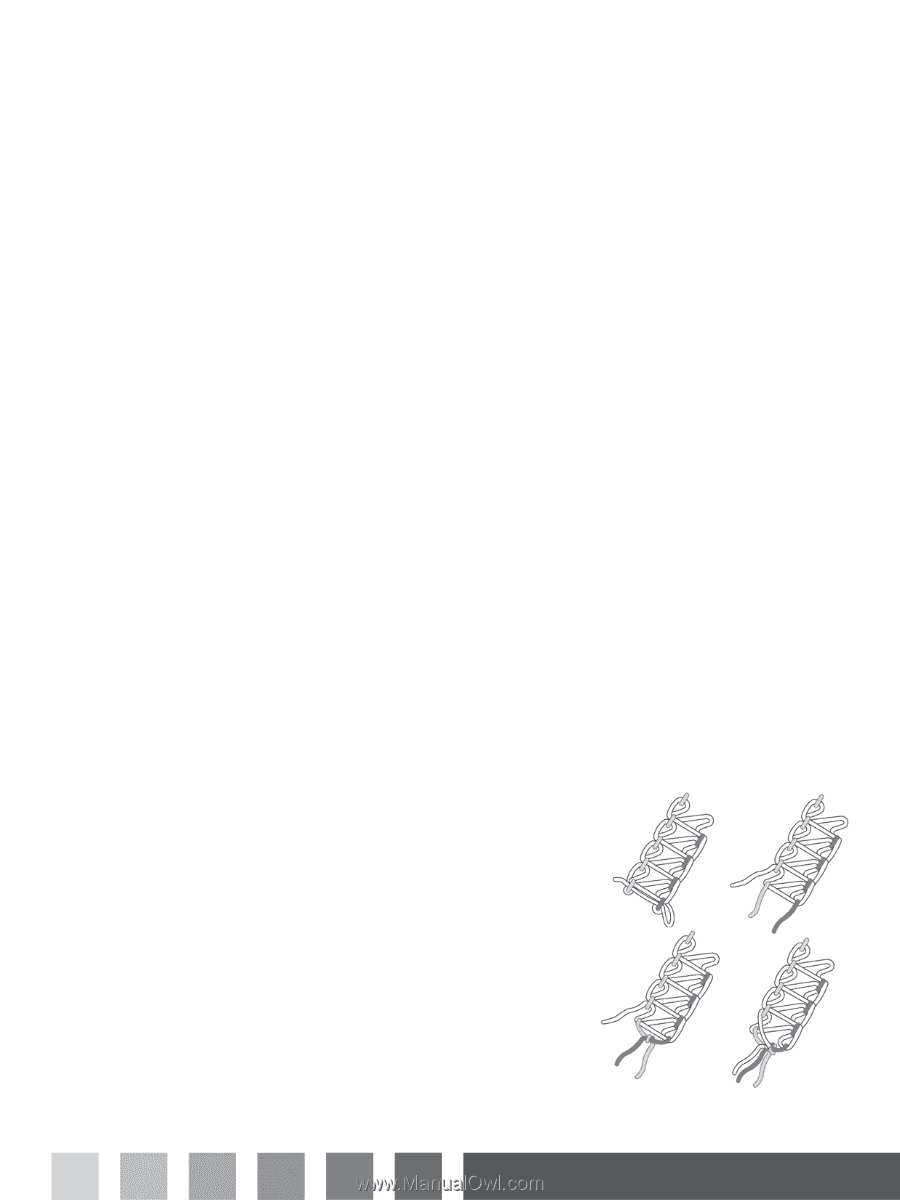
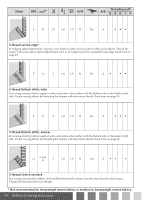
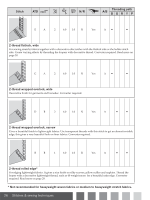
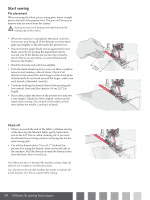
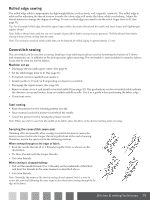
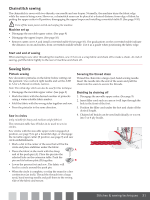
Rolled edge sewing The rolled edge stitch is appropriate for lightweight fabrics such as lawn, voil, organdy, crepe, etc. The rolled edge is achieved by adjusting the thread tension to make the fabric edge roll under the fabric while overlocking. Adjust the thread tension to change the degree of rolling. To sew a rolled edge you need to set the stitch Ànger lever to R. (See page 11) Tip: For a beautiful rolled edge, thread the upper looper with a decorative thread and the needle and lower looper with lightweight regular thread. Note: Make a thread chain and test sew on a sample of your fabric before sewing on your garment. Hold the thread chain before sewing to keep it from curling into the seam. Note: The minimum overlock stitch width that can be obtained for rolled edging is approximately 1.5 mm. Coverstitch sewing The coverstitch can be used for covering, binding or top-stitching necklines and for hemming the bottom of T-shirts and sweatsuits, etc. in addition to Áat joining seams (plain seaming).The coverstitch is most suitable for stretchy fabrics. It can also be used for woven fabrics. Machine set up • Disengage the movable upper cutter. (See page 9) • Set the stitch Ànger lever to R. (See page 11) • If inserted, remove needle B and needle A. • Install needles C, D and/or E depending on desired coverstitch. • Disengage the upper looper. (See page 10) • Remove cutter cover A and install coverstitch table B (see page 10). The graduations on the coverstitch table indicate the distance, in cm and inches, from coverstitch middle needle. Use it as a guide when positioning the fabric edge. • Close front cover. Start sewing • Raise the presser foot by lowering presser foot lift. • Place material under the presser foot behind the needle. • Lower the presser foot by raising the presser foot lift. Note: When you start to sew from the middle of the fabric, place the fabric at the desired starting point of sewing. Securing the coverstitch seam end Chaining off is not possible after sewing coverstitch because it causes the seam to unravel when the looper thread is pulled out at the end of sewing. Therefore, secure the seam end in the following manner. When sewing through to the edge of fabric • Knot the needle threads (2 or 3 threads) together Àrst, as shown on the illustration. • Tie these threads with the looper threads. • Cut extra threads. When sewing is stopped halfway • Pull out the needle threads (2 or 3 threads) on the underside of the fabric and knot the threads in the same manner as described above. • Cut extra threads. Note: Normally, the seams at the start of sewing do not unravel, but it is wise to secure the seam end following the same steps as described when sewing through to the edge of the fabric. Stitches & sewing techniques 29
-
 1
1 -
2
-
3
-
4
-
5
-
6
-
7
-
8
-
9
-
10
-
11
-
12
-
13
-
14
-
15
-
16
-
17
-
18
-
19
-
20
-
21
-
22
-
23
-
 24
24 -
 25
25 -
 26
26 -
 27
27 -
 28
28 -
 29
29 -
 30
30 -
 31
31 -
 32
32 -
 33
33 -
 34
34 -
35
-
36
-
37
-
38
-
39
-
40
 |
 |