Pfaff hobby 1016 Owner's Manual - Page 31
stitches, practical, sewing
 |
View all Pfaff hobby 1016 manuals
Add to My Manuals
Save this manual to your list of manuals |
Page 31 highlights
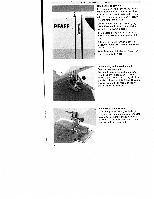
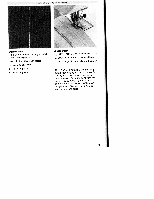
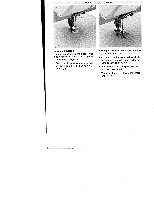
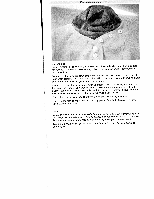
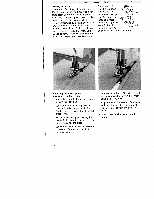
Utility stitches mu! practical sewing iwri . Program A3 /4A 12 / A1 Sewing buttonholes with the button hole foot Linen buttonhole • Attach the buttonhole foot and slide the foot forward as far as it will go. • Position the pattern adjustment dial at A1 and sew the first buttonhole seam in the desired length. • Select setting A 112 and sew 4-6 stitches for the bartack. Make sure the fabric stays in position while doing this. - Select setting A3 and sew the second buttonhole seam in the reverse direction and in the same length. * Select setting A 42 again and sew a few bartack stitches while making sure the fabric stays in position. • Select straight stitch setting B1 and sew a few tying off stitches. Make sure the fabric stays in position. Cut open the buttonhole with the aid of a pair of scissors or a slitting knife. Linen buttonhole with gimp thread To sew especially durable buttonholes, e.g. on sportswear, we recommend using a gimp thread. On elastic materials the gimp thread is particularly important to prevent the but tonhole from stretching. • Lay the gimp thread over the rear pro trusion A and pass the thread ends un derneath the presser foot towards the front. • Clamp the threads to the left and right of protrusion B. • Slide the buttonhole runner as far for wards as possible and sew the but tonhole as described in the left hand column. • Pull the loop of the gimp thread into the buttonhole and trim the thread ends. Tip: In order to prevent damaging the bartack by cutting open the buttonhole, insert a pin into the bartack. 27
-
 1
1 -
2
-
3
-
4
-
5
-
6
-
7
-
8
-
9
-
10
-
11
-
12
-
13
-
14
-
15
-
16
-
17
-
18
-
19
-
20
-
21
-
22
-
23
-
24
-
25
-
 26
26 -
 27
27 -
 28
28 -
 29
29 -
 30
30 -
 31
31 -
 32
32 -
 33
33 -
 34
34 -
 35
35 -
 36
36 -
37
-
38
-
39
-
40
-
41
-
42
-
43
-
44
-
45
-
46
-
47
-
48
-
49
-
50
-
51
-
52
-
53
-
54
-
55
-
56
-
57
-
58
 |
 |
