Pfaff powerquilter p3 PowerQuiltertm p3 Pillow Project - Page 4
Quilt Top Border, Quilt Left Side Border
 |
View all Pfaff powerquilter p3 manuals
Add to My Manuals
Save this manual to your list of manuals |
Page 4 highlights
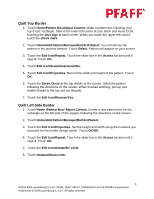
Quilt Top Border 1. Touch Home/Pattern Box/Adjust Current. Make a pattern box following your top 4"x10" rectangle. Start in the lower left corner of your block and move CCW , touching the plus sign at each corner. When you reach the upper left corner, touch the check mark. 2. Touch Home/Add Pattern/Baroque/Bar1brdr/Select. You should see the pattern in the preview window. Touch Select. Pattern will appear on your screen. 3. Touch the Edit Icon/Repeat. Touch the slider bar in the Across section until it says 3. Touch OK. 4. Touch Edit Icon/Scale/Smartscale/No. 5. Touch Edit Icon/Properties. Record the width and height of the pattern. Touch OK. 6. Touch the Green Circle at the top middle of the screen. Stitch the pattern following the directions on the screen. When finished stitching, pull up your bobbin thread to the top and cut threads. 7. Touch the Edit Icon/Remove/Yes. Quilt Left Side Border 1. Touch Home /Pattern Box/ Adjust Current. Create a new pattern box for the rectangle on the left side of the square, following the directions on the screen. 2. Touch Home/Add Pattern/Baroque/Bar1brd/Select. 3. Touch the Edit Icon/Properties. Set the height and width using the numbers you recorded for the border design earlier. Touch OK/OK. 4. Touch the Edit Icon/Repeat. Touch the slider bar in the Across section until it says 3. Touch OK. 5. Touch the Edit Icon/Rotate/90° CCW. 6. Touch Notepad/Autocenter. 4 ©2013 KSIN Luxembourg ll, S.ar.l. PFAFF, QUILT ARTIST, POWERQUILTER and INSPIRA are exclusive trademarks of KSIN Luxembourg ll, S.ar.l. All rights reserved.
-
 1
1 -
 2
2 -
 3
3 -
 4
4 -
 5
5 -
 6
6 -
 7
7 -
 8
8
 |
 |