Pfaff tipmatic 6150 Owner's Manual - Page 68
machine, fabric., Remember, letters
 |
View all Pfaff tipmatic 6150 manuals
Add to My Manuals
Save this manual to your list of manuals |
Page 68 highlights
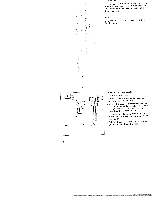
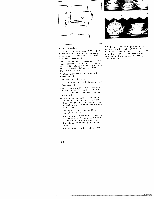
pl 1 Appliqué work Advrd(esuaepnpcrnptieesalceimtiqailaoyualbnéteseassrtaciigauctacaretleihslsfoesuqraodleunr.idfisceaYeksnpalofcyam,uyttbmceewearfacnfnidteashecumtys.taaheonkBuedeiyt acaahuaplsnapwpislneaiogqryabfusetdseacppiitfnef,rfocoeoiatl cutout on its sole for the zigzag seam. Insert the appliqué foot in the sewing - machine Transfer your side, smooth drafted side, of pattern to the fusible the face backing fabric. Remember that bers have to be drawn any letters or num as a mirror image. Now iron the qué material. backing Cut the fabric motif onto the appli out and pull the paper off Place and iron on the applique parts on the - base material. - Afterwards overstitch row and dense zigzag make sure the needle all contours with stitches D or E passes the outer nar Also edge so that no fraying occurs later. Richetieu This very artistic form embroidery is easy to of bar and make with eyelet your sewing mach me. Transfer your pattern onto the face side of - the fabric using the magic pen. Then place two plies of embroidery Avalon - backing under the area to be embroidered and tauten the fabric and backing in an embroidery hoop. Insert foot number 0. - To make the embroidery more stable, sew - around all contours double with a straight stitch of approx. 1 mm length. - After that, carefully cut the areas that will form out the the fabric cutouts at from about 2 mm along their contours, but do not cut away the backing material. Embroider the contours with a dense zigzag - stitch. The backing material provides this part of - the work with much more shape and stabi lity. Finally, all you have to do is dissolve the - Ayovuarlopnieecme borfoiidnderivyidbuaaclklyinmg aindeweamtebr,roainddery is ready. 66
-
 1
1 -
2
-
3
-
4
-
5
-
6
-
7
-
8
-
9
-
10
-
11
-
12
-
13
-
14
-
15
-
16
-
17
-
18
-
19
-
20
-
21
-
22
-
23
-
24
-
25
-
26
-
27
-
28
-
29
-
30
-
31
-
32
-
33
-
34
-
35
-
36
-
37
-
38
-
39
-
40
-
41
-
42
-
43
-
44
-
45
-
46
-
47
-
48
-
49
-
50
-
51
-
52
-
53
-
54
-
55
-
56
-
57
-
58
-
59
-
60
-
61
-
62
-
 63
63 -
 64
64 -
 65
65 -
 66
66 -
 67
67 -
 68
68 -
 69
69 -
 70
70 -
 71
71 -
 72
72 -
 73
73 -
74
-
75
-
76
-
77
-
78
-
79
-
80
-
81
-
82
-
83
-
84
-
85
-
86
-
87
-
88
-
89
 |
 |
