Pfaff tipmatic 6150 Owner's Manual - Page 79
J,I%I
 |
View all Pfaff tipmatic 6150 manuals
Add to My Manuals
Save this manual to your list of manuals |
Page 79 highlights
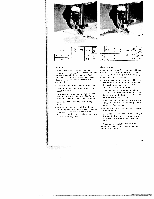
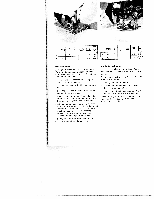
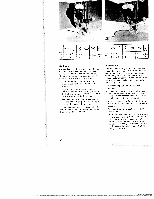
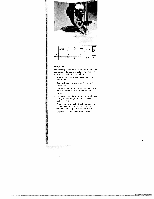
proglJ,I I% I c:jI - Ia C O35-lj 1,5 2 b j C jO.35.lj 1.5 2 I I 3 I cording foot Cording foot Cording is a technique in which pearl thread or a fine cord is overstitched to produce a purl seam. With this you can obtain an effect similar to braiding. Appliqués can also be made more effective with this seam. -. Mark the required motif on the fabric, avoiding too tight curves or angles if possible. - Engage the cording foot and place the fil ling thread in one of the front grooves of the foot. then place the filling thread in the back groove under the foot shoe. - Now overstitch the filling thread with nar row and dense zigzag stitches Now you have made a socalled purl seam. TIP: You can also obtain a special effect by overstitching a medium pearl thread with a thread of a different colour. Appliqué foot Appliqués are quickly made and always pro duce a beautiful fancy effect. By using diffe rent materials and patterns you can obtain variations galore. You can make a perfect. densely stitched seam with the appliqué foot, because it has a special cutout on its sole for the zigzag seam - Insert the appliqué foot in the sewing machine. - Transfer your drafted pattern to the face side, smooth side, of the fusible backing fabric. Remember that any letters or num bers have to be drawn in mirrored fashion. -. Now iron the backing fabric onto the appli que material. Cut the motif Out and pull the paper off. - Place and iron on the applique parts on the base material. - Afterwards overstitch all contours with nar row and dense zigzag stitches. When you reach a curve, use the needle down" iModel 62301 function to help you guide the work more easily. Also make sure the needle passes the outer edge so that no fraying occurs later. 78
-
 1
1 -
2
-
3
-
4
-
5
-
6
-
7
-
8
-
9
-
10
-
11
-
12
-
13
-
14
-
15
-
16
-
17
-
18
-
19
-
20
-
21
-
22
-
23
-
24
-
25
-
26
-
27
-
28
-
29
-
30
-
31
-
32
-
33
-
34
-
35
-
36
-
37
-
38
-
39
-
40
-
41
-
42
-
43
-
44
-
45
-
46
-
47
-
48
-
49
-
50
-
51
-
52
-
53
-
54
-
55
-
56
-
57
-
58
-
59
-
60
-
61
-
62
-
63
-
64
-
65
-
66
-
67
-
68
-
69
-
70
-
71
-
72
-
73
-
 74
74 -
 75
75 -
 76
76 -
 77
77 -
 78
78 -
 79
79 -
 80
80 -
 81
81 -
 82
82 -
 83
83 -
 84
84 -
85
-
86
-
87
-
88
-
89
 |
 |
