Philips 46PFL7505D User manual - Page 9
Get started - manual
 |
UPC - 609585186286
View all Philips 46PFL7505D manuals
Add to My Manuals
Save this manual to your list of manuals |
Page 9 highlights
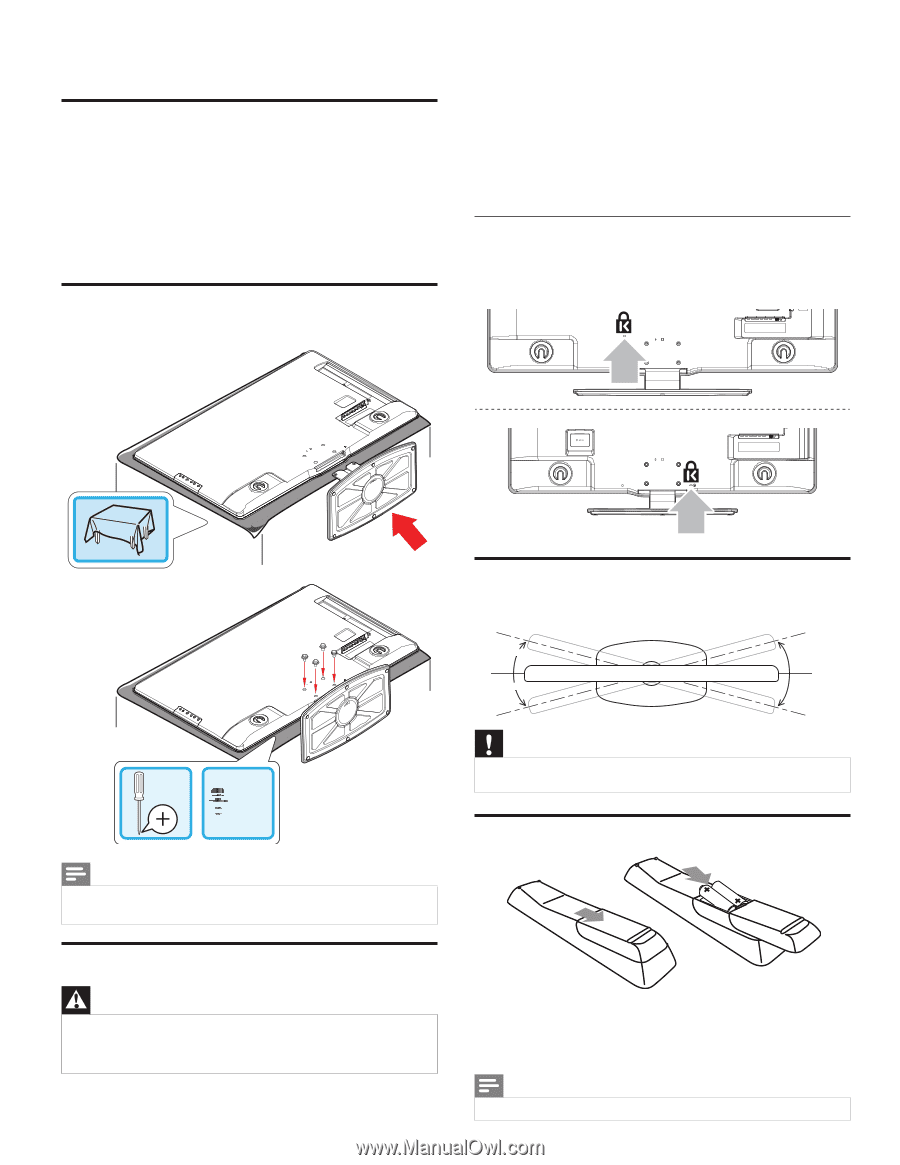
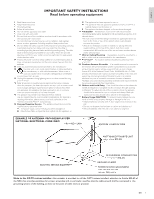
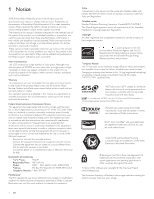
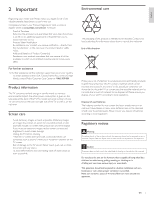
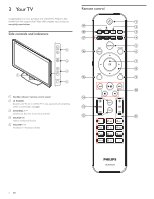
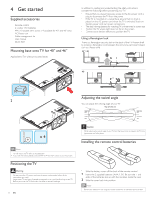
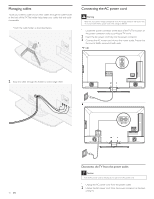
4 Get started Supplied accessories • Remote control • 2 x AAA, 1.5V batteries • M4 x 10 double sems screw x 4 (available for 40" and 46" only) • AC Power cord • Cable management tie • User manual • Quick Start Mounting base onto TV for 40" and 46" Applicable to TVs without mounted bases. 1 In addition to reading and understanding the safety instructions, consider the following before positioning your TV : • Ensure that you always have easy access to the AC power cord or plug to disconnect the TV from the power. • If the TV is mounted on a swivel base, ensure that no strain is placed on the AC power cord when the TV is swiveled. Strain on the AC power cord can loosen connections. • The ideal viewing distance for watchingTV is three times its screen size. • Position the TV where light does not fall on the screen. • Connect your devices before you position the TV. Using a Kensington lock There is a Kensington security slot on the back of the TV. Prevent theft by looping a Kensington lock between the slot and a permanent object, such as a heavy table. 55" / 46" 40" 2 x 4 Note • To wall mount the TV, refer to the addendum. • If you lose the screws, please purchase M4×10 Philips head screws at your local store. Positioning the TV Warning • Do not insert the AC power cord into the power socket outlet before all the connections are made. • Large screen TVs are heavy. 2 people are required to carry and handle a large screen TV. • Before you move the TV, disconnect the cables to prevent breakage. 8 EN Adjusting the swivel angle You can adjust the viewing angle of your TV. Top of the unit approx. 15° approx. 15° approx. 15° approx. 15° Caution • While adjusting the swivel angle of your TV, hold the base firmly to prevent the TV from tipping over and falling down. Installing the remote control batteries 1 Slide the battery cover off the back of the remote control. 2 Insert the 2 supplied batteries (AAA, 1.5V). Be sure the + and − ends of the batteries line up with the markings inside the case. 3 Slide the cover back into position. Note • Remove the batteries if not using the remote control for an extended period of time.
-
 1
1 -
2
-
3
-
 4
4 -
 5
5 -
 6
6 -
 7
7 -
 8
8 -
 9
9 -
 10
10 -
 11
11 -
 12
12 -
 13
13 -
 14
14 -
15
-
16
-
17
-
18
-
19
-
20
-
21
-
22
-
23
-
24
-
25
-
26
-
27
-
28
-
29
-
30
-
31
-
32
-
33
-
34
-
35
-
36
-
37
-
38
 |
 |