Philips CD1552B User manual - Page 16
Getting started
 |
UPC - 609585144781
View all Philips CD1552B manuals
Add to My Manuals
Save this manual to your list of manuals |
Page 16 highlights
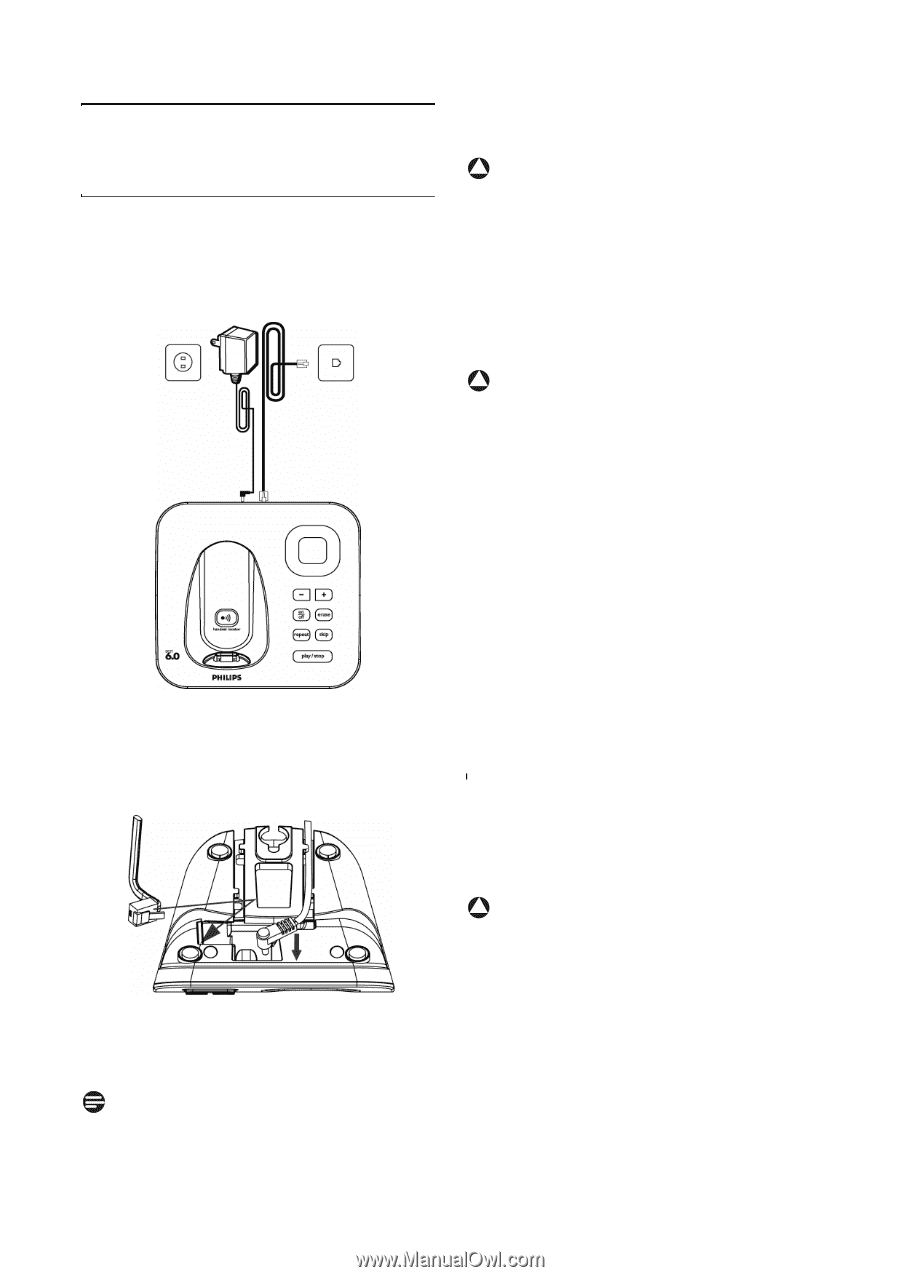
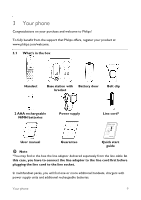
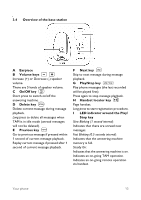
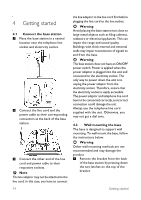
4 Getting started 4.1 Connect the base station 1 Place the base station in a central location near the telephone line socket and electricity socket. 2 Connect the line cord and the power cable to their corresponding connectors at the back of the base station. 3 Connect the other end of the line cord and power cable to their respective sockets. Note The line adaptor may not be attached to the line cord. In this case, you have to connect the line adaptor to the line cord first before plugging the line cord to the line socket. ! Warning Avoid placing the base station too close to large metal objects such as filing cabinets, radiators or electrical appliances. This can impair the range and sound quality. Buildings with thick internal and external walls may impair transmission of signals to and from the base. ! Warning The base station does not have an ON/OFF power switch. Power is applied when the power adaptor is plugged into the unit and connected to the electricity socket. The only way to power down the unit is to unplug the power adaptor from the electricity socket. Therefore, ensure that the electricity socket is easily accessible. The power adaptor and telephone line cord have to be connected correctly, as incorrect connection could damage the unit. Always use the telephone line cord supplied with the unit. Otherwise, you may not get a dial tone. 4.2 Wall mounting the base The base is designed to support wall mounting. To wall mount the base, follow the instructions below. ! Warning Other wall mounting methods are not recommended and may damage the product. 1 Remove the bracket from the back of the base station by pressing down the two latches on the top of the bracket. 14 Getting started
-
 1
1 -
2
-
3
-
4
-
5
-
6
-
7
-
8
-
9
-
10
-
 11
11 -
 12
12 -
 13
13 -
 14
14 -
 15
15 -
 16
16 -
 17
17 -
 18
18 -
 19
19 -
 20
20 -
 21
21 -
22
-
23
-
24
-
25
-
26
-
27
-
28
-
29
-
30
-
31
-
32
-
33
-
34
-
35
-
36
-
37
-
38
-
39
-
40
-
41
-
42
-
43
-
44
-
45
-
46
-
47
-
48
-
49
 |
 |