Philips HTS6515D User manual - Page 12
Connect video cables - theater system
 |
UPC - 609585146853
View all Philips HTS6515D manuals
Add to My Manuals
Save this manual to your list of manuals |
Page 12 highlights
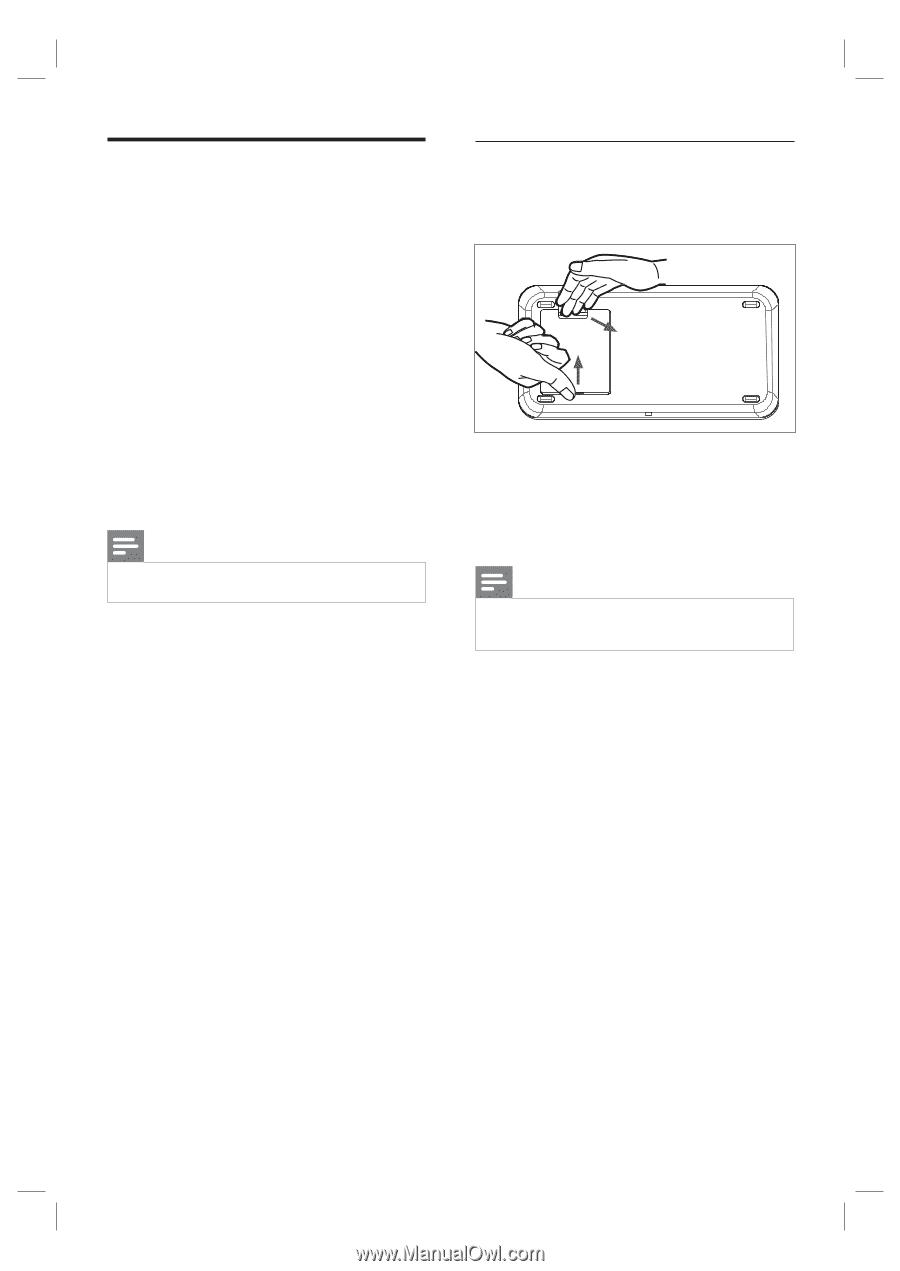
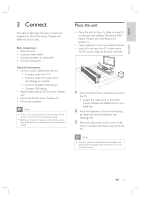
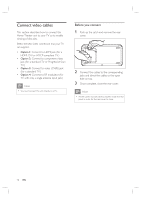
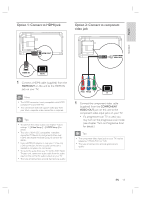
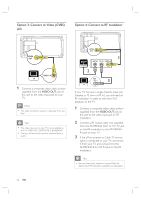
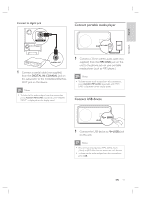
Connect video cables This section describes how to connect this Home Theater unit to your TV so to enable viewing of disc play. Select the best video connection that your TV can support. • Option 1: Connect to HDMI jack (for a HDMI, DVI or HDCP-compliant TV.) • Option 2: Connect to component video jack (for a standard TV or Progressive Scan TV.) • Option 3: Connect to video (CVBS) jack (for a standard TV.) • Option 4: Connect to RF modulator (for TV with only a single antenna input jack.) Note • You must connect this unit directly to a TV. Before you connect 1 Push up the catch and remove the rear cover. 2 Connect the cables to the corresponding jacks and direct the cables to the open hole on top. 3 Once complete, close the rear cover. Note • All the cables must be placed properly inside the rear panel in order for the rear cover to close. 12 EN
-
 1
1 -
2
-
3
-
4
-
5
-
6
-
 7
7 -
 8
8 -
 9
9 -
 10
10 -
 11
11 -
 12
12 -
 13
13 -
 14
14 -
 15
15 -
 16
16 -
 17
17 -
18
-
19
-
20
-
21
-
22
-
23
-
24
-
25
-
26
-
27
-
28
-
29
-
30
-
31
-
32
-
33
-
34
-
35
-
36
-
37
-
38
-
39
-
40
-
41
-
42
-
43
-
44
-
45
-
46
-
47
-
48
-
49
-
50
-
51
-
52
 |
 |