Philips HTS6515D User manual - Page 13
Option 1: Connect to HDMI jack, Option 2: Connect to component, video jack - 2 1 dvd
 |
UPC - 609585146853
View all Philips HTS6515D manuals
Add to My Manuals
Save this manual to your list of manuals |
Page 13 highlights
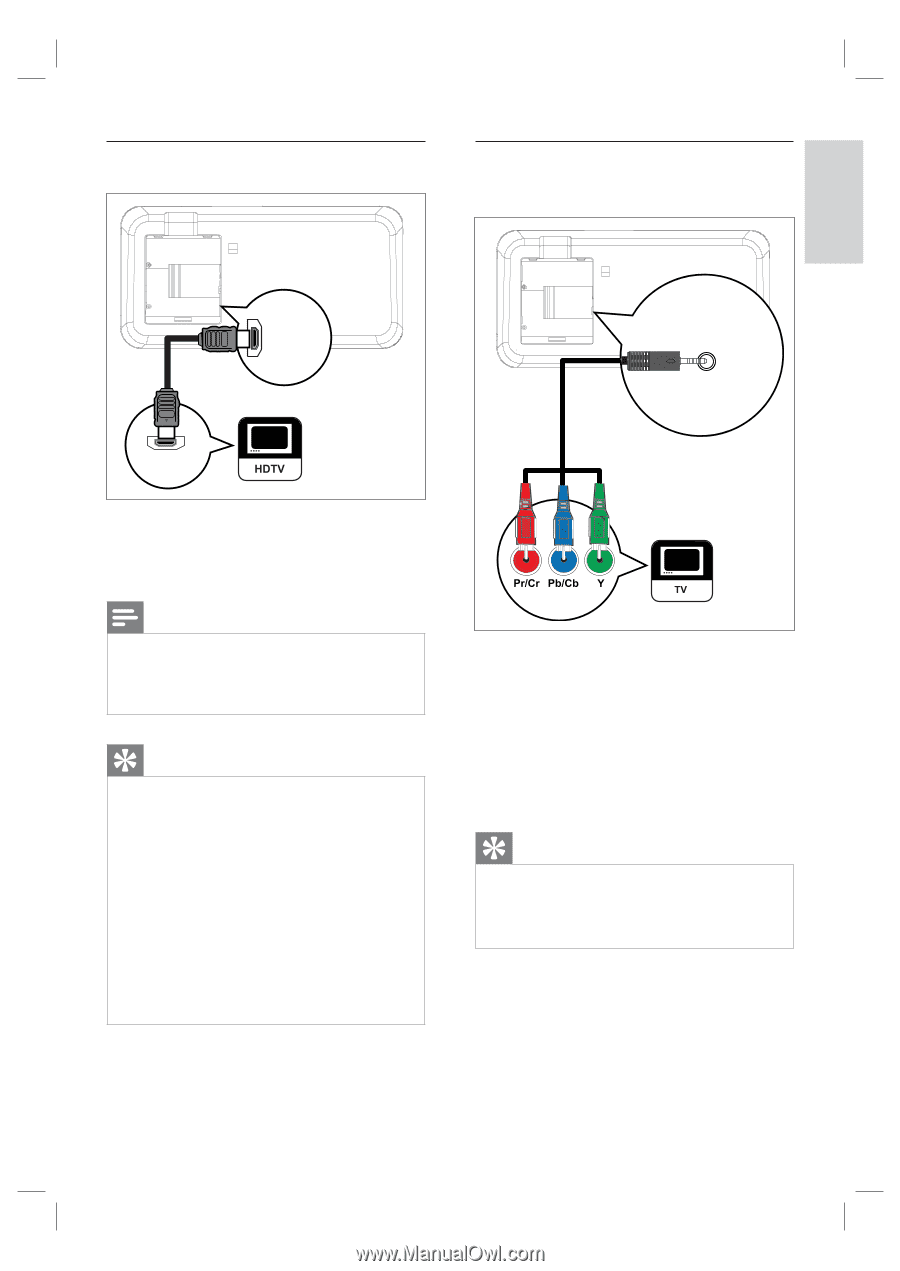
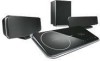
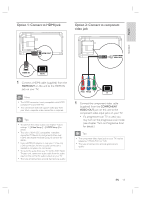
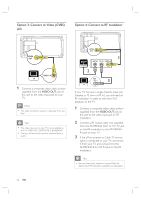
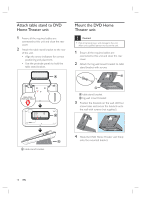
Option 1: Connect to HDMI jack Option 2: Connect to component video jack English Connect HDMI OUT COMPONENT VIDEO OUT HDMI IN 1 Connect a HDMI cable (supplied) from the HDMI OUT on this unit to the HDMI IN jack on your TV. Note • The HDMI connector is only compatible with HDMI compliant TVs and DVI-TVs. • This connection does not support video play from your iPod, a separate video connection is required. Tips • To optimize the video output, see chapter 'Adjust settings' > [ Video Setup ] > [ HDMI Setup ] for details. • This unit is HDMI CEC compatible. It enables connected TV/device to control each other over HDMI, see chapter 'Activate EasyLink control' for details. • Use a HDMI/DVI adaptor in case your TV has only a DVI connection. An extra audio connection is needed to complete this connection. • To route the audio from your TV to this DVD Home Theater unit, connect an audio cable from the audio input on this unit to the audio output on your TV. • This type of connections provide best picture quality. 1 Connect the component video cable (supplied) from the COMPONENT VIDEO OUT jack on this unit to the component video input jacks on your TV. • If a progressive scan TV is used, you may turn on the progressive scan mode (see chapter 'Turn on Progressive Scan' for details.) Tips • The component video input jack on your TV may be labeled as Y Pb/Cb Pr/Cr or YUV. • This type of connections provide good picture quality. EN 13
-
 1
1 -
2
-
3
-
4
-
5
-
6
-
7
-
 8
8 -
 9
9 -
 10
10 -
 11
11 -
 12
12 -
 13
13 -
 14
14 -
 15
15 -
 16
16 -
 17
17 -
 18
18 -
19
-
20
-
21
-
22
-
23
-
24
-
25
-
26
-
27
-
28
-
29
-
30
-
31
-
32
-
33
-
34
-
35
-
36
-
37
-
38
-
39
-
40
-
41
-
42
-
43
-
44
-
45
-
46
-
47
-
48
-
49
-
50
-
51
-
52
 |
 |