Philips LC5331 User Guide - Page 20
General explanation
 |
UPC - 037849940563
View all Philips LC5331 manuals
Add to My Manuals
Save this manual to your list of manuals |
Page 20 highlights
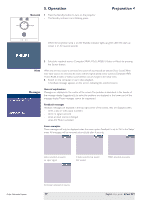
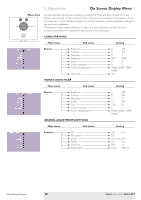
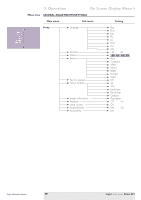
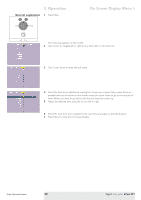
5. Operation General explanation Menu OK 1 Press Menu. Source Auto Image On Screen Display Menu > Lamp Temp. - The menu bar appears on the screen. 2 Use Cursor to navigate left or right to any other item in the menu bar. 3 Use Cursor down to enter the sub menu. 4 Select the item to be adjusted by moving the Cursor up or down. When more items are available than can be shown in one screen, move the cursor down to go to the next list of items. When you want to go back to the first list, move the cursor up. 5 Adjust the selected item, using the Cursor left or right. 6 Select the next item to be adjusted in the sub menu and adjust as described above. 7 Press Menu to close the On Screen Display. Philips Multimedia Projector 20 English User guide bCool SV1
-
 1
1 -
2
-
3
-
4
-
5
-
6
-
7
-
8
-
9
-
10
-
11
-
12
-
13
-
14
-
 15
15 -
 16
16 -
 17
17 -
 18
18 -
 19
19 -
 20
20 -
 21
21 -
 22
22 -
 23
23 -
 24
24 -
 25
25 -
26
-
27
-
28
-
29
-
30
-
31
-
32
-
33
-
34
-
35
-
36
 |
 |
