Philips MZ3 User manual - Page 15
Warning
 |
View all Philips MZ3 manuals
Add to My Manuals
Save this manual to your list of manuals |
Page 15 highlights
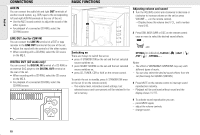
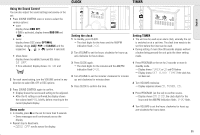
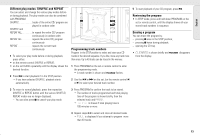
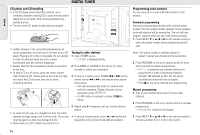
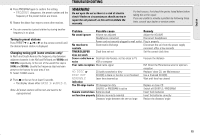
English TROUBLESHOOTING 4 Press PROGRAM again to confirm the setting. ™ PROGRAM disappears, the preset number and the frequency of the preset station are shown. 5 Repeat the above four steps to store other stations. WARNING Do not open the set as there is a risk of electric shock! Under no circumstances should you try to repair the set yourself, as this will invalidate the warranty. If a fault occurs, first check the points listed below before taking the set for repair. If you are unable to remedy a problem by following these hints, consult your dealer or service center. • You can overwrite a preset station by storing another frequency in its place. Tuning to preset stations Press PRESET 4 or 3 (¡ or ™ on the remote control) until the desired preset station is displayed. Changing tuning grid (some versions only) In North and South America the frequency step between adjacent channels in the AM and FM band are 10 KHz and 100 KHz respectively. In the rest of the world this step is 9 KHz and 50 KHz. Usually the frequency step has been preset in the factory for your area if not: 1 Select TUNER source. 2 Press 9 on the set for at least 5 seconds. ™ The display shows either GRID 9 or GRID10. Note: All preset stations will be lost and need to be reprogrammed. Problem Possible cause Remedy No sound /power Volume not adjusted Adjust the VOLUME Headphones connected Disconnect headphones Power cord not securely plugged to wall outlet Plug in properly No reaction to Electrostatic discharge Disconnect the unit from the power supply controls reconnect affter a few seconds TIMER/SLEEPER Clock time not set Set the correct clock time does not work Severe radio hum or Electrical interference: set too close to TV, Increase the distance noise VCR or computer Poor radio reception Weak radio signal FM: Direct the FM antenna wire for optimum reception NO DISC or CD badly scratched or dirty Replace/ clean CD, see Maintenance DISC NOT CD-R(W) is blank or the disc is not finalised Use a finalised CD-R(W) READABLE Laser lens steamed up Wait until lens has cleared indication The CD skips tracks CD damaged or dirty Replace or clean CD SHUFFLE or PROGRAM is active Switch off SHUFFLE / PROGRAM Remote control does Batteries dead Insert fresh batteries not function properly Batteries incorrectly inserted Insert the batteries correctly Distance/ angle between the set too large Reduce the distance/ angle 15
-
 1
1 -
2
-
3
-
4
-
5
-
6
-
7
-
8
-
9
-
 10
10 -
 11
11 -
 12
12 -
 13
13 -
 14
14 -
 15
15 -
 16
16 -
 17
17 -
 18
18 -
 19
19 -
 20
20 -
21
-
22
-
23
-
24
-
25
-
26
-
27
-
28
-
29
-
30
-
31
-
32
-
33
-
34
-
35
-
36
-
37
-
38
-
39
-
40
-
41
-
42
-
43
 |
 |