Pioneer CT-W404R Operating Instructions
Pioneer CT-W404R Manual
 |
View all Pioneer CT-W404R manuals
Add to My Manuals
Save this manual to your list of manuals |
Pioneer CT-W404R manual content summary:
- Pioneer CT-W404R | Operating Instructions - Page 1
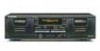
STEREO DOUBLE CASSE'n'E DECK CT- /504R CT-W404R CT-W204 )_ _==m=_==== CT-WSO4_II U _i i_ll l======_==J .., • I. I°l. o c3 zD_®.: o ... Ii. Ioi. II ...AUTON_ _tS_ld_4 -=. ! ! • The above illustration shows CT-W504R. For the demo function, instructions. refer to back cover of these - Pioneer CT-W404R | Operating Instructions - Page 2
replacement supporting SERVICE - The appliance should be serviced by a Pioneer authorized service center or qualified service SERVICING -The user should not attempt to service the appliance beyond that described in the operating instructions. All other servicing shoutd be referred to qualified service - Pioneer CT-W404R | Operating Instructions - Page 3
with the instructions, may User Alteration or modifications carried out without appropriate authorization may invalidate the user's right to operatethe equipment. I I [For Canadian model level: • Start your volume control at a low setting. • concert in front of speakers, thunderclap Gunshot blast, - Pioneer CT-W404R | Operating Instructions - Page 4
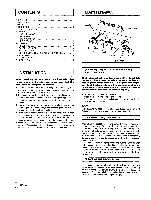
...HANDLING CASSETTE TAPES ...CONNECTIONS ...FRONT PANEL FACILITIES ...PLAYBACK ...SINGLE PLAYBACK ...BLANK SKIP ...RELAY PLAYBACK ...MUSIC SEARCH ...RECORDING ...RECORDING ...RECORDING MUTE ...ERASING A TAPE ...CD • DECK SYNCHRO RECORDING (CT-W504R only) ...TAPE COPYING ...TROUBLESHOOTING - Pioneer CT-W404R | Operating Instructions - Page 5
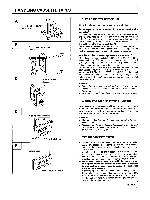
B Cover prevention adhesive tape • I AUTOMATIC TAPE SELECTOR FUNCTION This cassette deck is equipped with an automatic tape selector function which utilizes the sensor holes on the tape cassette to determine the type of tape being used. The deck is then set to match the tape recording bias and - Pioneer CT-W404R | Operating Instructions - Page 6
deck I with a remote control unit which was not designed for double deck cassette players, see page 8. Right channel_ "" c_2_ Red plug Connect the TAPE jacks of your amplifier to the LINE jacks of the cassette deck. Be sure to connect the REC (INPUT) jacks of the deck to the recording (output - Pioneer CT-W404R | Operating Instructions - Page 7
HIGH : Double speed copy Reverse mode switch (RELAYISKIP) (CT-WS04R/CTW404R only) RELAY/SKIP ON/OFF DECK II counter mode reset DECK II counter CD .DECK (CT-WS04R Deck W204 only) AUTO PLAY button (CT-W404R/CTswitch button button (CT-W204 (RESET) button (CD SYNC) only) @ • : Recording DECK II eject - Pioneer CT-W404R | Operating Instructions - Page 8
-W404R If Deck I and II are loaded with tapes, each tape will be played using relay playback. RELAY/SKIP Svw'r'CH (CT.W204) • • • If Deck I and II are loaded with tapes, each tape will be played using relay palyback. OPERATION OF DECK I WITH A REMOTE CONTROL UNIT NOT DESIGNED FOR DOUBLE DECKS - Pioneer CT-W404R | Operating Instructions - Page 9
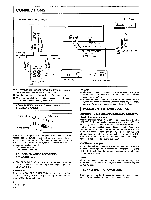
results, the HX PRO system is activated automatically when recording begins. Since this system controls the quality of recording itself, the clarity of the sound will be maintained even when the tapes are played back on another cassette deck which does not contain the HX PRO Headroom Extension - Pioneer CT-W404R | Operating Instructions - Page 10
-WSO4R/CT-W404R] For both DECK I and II Forward mode Stop Playback Fast forward -,,,- "ii',_"Flashing rapidly Reverse mode -11 PLAY I1_ Different counters are provided for DECK I and II. The number of a counter increases/decreases as a tape runs. It is convenient if you make a note of the recorded - Pioneer CT-W404R | Operating Instructions - Page 11
switch to the same position that was used for recording. [CT-W-504R/CT-W404R] 3. Set the REV MODE switch to ---" or _ (see page 8). 4. Set the stereo amplifier for tape playback. 5. Press the playback II. (1_ or 4) button of either DECK I or [CT-W504R only] To improve high frequency sound during - Pioneer CT-W404R | Operating Instructions - Page 12
position. During forward playback [CT-WSO4RICT-W404R] REV MODE Iswitch o Starting playback button DECK II_ Another deck mode *2 When you wish selection recorded on the tape, forward search will continue on the opposite side, but reverse search will stop at the tape end. (Except for CT-W204) - Pioneer CT-W404R | Operating Instructions - Page 13
and playback of the same tape. This is due to differences in tape sensitivity, and creates no problem. 2 3 • I I I // I I I ECORDING MUTE I 76 1 1. Load a tape for recording in Deck II. 2. Set the DOLBY NR switch. 3. Set the REV MODE switch. (Except for CT-W204) • To recordon one side - Pioneer CT-W404R | Operating Instructions - Page 14
Be sure to connect the deck and the CD player with the CD • DECK SYNCHRO control cord. Only PIONEER CD players equipped with a CD. DECKSYNCHRO jack can be used for CD • DECK SYNCHRO recording. Any type of CD player which meets these requirements, including twin-tray or multiplay models, can be used - Pioneer CT-W404R | Operating Instructions - Page 15
copying at twice the normal playback speed). • 1. Load a tape for playback into DECK I and a tape cording into Deck II. 2. Set the REV MODE switch. (CT-WS04R/CT-W404R) 3. Set the W404R) • tape transport direction. for re• (CT-W504R/CT- Tape copying is always performed in the direction indicated - Pioneer CT-W404R | Operating Instructions - Page 16
REC LEVEL control is set too low. The amplifier is not delivering a recording signal (from the tuner, CD player, etc.). Wrong connection, connection cord removed, poor contact, broken wire. The tape is completely The tape is slack. The head is dirty. wound up Replace the cassette with one whose - Pioneer CT-W404R | Operating Instructions - Page 17
use the remote control system. CD • DECK SYNCHRO is disabled. (CT-W504R only) • • The components are not connected properly. The cassette erasure prevention tabs are broken. • • Connect them properly (see page 6). Replace the cassette with one whose tabs are intact. Replace the tape with a longer - Pioneer CT-W404R | Operating Instructions - Page 18
CD • DECK SYNCHRO recording capability (CT-W504R only) Peak level meter with peak-hold function Automatic space recording mute Automatic tape selector [] System remote control available (CT-W504R/CT-W404R/CTW204: Australian models) 2-mode electronic 4-digit twin tape counter Headphone jack (CT-W504R - Pioneer CT-W404R | Operating Instructions - Page 19
- Pioneer CT-W404R | Operating Instructions - Page 20
(RESET) and the DECK II counter mode button (TIME/COUNI) simultaneously to set the demonstration mode. Published by Pioneer Electronic Corpo,ahon Copyright O 1994 Pioneer Electronic Corporat,oJ_. All rights reserved. PIONEER PIONEER PIONEER PIONEER PIONEER PIONEER ELECTRONIC [USA] CORPORATION
-
 1
1 -
 2
2 -
 3
3 -
 4
4 -
 5
5 -
 6
6 -
 7
7 -
8
-
9
-
10
-
11
-
12
-
13
-
14
-
15
-
16
-
17
-
18
-
19
-
20
 |
 |
STEREO
DOUBLE
CASSE'n'E
DECK
CT- /504R
CT-W404R
CT-W204
)_
_==m=_====
CT-WSO4_II
U
_i
._..=,---._.
i_ll
l======_==J
.......
AUTON_
_tS_ld_4
I.
I°l.
Ii.
Ioi.
II
...........
..,
o
c3 zD_®.:o
...
-=.
!
!
•
The above
illustration
shows
CT-W504R.
•
For the demo
function,
refer
to back cover
of these
operating
instructions.
Thank
you
for
bwing
this
Pioneer
product.
Please read
through these operating
instructions
so
you
will
know
how to operate your unit properly.
After
you have
fin-
ished reading the instructions,
keep
the manual in a safe
place
for future reference.
In
some
countries or regions, the shape of the power plug
and power
outlet
may sometimes
differ
from
that
shown
in
the explanatory drawings. However, the
method
of connect-
ing and operating the unit is the same.
WARNING:To
PREVENT
FIRE OR SHOCK
HAZARD,
DO
NOT
EXPOSE
THIS
APPLIANCE
TO RAIN
OR MOIS-
TURE.
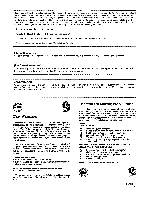
IMPORTANT
NOTICE
The
serial number
for this equipment
is located on the
rear
panel. Please write this
serial number
on
your
enclosed
war-
ranty card and
keep
it in a
secure
area. This is for
your
secu-
rity.
I
THE
POWER
SWITCH
IS SECONDARY
CONNECTED
I
AND
THEREFORE
DOES
NOT SEPARATE
THE
UNIT
I
FROM
MAINS
POWER
IN STANDBY
POSITION.
[For Canadian
model]
CAUTION:
TO PREVENT
ELECTRIC
SHOCK DO NOT
USE THIS
(POLARIZED)
PLUG
WITH
AN
EXTENSION
CORD,
RECEPTACLE
OR OTHER
OUTLET
UNLESS
THE
BLADES CAN BE FUM.Y INSERTED TO PREVENT
BLADE
EXPOSURE.
ATTENTION:
POUR
PREVENIR
LES
CHOCS
ELECTRIQUES
NE
PAS
UTILISER
CETTE
FICHE
POLARISEE
AVEC
UN
PROLONGATEUR
UNE
PRISE DE
COURANT
OU UNE AUTRE
SORTIE
DE COUP,ANT,
SAUF
Sl LES LAMES PEUVENT
ETRE INSEREES A FOND
SANS
EN LAISSER
AUCUNE
PARTIE A DECOUVERT.
J
"This
product complies with the Radiointerference
requirements
I
of the EC(European Community) Directive 87/308/EEC."
I
CAUTION
This
product
satisfies
FCC
regulations
when
shielded
cables and connectors
are used to connect
the unit to
other
equipment.
To prevent
electromagnetic
interference
with electric appliances
such
as
radios
and televisions,
use
shielded
cables and connectors for connections.
IMPORTANT
1
The
lightning
flash
with
arrowhead,
within
an
equilateral
triangle,
is intended
to alert
the user to the
presence
of uninsulated "dangerous voltage" within the
product's
enclosure
that
may
be
of
sufficient
magnitude
to
constitute
a
risk of
electric
shock
to
persons.
CAUTION
CAUTION:
TO
PREVENT
THE
RISK
OF
ELECTRIC
SHOCK,
DO
NOT
REMOVE
COVER
(OR
BACK).
NO
USER-SER-
VICEABLE
PARTS
INSIDE.
REFER
SERVICING
TO
QUALIFIED
SERVICE
PERSONNEL.
The exclamation
point within
an
equilateral
triangle
is
intended
to alert
the user
to the presence
of important
operating
and maintenance
(servicing)
instructions
in
the
literature
accompanying
the applia nce.
PlOI IlEEIR
°
The Art of
_nmem