Pioneer CT-W616DR Operating Instructions - Page 13
Recording
 |
View all Pioneer CT-W616DR manuals
Add to My Manuals
Save this manual to your list of manuals |
Page 13 highlights
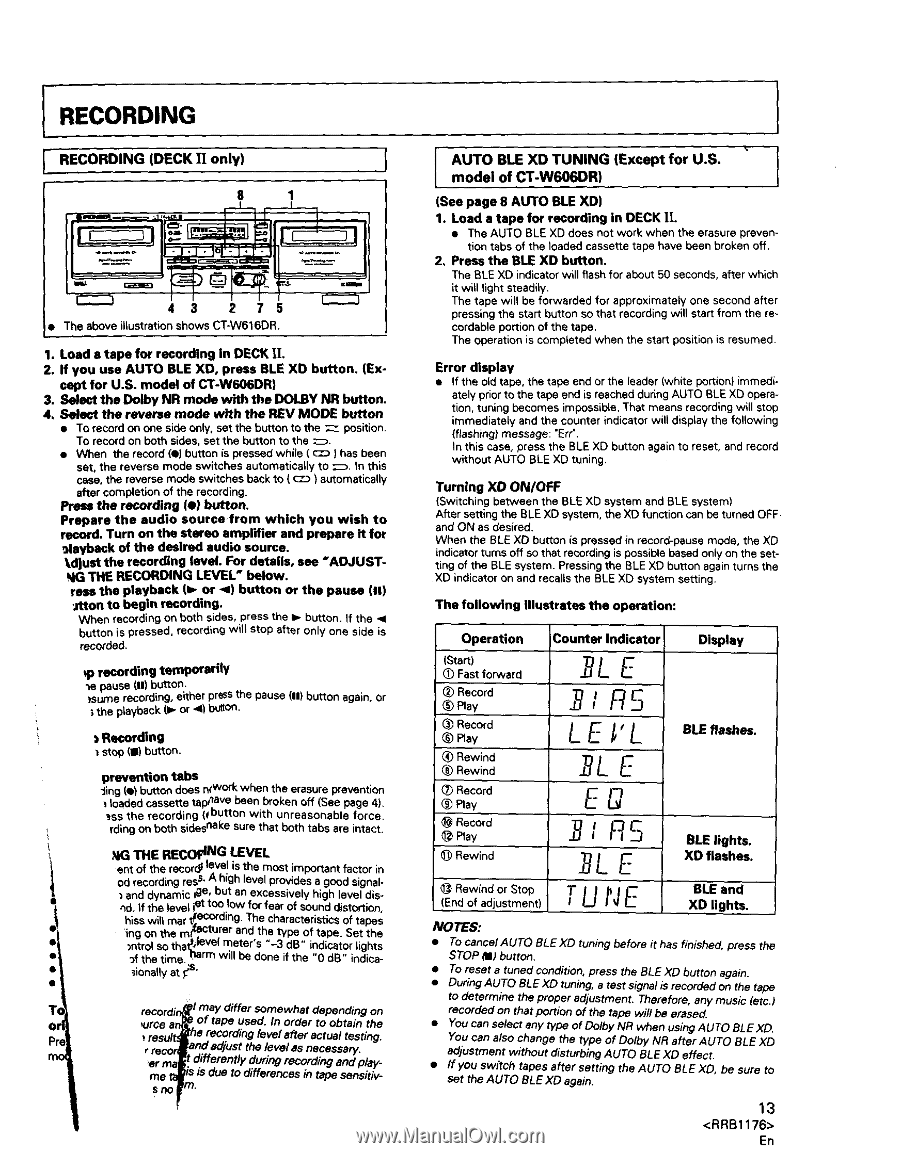
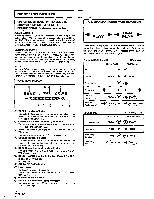
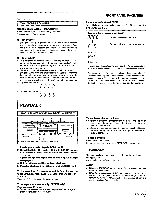
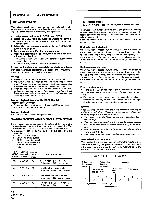
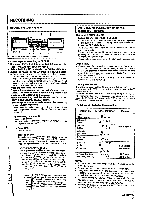
RECORDING L RECORDING (DECK 11only) _'=, .... I 43 2 7 • The above illustration shows CT-W616OR 1. Load a tape for recording in DECK 11. 2. If you use AUTO BLE XD, press BLE XO button. (Ex- cept for U.S. model of CT-W606DRI 3, Select the Dolby NR mode with the DOLBY NR button. 4. Select the reverse mode with the REV MODE button • To recordon one side only,set the button to the __ position. To recordon both sides,set the buttonto the _. • When the record(el buttonis pressedwhile ( _'.-_) has been set, the reverse mode switches eutomaticagyto _. In this case,the reversemode switchesbeckto I c'-=.)_automatically after completionof the recording. Press the recording let button. Prepare the audio source from which you wish to record. Turn on the stereo amplifier and prepare it for ,_laybeck of the desired audio source. _d]ust the recording level. For details, see "ADJUSTNiG THE RECORDING LEVEL" below. ross the playback (is- or I) button or the pause (11) _Jtton to begin recording. When recording on both sides,pressthe Ip button. If the button is pressed, recordingwill stop after onlyone side is recorded. recording temporarily mepause {n) button. tsume recording, either prOS the pause (11)button again, or ; the playback (i_ or 41 button. Recording ) stop(la) button. prevention tabs "Jing(el button does n( work when the erasure prevention loaded cassette tappeve been broken off (See page 4). _ss the recording (,button with unreasonable force. rding on both sidesnake sure that both tabs are intact. _IG THE RECOflN G LEVEL ent o=_ _n.=..*.,_.=,ur_,"l_zle_eisvethle most im pottant factor 'm D-Orecor(_:.an-v .1^_,"a A high level provides a, good sign,al) en-H -_vn._..m....i.t" {go, but an excesswely" h_gh level d_s•_d if the level i_ too low for fear of sound distortion, hiss Will mar -t-tecc_ding•The characteristics of tapes re;lecturer and the t_pe of tape Set the )ntro so tha__1. ef meter's "-3 dB" indicator ights _f the time. harm will be done if the 0 dB" ndica_ionally at _s. T, recordin _1may differ somewhat depending on or _ree an, of tape used. In order to obtain the Pr* _result: he recording fever after actual testing. m¢ r _ecor and adjust the level as necessary. _r rrh differently during recording and play- me t_ is is due to differences in tape sensitiv?t. S no AUTO BLE XD TUNING (Except for U.S. I model of CT-W606DR) (See page 8 AUTO BLE XD) 1. Load a tape for recording in DECK l[. • The AUTO BLE XD does not work when the erasure prevention tabs of the loaded cassette tape have been broken off. 2, Press the BLE XD button. The BLE XD indicator will flash for about 50 seconds, after which it will light steadily. The tape will be forwarded for approximately one second after pressing the start button so that recording will start from the recordeble portion of the tape. The operation is completed when the start position is resumed. Error display • If the old tape, the tape end or the leader (white portion) immedi- ately prior to the tape end is reached during AUTO BLE XD operation, tuning becomes impossible. That means recording will stop immediately and the counter indicator will display the following (flashing) message: "Err'. In this case, press the BLE XD button again to reset, and record without AUTO BLE XD tuning. Turning XD ON/OFF (Switching between the BLE XD system end BLE system) After setting the BLE XD system, the XD function can be turned OFF end ON as desired• When the BLE XO button is pressed in record-pause mode, the XD indicator turns off so that recording is possible based only on the setting of the BLE system. Pressing the BLE XD button again turns the XD indicator on end recalls the BLE XD system setting. The following Illustrates the operation: Operation (Start) Fast forward (_ Record (_ Play (_ Record ® Ray (_) Rewind Rewind C_)Record (_ Play Record Play Rewind Counter Indicator /R5 LE 'L E Eg R Display BLE flashes. BLElights. XD flashes. TUNE I _:_Rewind or Stop !End of adustment) BLE and XD lights. NOTES: • To cancelAUTO BLEXD tuning before it has finished, press the STOP _) button. • To reset a tuned condition, press the BLE XD button again. • DuringAUTOBLEXDtuning, atastsignelisrecordedonthetape to determine the proper adjustment, Therefore, any music (etc.i recorded on that portion of the tape will be erased. • You can select any type of Dolby NR when using AUTO BLE XD. You can also change the type of Dolby NR after AUTO BLE XD adjustment without disturbing AUTO BI.E XD effect. • ff you switch tapes after setting the AUTO BLE XD, be sure to set the AUTO BLE XD again. 13 En
-
 1
1 -
2
-
3
-
4
-
5
-
6
-
7
-
 8
8 -
 9
9 -
 10
10 -
 11
11 -
 12
12 -
 13
13 -
 14
14
 |
 |