Pioneer CT-W616DR Operating Instructions - Page 4
Handling, Cassette Tapes - tape deck
 |
View all Pioneer CT-W616DR manuals
Add to My Manuals
Save this manual to your list of manuals |
Page 4 highlights
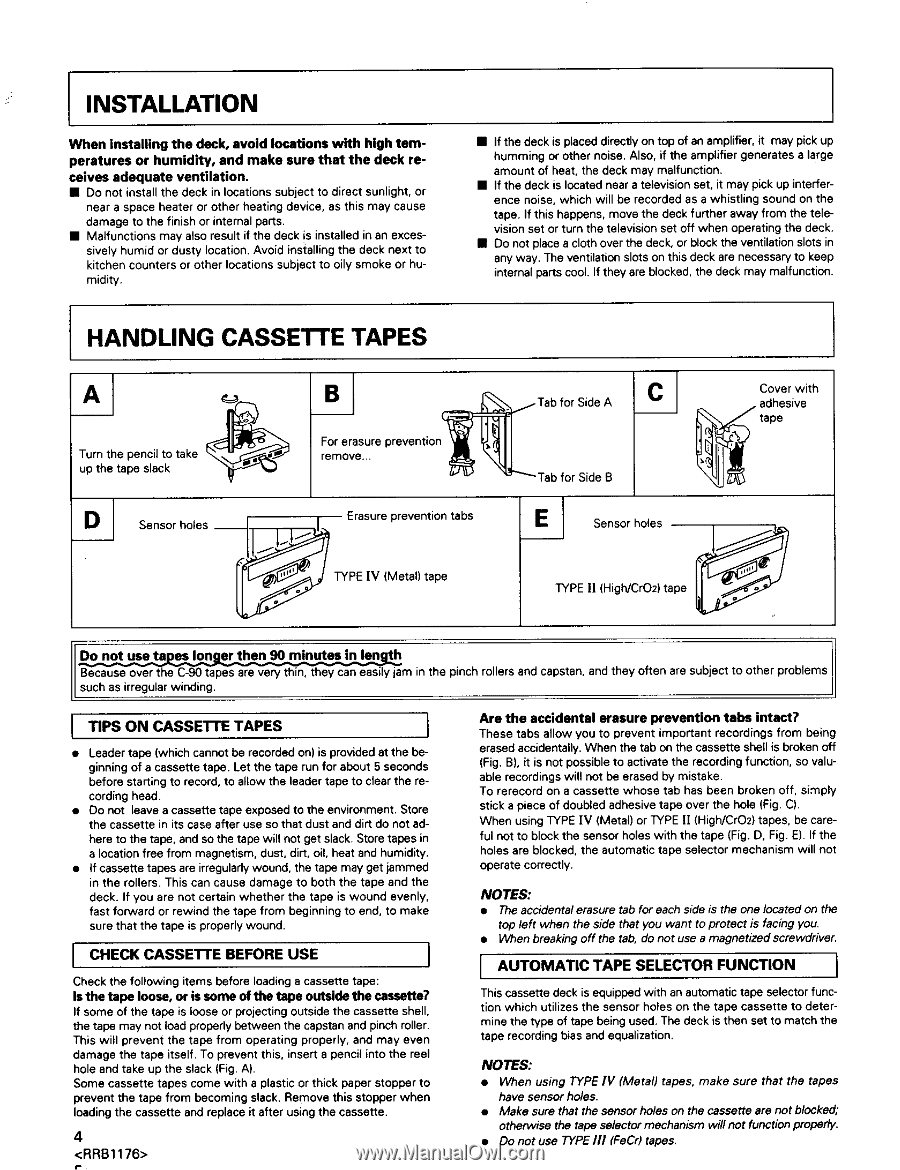
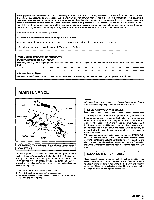
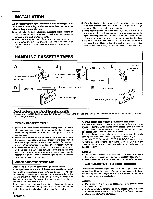
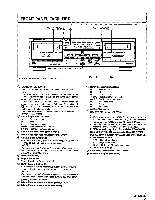
I INSTALLATION When installing the deck, avoid locations with high tem- peratures or humidity, and make sure that the deck re- ceivec adequate ventilation, • Do not install the deck in locations subject to direct sunlight, or near a space heater or other heating device, as this may cause damage to the finish or internal parts. • Malfunctions may also result if the deck is installed in an excessively humid or dusty location. Avoid installing the deck next to kitchen counters or other locations subject to oily smoke or humidity. HANDLING CASSETTE TAPES • If the deck is placed directly on top of an amplifier, it may pick up humming or other noise. Also, if the amplifier generates a large amount of heat, the deck may malfunction. • If the deck is located near a television set, it may pick up interference noise, which will be recorded as a whistling sound on the tape. If this happens, move the deck further away from the television set or turn the television set off when operating the deck. • Do not place a cloth over the deck, or block the ventilation slots in any way. The ventilation slots on this deck are necessary to keep internal parts cool. If they are blocked, the deck may malfunction. Turn the pencil to take up the tape slack D I Sensor holes CI B_For erasure prevention _Tab remove... _" for Side A _ _Tab for Side B Erasure prevention tabs E_ Sensor holes TYPE IV (Metal) tape TYPE 11 (High/CrO2) tape Cadohversivweith tape I DB_eocause over the C-90 tapeesrthaernegv0emryintuhtiens,inthleeny can easily jham in the pinch rollers and capstan, and they often are subject to other problems such as rregu ar winding, TIPS ON CASSE'I-FE TAPES • Leader tape (which cannot be recorded on) is provided at the beginning of a cassette tape. Let the tape run for about 5 seconds before starling to record, to allow the leader tape to clear the recording head. • Do not leave a cassette tape exposed to the environment, Store the cassette in its case after use so that dust and dirt do not adhere to the tape, and so the tape will not get slack. Store tapes in a location free from magnetism, dust, dirt, oil, heat and humidity. • If cassette tapes are irregularly wound, the tape may get jammed in the rollers. This can cause damage to both the tape and the deck. If you are not certain whether the tape is wound evenly, fast forward or rewind the tape from beginning to end, to make sure that the tape is properly wound. I CHECK CASSETrE BEFORE USE Check the following items before loading a cassette tape: Is the tape loose, or is some of the tape outside the cassette? if some of the tape is loose or projecting outside the cassette shell, the tape may not load properly between the capstan and pinch roller. This will prevent the tape from operating properly, and may even damage the tape itself. To prevent this, insert a pencil into the reel hole and take up the slack (Fig. A). Some cassette tapes come with a plastic or thick paper stopper to prevent the tape from becoming slack, Remove this stopper when loading the cassette and replace it after using the cassette. 4 TAhreesethetabasccaildloewntaylou etorapsruerveent primevpeonrttiaonnt retcaobrdsinginstacfrto?m being erased accidentally. When the tab on the cassette shell is broken off (Fig. B), it is not possible to activate the recording function, so valuable recordings will not be erased by mistake. To rereeord on a cassette whose tab has been broken off, simply stick a piece of doubled adhesive tape over the hole (Fig. C). When using TYPE [V (Metal) or TYPE I1 (High/CrO2) tapes, be care* ful not to block the sensor holes with the tape (Fig. D, Fig. E). If the holes are blocked, the automatic tape selector mechanism will not operate correctly. NOTES: • The accidental erasure tab for each side is the one located on the top left when the side that you want to protect is facing you. • When breaking off the tab, do not use a magnetized screwdriver. I AUTOMATIC TAPE SELECTOR FUNCTION I This cassette deck [s equipped with an automatic tape selector function which utilizes the sensor holes on the tape cassette to determine the type of tape being used, The deck is then set to match the tape recording bias and equalization. NOTES: • When using TYPEIV (Metal) tapes, make sure that the tapes have sensor holes. • Makesurethatthesensorho/esonthecassettearenotblocked; otherwise the tape selector mechanism will not function properly. • Do not use TYPE///(FeCr) tapes.
-
 1
1 -
 2
2 -
 3
3 -
 4
4 -
 5
5 -
 6
6 -
 7
7 -
 8
8 -
 9
9 -
 10
10 -
11
-
12
-
13
-
14
 |
 |