Pioneer DEH P2900MP Owner's Manual - Page 23
Adjusting initial settings, Setting the clock, Switching the auxiliary setting, Setting the rear
 |
UPC - 012562840062
View all Pioneer DEH P2900MP manuals
Add to My Manuals
Save this manual to your list of manuals |
Page 23 highlights
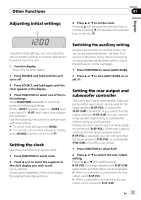
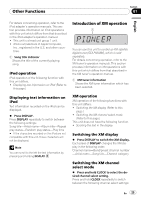
Other Functions Section 07 English Adjusting initial settings 1 3 Press a or b to set the clock. Pressing a will increase the selected hour or minute. Pressing b will decrease the selected hour or minute. Using the initial settings, you can customize various system settings to achieve optimal performance from this unit. 1 Function display Shows the function status. 1 Press SOURCE and hold until the unit turns off. 2 Press SOURCE and hold again until the clock appears in the display. 3 Press FUNCTION to select one of the initial settings. Press FUNCTION repeatedly to switch between the following settings: Clock-AUX1 (auxiliary input 1)-AUX2 (auxiliary input 2)-R-SP (rear output and subwoofer controller) Use the following instructions to operate each particular setting. # To cancel initial settings, press BAND. # You can also cancel initial settings by holding down SOURCE until the unit turns off. Setting the clock Use these instructions to set the clock. 1 Press FUNCTION to select clock. 2 Press c or d to select the segment of the clock display you wish to set. Hour-Minute As you select segments of the clock display the segment selected will blink. Switching the auxiliary setting Auxiliary equipments connected to this unit can be activated individually. Set each AUX source to ON when using. About connecting or using auxiliary equipments, refer to Using the AUX source on the next page. 1 Press FUNCTION to select AUX1/AUX2. 2 Press a or b to turn AUX1/AUX2 on or off. Setting the rear output and subwoofer controller This unit's rear output (rear speaker leads output and RCA rear output) can be used for fullrange speaker (R-SP :FUL) or subwoofer (R-SP :S/W) connection. If you switch the rear output setting to R-SP :S/W, you can connect a rear speaker lead directly to a subwoofer without using an auxiliary amp. Initially, the unit is set for rear full-range speaker connection (R-SP :FUL). When rear output is connected to full range speakers (when R-SP :FUL is selected), you can connect other full range speakers (P/O :FUL) or a subwoofer (P/O :S/W) to the RCA rear output. 1 Press FUNCTION to select R-SP. 2 Press a or b to switch the rear output setting. Pressing a or b will switch between R-SP :FUL (full-range speaker) and R-SP :S/W (subwoofer) and that status will be displayed. # When no subwoofer is connected to the rear output, select R-SP :FUL. # When a subwoofer is connected to the rear output, set for subwoofer R-SP :S/W. En 23
-
 1
1 -
2
-
3
-
4
-
5
-
6
-
7
-
8
-
9
-
10
-
11
-
12
-
13
-
14
-
15
-
16
-
17
-
 18
18 -
 19
19 -
 20
20 -
 21
21 -
 22
22 -
 23
23 -
 24
24 -
 25
25 -
 26
26 -
 27
27 -
 28
28 -
29
-
30
-
31
-
32
-
33
-
34
-
35
-
36
-
37
-
38
-
39
-
40
-
41
-
42
-
43
-
44
-
45
-
46
-
47
-
48
-
49
-
50
-
51
-
52
-
53
-
54
-
55
-
56
-
57
-
58
-
59
-
60
-
61
-
62
-
63
-
64
-
65
-
66
-
67
-
68
-
69
-
70
-
71
-
72
-
73
-
74
-
75
-
76
-
77
-
78
-
79
-
80
-
81
-
82
-
83
-
84
-
85
-
86
-
87
-
88
-
89
-
90
-
91
-
92
-
93
-
94
 |
 |
