Pioneer DV-220V-K Owner's Manual - Page 22
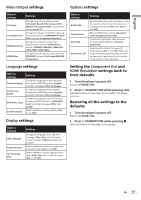
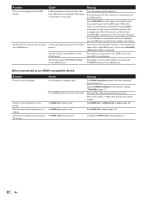
When connected to an HDMI-compatible device
 |
UPC - 012562963044
View all Pioneer DV-220V-K manuals
Add to My Manuals
Save this manual to your list of manuals |
Page 22 highlights
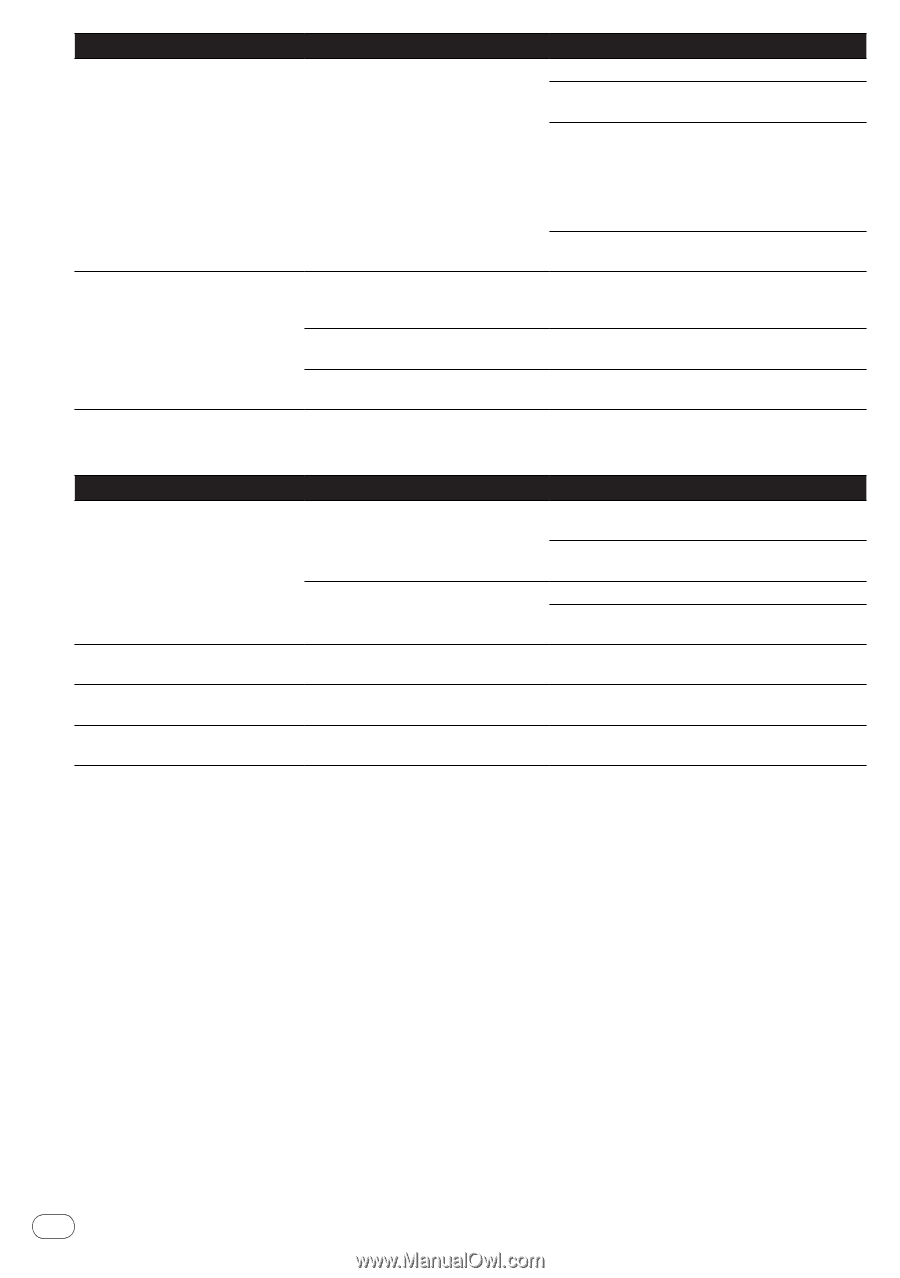
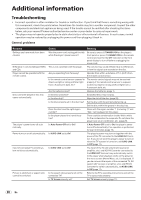
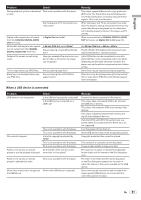
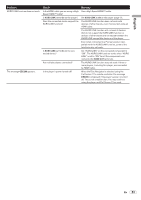
Problem Power is not supplied to the USB device. Audio CD tracks cannot be recorded on a USB device. Check Is Err displayed on the front panel display? No power is supplied if the power consumption is too high. Is there enough free space on the USB device? Are there 300 or more folders on the USB device? Are there already 99 PIONEER folders on the USB device? Remedy Turn the power off then back on. Turn the power off, then disconnect and reconnect the USB device. Press DVD/USB to switch back to the DVD mode, then switch again to the USB mode. (When the input is switched back to the DVD mode, LOAd is displayed on the front panel display and the disc is recognized. When the input is switched back to USB, USb is displayed on the front panel display.) If the USB device is equipped with an AC adapter, use the USB device with the AC adapter connected. Recording is not possible if there is not enough free space left on the USB device. In this case, Available USB space is low is displayed. Recording is not possible if the USB device contains 300 or more folders. Recording is not possible if there are already 99 PIONEER folders on the USB device. When connected to an HDMI-compatible device Problem Picture is not displayed. Sound is not produced or is distorted. Multichannel audio signals are not output. Colors are not properly displayed on TV screen. Check Is the resolution properly set? Is the HDMI cable properly connected? Is HDMI Out properly set? Is HDMI Out properly set? Is HDMI Color properly set? Remedy Set HDMI Resolution properly for the connected device (page 17). Restore HDMI Resolution to the default setting (720x480p) (page 17). Connect the cable securely (all the way in). With some cables, 1 080p video signals will not be output. Set HDMI Out to LPCM (2CH) or Auto (page 16). Set HDMI Out to Auto (page 16). Change the HDMI Color setting (page 17). 22 En
-
 1
1 -
2
-
3
-
4
-
5
-
6
-
7
-
8
-
9
-
10
-
11
-
12
-
13
-
14
-
15
-
16
-
 17
17 -
 18
18 -
 19
19 -
 20
20 -
 21
21 -
 22
22 -
 23
23 -
 24
24 -
 25
25 -
 26
26 -
 27
27 -
28
-
29
-
30
-
31
-
32
-
33
-
34
-
35
-
36
-
37
-
38
-
39
-
40
-
41
-
42
-
43
-
44
-
45
-
46
-
47
-
48
-
49
-
50
-
51
-
52
-
53
 |
 |