Pioneer M-10X Operating Instructions - Page 6
Connections - power
 |
View all Pioneer M-10X manuals
Add to My Manuals
Save this manual to your list of manuals |
Page 6 highlights
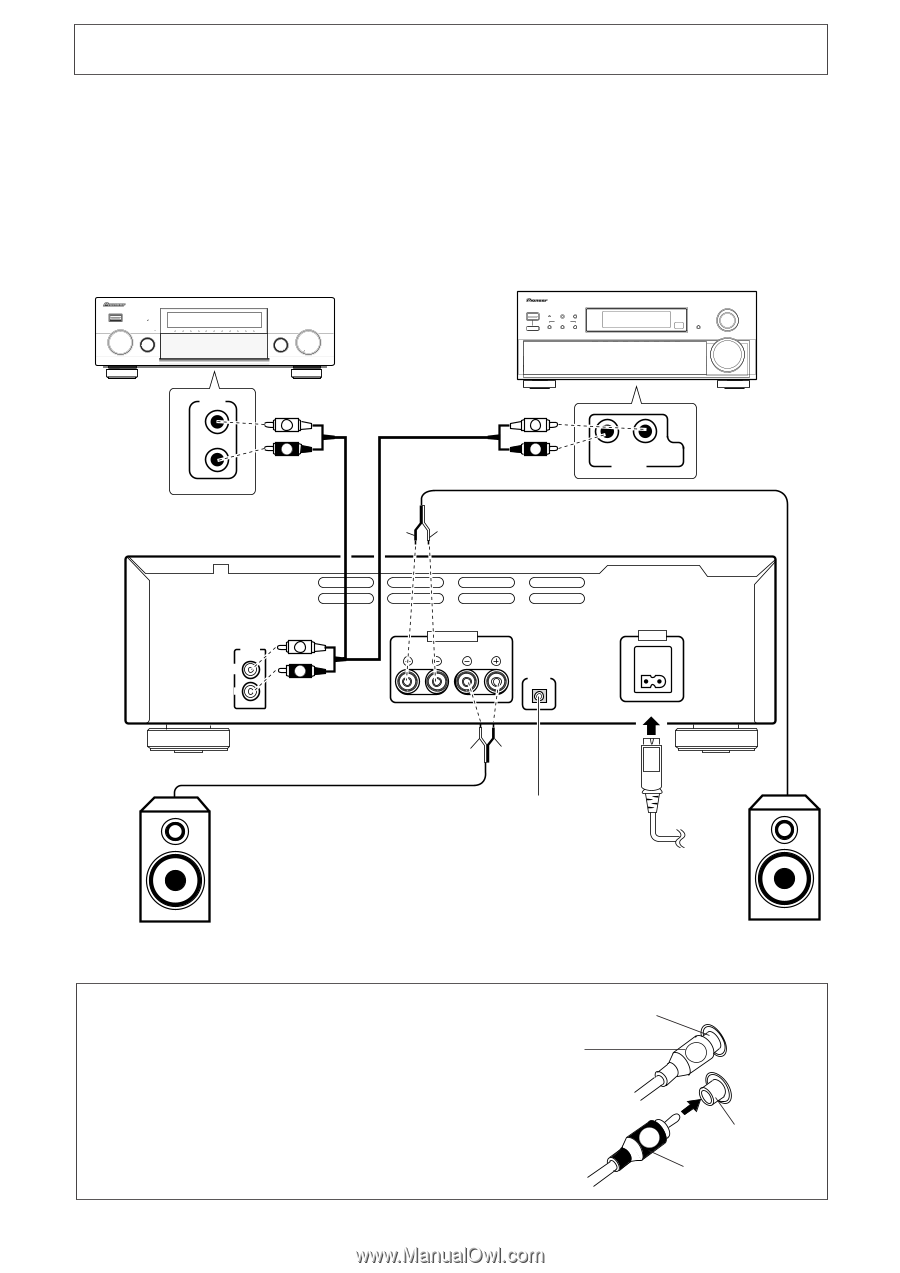
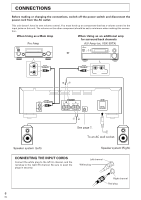
CONNECTIONS Before making or changing the connections, switch off the power switch and disconnect the power cord from the AC outlet. This unit doesn't have its own volume control. You must hook up an component that has a volume control to the input jacks on this unit. The volume on the other component should be set to minimum when making this connection. When Using as a Main Amp Pre-Amp When Using as an additional amp for surround back channels A/V Amp (ex. VSX-39TX) or OUTPUT L L R R ª · L R R SURROUND L (Single) BACK PRE OUT INPUT L L R R SPEAKERS R L CONTROL IN AC IN ·ª See page 7. To an AC wall socket. Speaker system (Left) Speaker system (Right) CONNECTING THE INPUT CORDS Connect the white plug to the left (L) channel, and the red plug to the right (R) channel. Be sure to push the plugs in securely. Left channel White plug L R Right channel Red plug 6 En
-
 1
1 -
 2
2 -
 3
3 -
 4
4 -
 5
5 -
 6
6 -
 7
7 -
 8
8 -
 9
9 -
 10
10 -
 11
11 -
 12
12
 |
 |