Pioneer X-MT2000 Owner's Manual - Page 15
Setting the clock, Switching on the clock in standby
 |
View all Pioneer X-MT2000 manuals
Add to My Manuals
Save this manual to your list of manuals |
Page 15 highlights
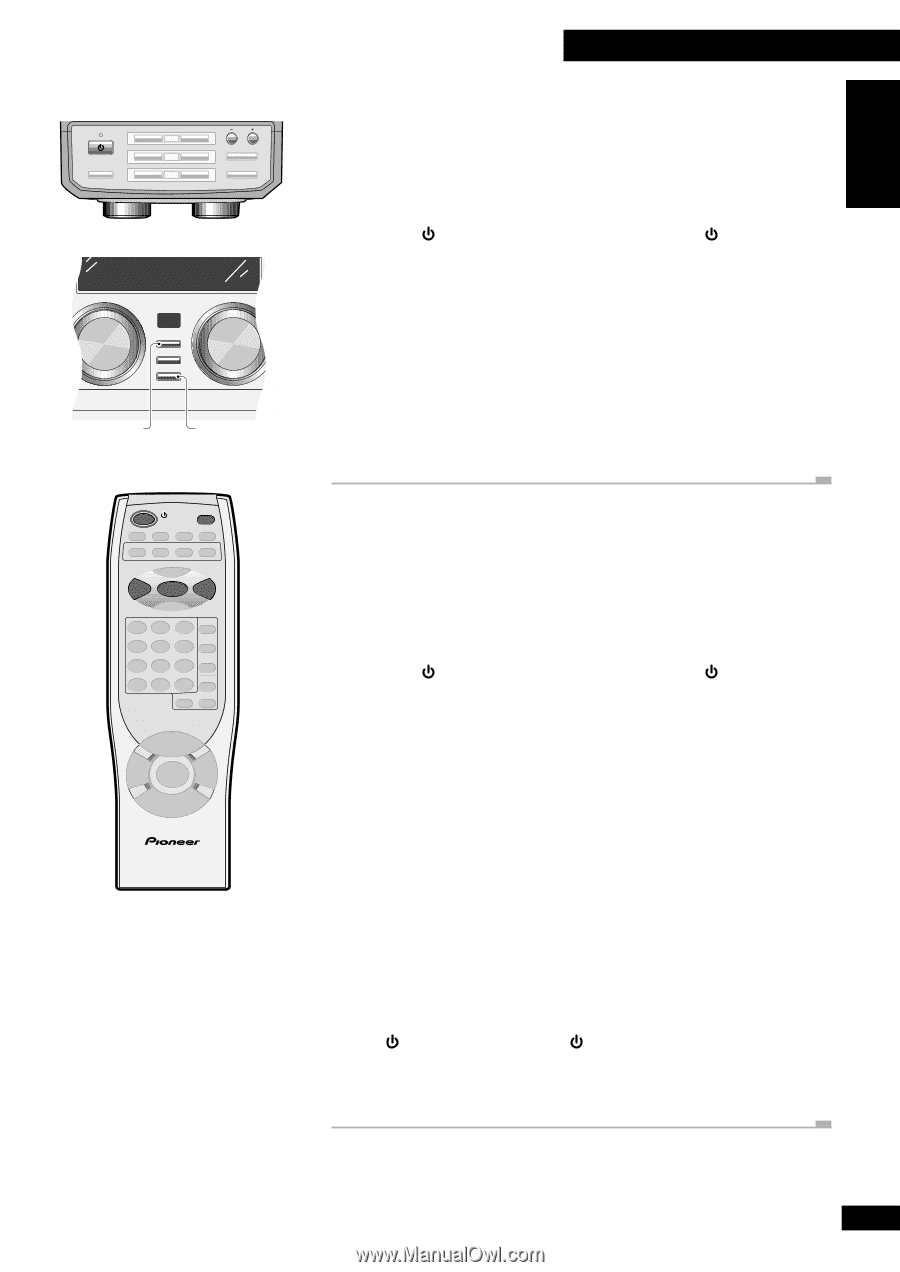
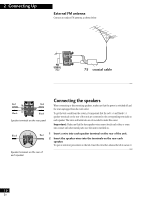
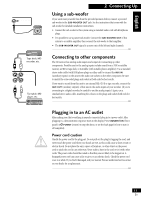
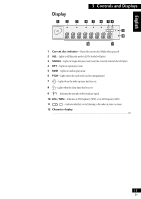
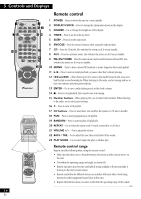
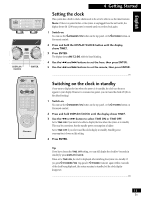
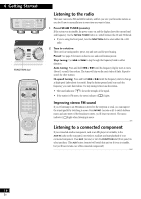
English STANDBY STANDBY/ON BASS/TREBLE 1 2 3 CD SELECT ) ) ) OPEN/CLOSE TUNING ! ⁄ $ › & #* FUNCTION VOLUME DISPLAY/ CLOCK TIMER ENTER (DEMO) DISPLAY/ CLOCK ENTER 4 Getting Started Setting the clock This system has a built in clock, which needs to be set to be able to use the timer features. Note: If there is a power failure or the system is unplugged from the wall outlet, the display shows AM 12:00 once power is restored until you set the clock again. 1 Switch on. You can use the STANDBY/ON button on the top panel, or the POWER button on the remote control. 2 Press and hold the DISPLAY/CLOCK button until the display shows TIME?. 3 Press ENTER. The display shows AM 12:00, with the hour blinking. 4 Use the 4 and ¢ buttons to set the hour, then press ENTER. 5 Use the 4 and ¢ buttons to set the minute, then press ENTER. POWER DISPLAY /CLOCK 4 ENTER ¢ REMOTE CONTROL UNIT Switching on the clock in standby If you want to display the time when the system is in standby, the clock can be set to appear in your display. However, to consume less power, you can leave the clock off (this is the default setting). 1 Switch on. You can use the STANDBY/ON button on the top panel, or the POWER button on the remote control. 2 Press and hold DISPLAY/CLOCK until the display shows TIME?. 3 Use the 4 or ¢ button to select TIME ON or TIME OFF. Set to TIME ON if you want to be able to display the time when the system is in standby. This may be convenient, but the standby power consumption is higher. Set to TIME OFF if you don't need the clock display in standby. Standby power consumption is lower on this setting. 4 Press ENTER. Tip If you have chosen the TIME OFF setting, you can still display the clock for 4 seconds in standby by press DISPLAY/CLOCK. When set to TIME ON, the clock is displayed after switching the system into standby. If you press STANDBY/ON (top panel) / POWER (remote) again within 2 seconds of the clock being displayed, the system remains in standby, but the clock display disappears. 15 En
-
 1
1 -
2
-
3
-
4
-
5
-
6
-
7
-
8
-
9
-
 10
10 -
 11
11 -
 12
12 -
 13
13 -
 14
14 -
 15
15 -
 16
16 -
 17
17 -
 18
18 -
 19
19 -
 20
20 -
21
-
22
-
23
-
24
-
25
-
26
-
27
-
28
-
29
-
30
-
31
-
32
-
33
-
34
-
35
-
36
-
37
-
38
-
39
-
40
-
41
-
42
-
43
-
44
-
45
-
46
-
47
-
48
-
49
-
50
-
51
-
52
-
53
-
54
-
55
-
56
-
57
-
58
-
59
-
60
-
61
-
62
-
63
-
64
 |
 |