PlayStation PS3 Quick Reference Guide - Page 6
Setting up the PS3™ system - manual
 |
UPC - 711719800002
View all PlayStation PS3 manuals
Add to My Manuals
Save this manual to your list of manuals |
Page 6 highlights
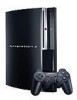
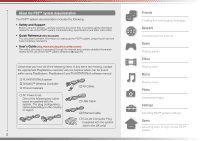
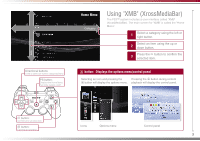
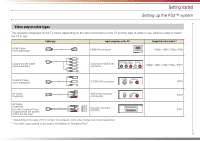
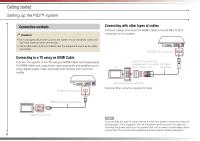
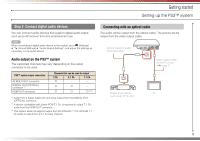
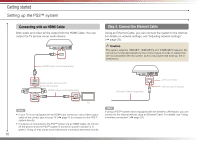
02 Getting started Setting up the PS3™ system Procedure flow for setting up the system Step 1: Connect to a TV. Page 6 m Step 2: Connect digital audio devices. Page 9 m Step 3: Connect the Ethernet Cable. Page 10 m Step 4: Connect the AC Power Cord. Page 11 m Step 5: Perform initial setup of the system software. Page 11 Step 1: Connect to a TV Video output on the PS3™ system The PS3™ system can output two types of resolution: HD and SD. Refer to the instruction manual for the TV in use to check which video mode is supported. HD (High Definition) SD (Standard Definition) Video mode *1 1080p 1080i 720p 576p 576i *2 Aspect ratio 16:9 16:9 16:9 16:9 4:3 16:9 4:3 *1 This number indicates the number of scan lines. Note that "i" stands for "interlace" and "p" stands for "progressive". Using progressive results in high-quality video with minimal flickering. *2 The video output setting on the system will display as "Standard (PAL)". Screens showing the difference in resolution HD screen SD screen 6
-
 1
1 -
 2
2 -
 3
3 -
 4
4 -
 5
5 -
 6
6 -
 7
7 -
 8
8 -
 9
9 -
 10
10 -
 11
11 -
 12
12 -
13
-
14
-
15
-
16
-
17
-
18
-
19
-
20
-
21
-
22
-
23
-
24
-
25
-
26
-
27
-
28
-
29
-
30
-
31
-
32
 |
 |