Poulan 1600 User Manual - Page 14
General, Maintenance, Awarning
 |
View all Poulan 1600 manuals
Add to My Manuals
Save this manual to your list of manuals |
Page 14 highlights
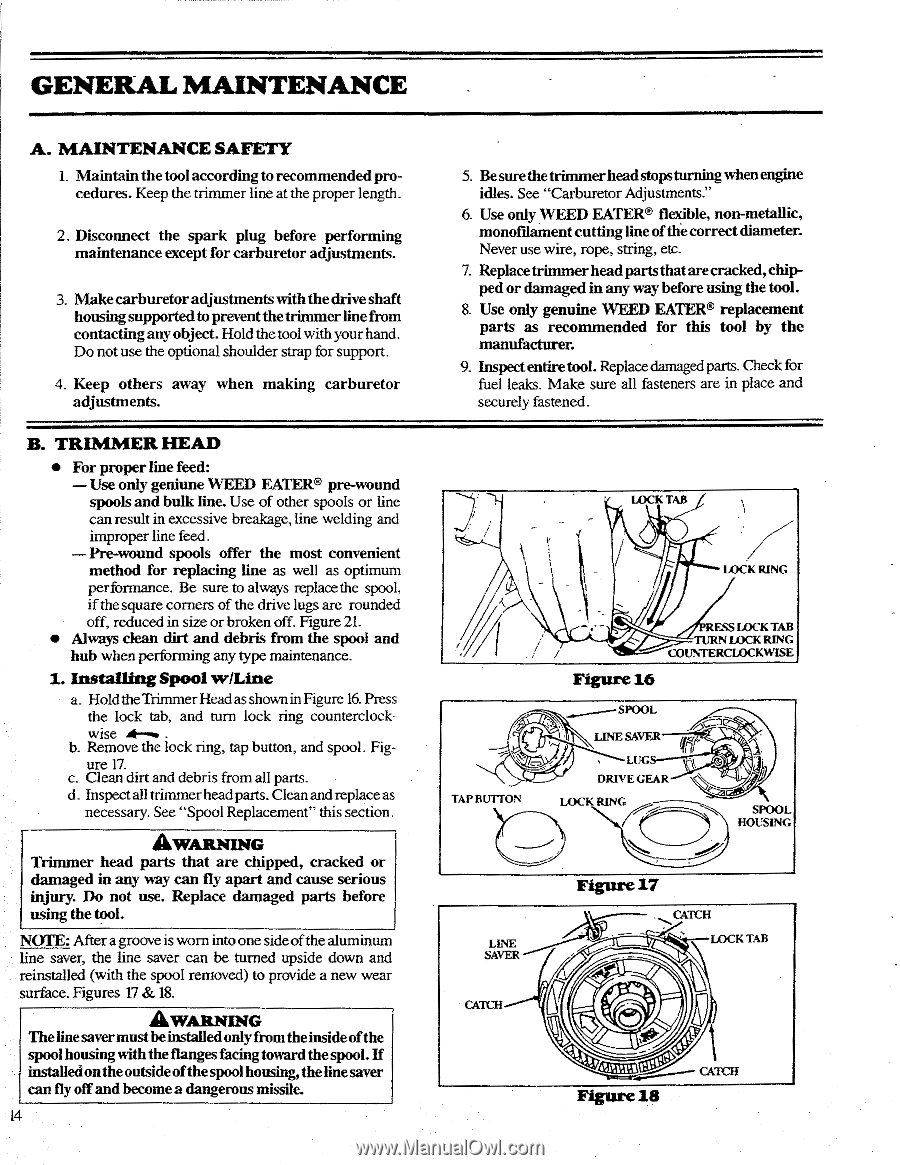
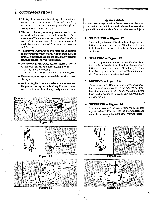
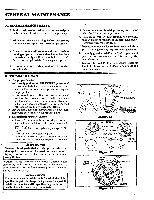
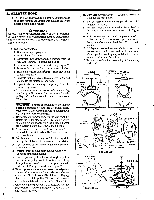
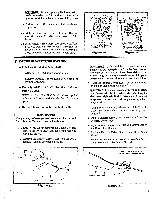
GENERAL MAINTENANCE A. MAINTENANCE SAFETY 1. Maintain the tool according to recommended procedures. Keep the trimmer line at the proper length. 2. Disconnect the spark plug before performing maintenance except for carburetor adjustments. 3. Make carburetor adjustments with the drive shaft housingsupported to prevent thetrimmer linefrom contacting any object. Hold the tool with your hand. Do not use the optional shoulder strap for support. 4. Keep others away when making carburetor adjustments. B. TRIMMER HEAD • For proper line feed: - Use only geniune WEED EATER® pre-wound spools and bulk line. Use of other spools or line can result in excessive breakage, line welding and improper line feed. - Pre-wound spools offer the most convenient method for replacing line as well as optimum performance. Be sure to always replace the spool, if thesquare corners of the drive lugs are rounded off, reduced in size or broken off. Figure 21. • Always clean dirt and debris from the spool and hub when performing any type maintenance. 1. Installing Spool wiLine a. Hold theTrimmerHead asshown in Figure 16. Press the lock tab, and turn lock ring counterclockwise 40-.. . b. Remove the lock ring, tap button, and spool. Figure 17. c. Clean dirt and debris from all parts. d. Inspect all trimmer head parts. Clean and replace as necessary. See "Spool Replacement" this section. AWARNING Trimmer head parts that are chipped, cracked or damaged in any way can fly apart and cause serious injury. Do not use. Replace damaged parts before using the tool. NOTE: Aftera groove is worn into one sideof the aluminum line saver, the line saver can be turned upside down and reinstalled (with the spool removed) to provide a new wear surface. Figures 17 & 18. AWARNING Thelinesavermust beinstalledonlyfrom theinsideofthe spool housing with theflanges facingtoward thespool. If installedontheoutsideof thespool housing,thelinesaver can fly off and become a dangerous missile. 14 5. Besurethetrimmerheadstopsturning when engine idles. See "Carburetor Adjustments." 6. Use only WEED EATER® flexible, non-metallic, monofilament cutting line of the correct diameter. Never use wire, rope, string, etc. 7. Replacetrimmer head partsthatarecracked,chipped or damaged in any way before using the tool. 8. Use only genuine WEED EATER® replacement parts as recommended for this tool by the manufacturer. 9. Inspect entire tool. Replace damaged parts. Check for fuel leaks. Make sure all fasteners are in place and securely fastened. LOCK TAB WCK RING TAP BUTTON RESS LOCK TAB TURN LOCK RING COUNTERCLOCKWISE Figure 16 SPOOL LINE SAVER LUG DRIVE GEAR LOCK RING ) SPOOL HOUSING LINE SAVER CATCH Figure 17 CATCH LOCK TAB set 40,PBB,401....----- CATCH Figure18
-
 1
1 -
2
-
3
-
4
-
5
-
6
-
7
-
8
-
 9
9 -
 10
10 -
 11
11 -
 12
12 -
 13
13 -
 14
14 -
 15
15 -
 16
16 -
 17
17 -
 18
18 -
 19
19 -
20
-
21
-
22
-
23
-
24
 |
 |