ProForm Slide Touch 6.0 Instruction Manual - Page 7
Note: Both pedals are labeled L
 |
View all ProForm Slide Touch 6.0 manuals
Add to My Manuals
Save this manual to your list of manuals |
Page 7 highlights
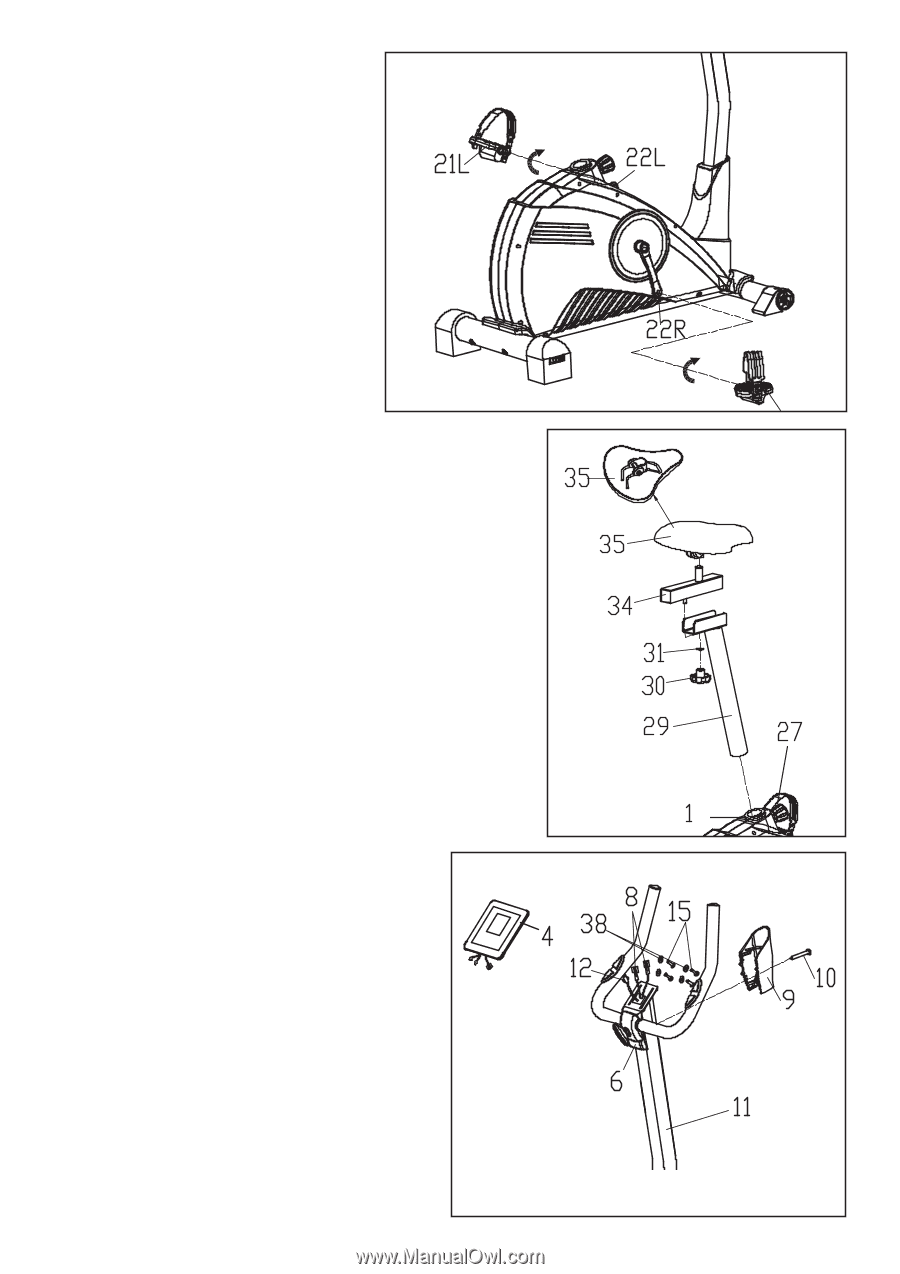
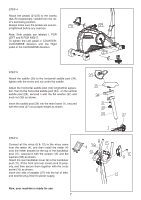
STEP 4 Attach the pedals (21L/R) to the cranks (22L/R) respectively, viewed from the rider's exercising position. Always make sure the pedals are securely tightened before any exercise. Note: Both pedals are labeled L FOR LEFT and R FOR RIGHT. To tighten the Left pedal in COUNTERCLOCKWISE direction and the Right pedal in the CLOCKWISE direction. STEP 5 Attach the saddle (35) to the horizontal saddle post (34), tighten with the screw and nut under the saddle. Adjust the horizontal saddle post (34) longitudinal separation, then fix the horizontal saddle post (34) on the vertical saddle post (29), secured it with the flat washer (31) and knob nut (30) as shown. Insert the saddle post (29) into the main frame (1), secured with the knob (27) at a proper height as shown. STEP 6 Connect all the wires (8 & 12) to the wires come from the meter (4), and then install the meter (4) onto the meter bracket on the top of the handlebar post (11), secured it with the screws (15) and flat washers (38) as shown. Attach the rear handlebar cover (9) to the handlebar post (11), fit the front and rear covers (6 & 9) properly, and then secure them together with the cross screw (10) as shown. Insert one side of adapter (37) into the tail of bike, and another plug insert to power supply. Now, your machine is ready for use. 7
-
 1
1 -
 2
2 -
 3
3 -
 4
4 -
 5
5 -
 6
6 -
 7
7 -
 8
8 -
 9
9 -
 10
10 -
 11
11 -
 12
12 -
13
-
14
-
15
-
16
 |
 |