ProForm Trailrunner 4.0 Treadmill English Manual - Page 14
How To Set Up The Console
 |
View all ProForm Trailrunner 4.0 Treadmill manuals
Add to My Manuals
Save this manual to your list of manuals |
Page 14 highlights
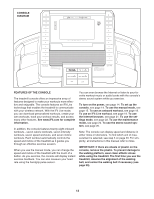
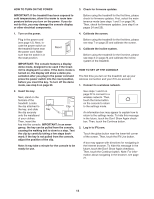
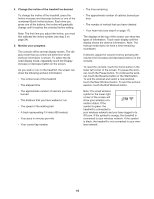
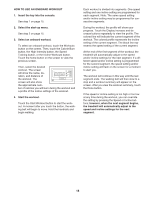
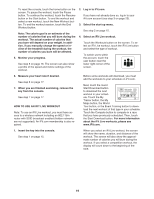
HOW TO TURN ON THE POWER 3. Check for firmware updates. IMPORTANT: If the treadmill has been exposed to cold temperatures, allow it to warm to room temperature before you turn on the power. If you do not do this, you may damage the console display or other electrical components. Before using the treadmill for the first time, please check for firmware updates. First, select the maintenance mode (see steps 1 and 2 on page 24). Then, check for firmware updates. (see step 6 on pages 24 and 25). 1. Turn on the power. 4. Calibrate the screen. Plug in the power cord (see page 12). Next, locate the power switch on the treadmill frame near the power cord. Make sure that the switch is in the reset position. Reset IMPORTANT: The console features a display demo mode, designed to be used if the treadmill is displayed in a store. If the demo mode is turned on, the display will show a demo presentation after you plug in the power cord and press the power switch into the reset position, before you insert the key. To turn off the demo mode, see step 6 on page 23. Before using the treadmill for the first time, please see step 7 on page 25 and calibrate the screen. 5. Calibrate the incline system. Before using the treadmill for the first time, please see step 3 on page 24 and calibrate the incline system of the treadmill. HOW TO SET UP THE CONSOLE The first time you turn on the treadmill, set up your wireless connection and your iFit Live account. 1. Connect to a wireless network. 2. Insert the key. Next, stand on the footrails of the treadmill. Locate the clip attached to Clip the key, and slide Key the clip securely onto the waistband of your clothes. Then, insert the key into the console. IMPORTANT: In an emer- gency, the key can be pulled from the console, causing the walking belt to slow to a stop. Test the clip by carefully taking a few steps back- ward; if the key is not pulled from the console, adjust the position of the clip. Note: It may take a minute for the console to be ready for use. See steps 1 and 2 on page 22 to connect to a wireless network. Then, touch the home button on the console to return to the settings mode. An information box may appear to explain how to return to the settings mode. To hide this message in the future, touch the Donʼt Show Again checkbox. Then, touch the Continue button. 2. Log in to iFit.com. Touch the globe button near the lower-left corner of the screen. Then, touch the iFit Live button. A box may appear with directions for navigating in the Internet browser. To hide this message in the future, touch the Donʼt Show Again checkbox. Then, touch the Continue button. Note: For information about navigating in the browser, see page 21. 14
-
 1
1 -
2
-
3
-
4
-
5
-
6
-
7
-
8
-
 9
9 -
 10
10 -
 11
11 -
 12
12 -
 13
13 -
 14
14 -
 15
15 -
 16
16 -
 17
17 -
 18
18 -
 19
19 -
20
-
21
-
22
-
23
-
24
-
25
-
26
-
27
-
28
-
29
-
30
-
31
-
32
-
33
-
34
-
35
-
36
-
37
-
38
-
39
-
40
 |
 |
