Pyle PETW102 Installation Guide - Page 3
Determining the Mounting Location
 |
View all Pyle PETW102 manuals
Add to My Manuals
Save this manual to your list of manuals |
Page 3 highlights
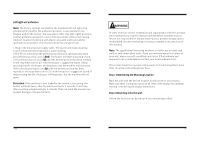
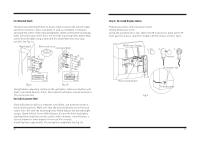
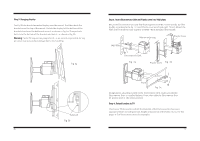
Left/right and preference Note: The factory settings are made for the maximum left and right stop positions(±25°)and for the preference position: screen parallel to the fixation wall (in the center). You may adjust other stop (left, right) positions another preference position to restrict the movement of the screen during rotation, to prevent collision with objects around it and to provide for optimum visual comfort. The remote control has a range of 10m. 1.Plug in the mount power supply cable. The buzzer will make a buzzing sound. Inform the whole machine is under working. 2.The TV-set will turn to the preference position (0°) automatically when press the Display Center arrows ( / ). The buzzer will make a buzzing sound. 3.Press the Display Left arrows( )until the desired position has been reached. It will stop when turn to 25° with the buzzer's suggestive sound. If keep pressing the left, the buzzer will keep buzz, but the machine will not move. 4.Press the Display Right arrows( )until the desired position has been reached. It will stop when turn to 25° with the buzzer's suggestive sound. If keep pressing the left, the buzzer will keep buzz, but the machine will not move. Protection: If the machine is over loaded or the current is too strong, the buzzer will buzz twice, after the machine stop for 2 seconds, it will stop after inverting automatically for 2 seconds. That can avoid the unnecessary product damage or the person harm. . WARNING In order to ensure correct installation and acquaintance with this product, we recommend you read this manual carefully before assembly and use. We are not responsible for any personal injury or product damage due to mishandling ,incorrect mounting, incorrect assembly or incorrect use of this product. Note: The supplied wall mounting hardware is not for use on steel stud walls or cold cinder block walls. If you are uncertain about the nature of your wall, please consult a qualified contractor. If the hardware you required is not included please contact your local hardware store. The system should not operate continuously, It should not perform more than 10 cycles to the left/right per hour. Step 1.Determining the Mounting Location Mark the wall with the desired location for the center of your display. Make sure there is adequate space on all sides of the display for optimum viewing, considering the display dimensions. Step 2.Mounting onto the wall. Follow the instructions based upon your mounting surface: -10- -3-
-
 1
1 -
 2
2 -
 3
3 -
 4
4 -
 5
5 -
 6
6
 |
 |
