Pyle PLD71MU PLD71MU Manual 1 - Page 7
Installation the unit
 |
View all Pyle PLD71MU manuals
Add to My Manuals
Save this manual to your list of manuals |
Page 7 highlights
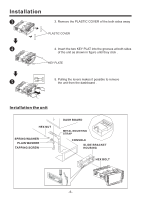
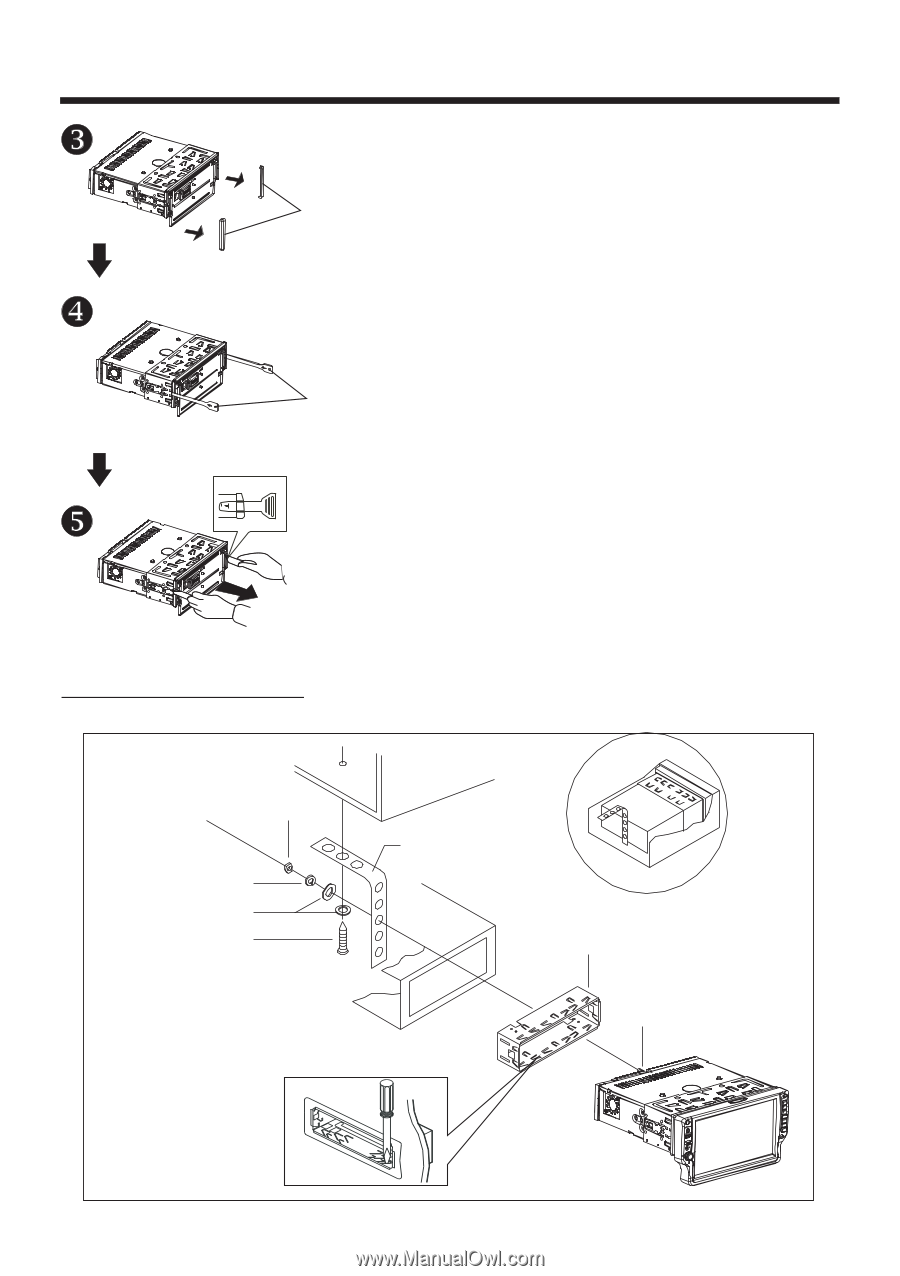
Installation 3. Remove the PLASTIC COVER of the both sides away PLASTIC COVER 4. Insert the two KEY PLAT into the grooves at both sides of the unit as shown in figure until they click . KEY PLATE 5. Pulling the levers makes it possible to remove the unit from the dashboard . Installation the unit HEX NUT SPRING WASHER PLAIN WASHER TAPPING SCREW DASH BOARD METAL MOUNTING STRAP CONSOLE SLIDE BRACKET HOUSING HEX BOLT -6-
-
 1
1 -
 2
2 -
 3
3 -
 4
4 -
 5
5 -
 6
6 -
 7
7 -
 8
8 -
 9
9 -
 10
10 -
 11
11 -
 12
12 -
13
-
14
-
15
-
16
-
17
-
18
-
19
-
20
-
21
-
22
-
23
-
24
-
25
-
26
-
27
-
28
-
29
-
30
-
31
-
32
-
33
-
34
-
35
-
36
-
37
-
38
 |
 |
Installation
-6-
Installation the unit
3. Remove the PLASTIC COVER of the both sides away
4. Insert the two KEY PLAT into the grooves at both sides
of the unit as shown in figure until they click .
PLASTIC COVER
KEY PLATE
5. Pulling the levers makes it possible to remove
the unit from the dashboard .
DASH BOARD
METAL MOUNTING
STRAP
HEX NUT
SPRING WASHER
PLAIN WASHER
TAPPING SCREW
CONSOLE
SLIDE BRACKET
HOUSING
HEX BOLT