Pyle PLD71MU PLD71MU Manual 1 - Page 8
How To Remove And Install The Front Panel
 |
View all Pyle PLD71MU manuals
Add to My Manuals
Save this manual to your list of manuals |
Page 8 highlights
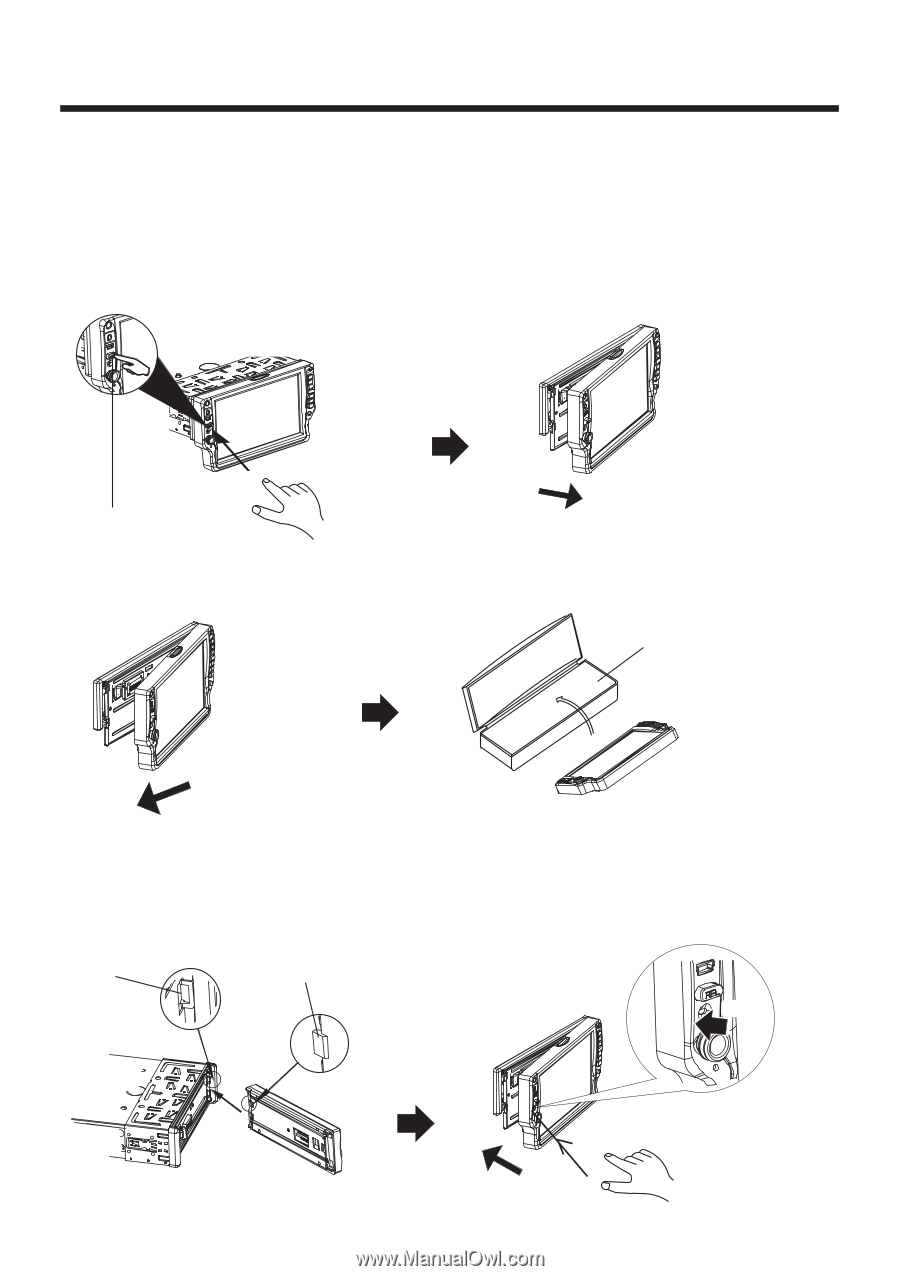
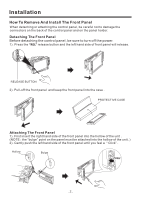
Installation How To Remove And Install The Front Panel When detaching or attaching the control panel, be careful not to damage the connectors on the back of the control panel and on the panel holder. Detaching The Front Panel Before detaching the control panel, be sure to turn off the power. 1). Press the "REL" release button and the left hand side of front panel will release. RELEASE BUTTON 2). Pull-off the front panel and keep the front panel into the case . PROTECTIVE CASE Attaching The Front Panel 1). First insert the right hand side of the front panel into the hollow of the unit . (NOTE : the "bulge" point on the panel must be attached into the hollow of the unit .) 2). Gently push the left hand side of the front panel until you feel a " Click" . Hollow Bulge PUSH -7-
-
 1
1 -
2
-
 3
3 -
 4
4 -
 5
5 -
 6
6 -
 7
7 -
 8
8 -
 9
9 -
 10
10 -
 11
11 -
 12
12 -
 13
13 -
14
-
15
-
16
-
17
-
18
-
19
-
20
-
21
-
22
-
23
-
24
-
25
-
26
-
27
-
28
-
29
-
30
-
31
-
32
-
33
-
34
-
35
-
36
-
37
-
38
 |
 |