Rane Sixty-One Sixty-One Mixer Manual for Scratch Live 2.5.0 - Page 26
SP-6 'Play From' Selector
 |
View all Rane Sixty-One manuals
Add to My Manuals
Save this manual to your list of manuals |
Page 26 highlights
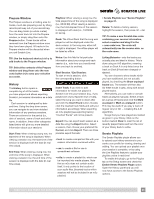
SP-6 Pitch Controls There are individual Pitch Slider, Bend, Nudge, and Keylock controls for each sample slot. The BPM is also displayed next to the pitch slider. If no BPM is present in the tracks ID3 tag, the pitch of the track is displayed as a percentage. Click and drag the pitch slider to make regular pitch adjustments. Hold the shift key and move the pitch slider to make fine pitch adjustments. Click on the + and - buttons to nudge the track into time. (temporary pitch adjustment) Hold the ctrl key and click the + and - buttons to make ultra-fine pitch adjustments to nudge the track, adjusting the pitch permanently. SP-6 'Play From' Selector Use the "Play From" selector to choose where the track will play from. You can choose to play a track from the start of the file, any one of the cue points, or any one of the loop in points. When this is set to play from start, or play from a cue point, the track will play right through until stopped. When a loop is selected, the track will play until the loop out point, unless you have "repeat" on, in which case the track will loop using the in and out points of the selected loop. The number of options will be dependent on the number of cue points and loops already set in your track. i.e if the track loaded has no cue points and loops set, then only "start" will be available as a "Play From" option. TIP: To set or adjust cue and loop information for a track, load it to a Virtual Deck, make your adjustments, then load it back into the sample slot. SP-6 Track Overviews Displays an overview of the track loaded to each sample slot. The waveform, play head position, cue points and selected loops will all be visible. SP-6 Slot Volumes Each individual sample slot has a separate volume slider and gain control. Volume Sliders - Use the volume slider to mix and make temporary adjustments to the volume of the sample you are playing. These sliders act like your mixer's, fading from full volume right through to completely silent. Gain Knobs - In addition to the volume slider there is an additional gain knob for each slot. These allow you to fine tune the maximum gain volume of the loaded sample. The gain adjustment will also be written to the track's ID3 tag, meaning that it will be the same everytime you load it. SP-6 Output Selector Use the master output selector button to choose where you wish to have the SP-6 output to. L to PGM 1 with 1 or as the PGM Source. A to AUX. R to PGM 2 with 1 or as the PGM Source. 2 selected 2 selected There is also a master sample player Gain knob to adjust the overall SP-6 volume. Individual Output Selectors By default each sample slot will be set to Master, mirroring the SP-6 master output setting. You can however, use the individual output selector buttons to override the Master output setting. To send an individual slot to a different output from the Master, deselect the master option by clicking on the MASTER button for the corresponding slot. This will unlink the sample slot from the master sample player output selection, allowing you to choose the L, A, or R output for each slot. These output routings will be saved when you close down Scratch Live, so the next time you launch Scratch Live, your preferred settings will remain the same. SP-6 Sample Banks The SP-6 has four separate sample banks, labeled A, B, C and D. To switch between the different banks click on the A, B, C or D buttons. Each bank will save the individual sample and sample slot settings you last used, allowing you to prepare banks for easy recall at a later stage. Sample Bank A will load as the default. SP-6 Mute Buttons Use the mute buttons to mute the audio output for each of the SP-6's sample slots. Click the mute button to silence the audio output, click the mute button again to turn the audio back on. You can also ctrl-click on the mute buttons to mute the outputs momentarily, meaning that the audio will only be muted for as long as you hold your mouse click. TIP: You can MIDI assign these buttons, allowing you to create a virtual kill switch for the sample slot. To MIDI assign momentary mute, hold ctrl and click on the mute button before tapping your MIDI controller. SP-6 MIDI All features of the SP-6 are MIDI assignable. The SP-6 window must be opened first before enabling MIDI assign mode. See "MIDI Control" on page 28. 26 RANE SIXTY-ONE MIXER FOR SERATO SCRATCH LIVE • OPERATOR'S MANUAL 2.5.0
-
 1
1 -
2
-
3
-
4
-
5
-
6
-
7
-
8
-
9
-
10
-
11
-
12
-
13
-
14
-
15
-
16
-
17
-
18
-
19
-
20
-
 21
21 -
 22
22 -
 23
23 -
 24
24 -
 25
25 -
 26
26 -
 27
27 -
 28
28 -
 29
29 -
 30
30 -
 31
31 -
32
-
33
-
34
-
35
-
36
-
37
-
38
-
39
-
40
-
41
-
42
-
43
-
44
-
45
-
46
-
47
-
48
-
49
-
50
-
51
-
52
 |
 |
