Reebok Rt 300 Bike English Manual - Page 12
How To Use A Smart Program
 |
View all Reebok Rt 300 Bike manuals
Add to My Manuals
Save this manual to your list of manuals |
Page 12 highlights
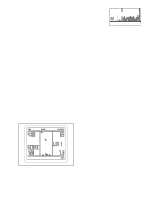
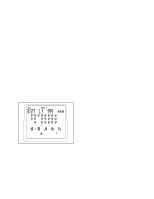
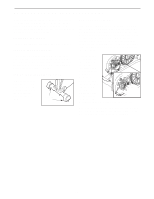
The console can show speed and distance in either miles or kilometers. The letters MPH or KM/H will appear in the display to show which unit of measurement is selected. To change the unit of measurement, first press and hold down the Program button for several seconds. Next, press the decrease button to select the desired unit of measurement. Then, press the Program button to save your selection. HOW TO USE A SMART PROGRAM 1. Begin pedaling or press any button on the console to turn on the console. A moment after you begin pedaling or press a button, the display will light. 2. Select a smart program. 5. Measure your heart rate if desired. If there are sheets of clear plastic on the Contacts metal contacts on the handgrip pulse sensor, remove the plas- tic. To measure your heart rate, hold the handgrip pulse sensor with your palms resting against the metal contacts. Avoid moving your hands or gripping the con- tacts too tightly. When your pulse is detected, one, two, or three dashes will appear, and then your heart rate will be shown. For the most accurate heart rate reading, hold the contacts for at least 15 seconds. Note: If you continue to hold the handgrip pulse sensor, the display will show your heart rate for up to 30 seconds. If the display does not show your heart rate, make sure that your hands are positioned as described. Be careful not to move your hands excessively or to squeeze the metal contacts too tightly. For optimal performance, clean the metal contacts using a soft cloth; never use alcohol, abrasives, or chemicals to clean the contacts. 6. When you are finished exercising, the console will turn off automatically. If the pedals do not move for several seconds, a tone will sound and the console will pause. If the pedals do not move for several minutes and the buttons are not pressed, the console will turn off and the display will be reset. To select one of the eight smart pro- Profile grams, press the Program button repeatedly until PROGRAM 1, 2, 3, 4, 5, 6, 7, or 8 appears in the dis- play. The program time and a profile of the resis- tance settings for the program will also appear in the display. 3. Begin pedaling to start the program. Each program is divided into either 20 or 30 oneminute segments. One resistance setting and one target pace setting are programmed for each segment. Note: The same resistance setting and/or target pace setting may be programmed for two or more consecutive segments. The resistance setting and the target pace setting for the first segment will appear in the center of the display for a few seconds. The resistance setting will then be indicated by the height of the flashing column of the profile in the display. The resistance settings for the next several segments will be indicated by the heights of the columns to the right of the flashing column. When the first segment of the program ends, the resistance setting and the target pace setting for the second segment will appear in the center of the display for a few seconds to alert you. The entire profile will then shift one column to the left, and the pedals will automatically adjust to the resistance setting for the second segment. 12
-
 1
1 -
2
-
3
-
4
-
5
-
6
-
 7
7 -
 8
8 -
 9
9 -
 10
10 -
 11
11 -
 12
12 -
 13
13 -
 14
14 -
 15
15 -
 16
16 -
 17
17 -
18
-
19
-
20
 |
 |
