Reebok Stride Select Rl 6.0 Elliptical English Manual - Page 8
Tip: Avoid damaging the Main Wire 60.
 |
View all Reebok Stride Select Rl 6.0 Elliptical manuals
Add to My Manuals
Save this manual to your list of manuals |
Page 8 highlights
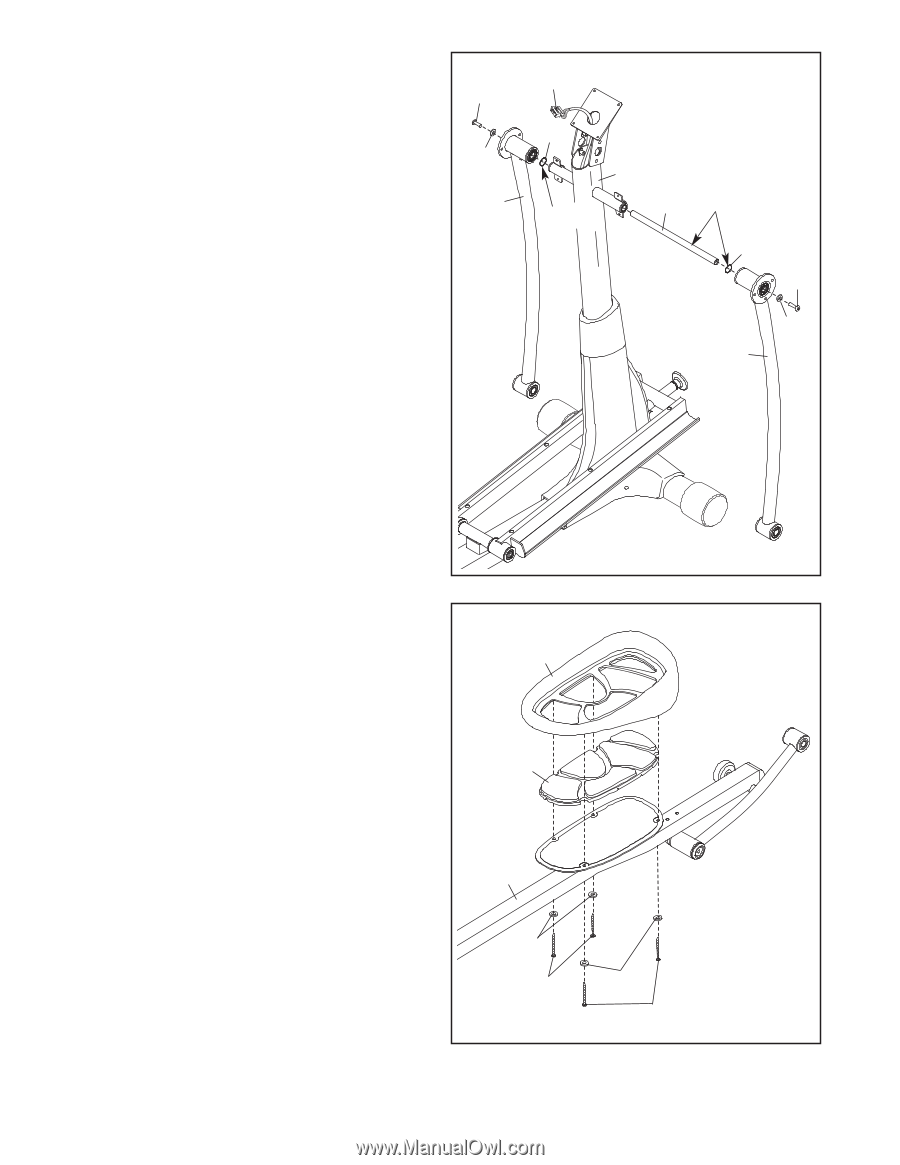
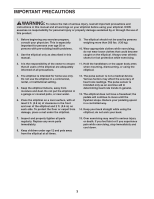
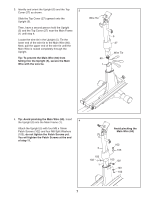
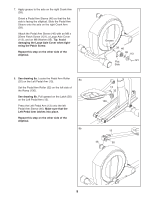
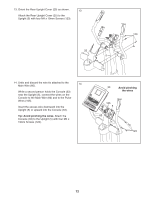
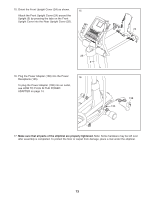
5. Using a small plastic bag to keep your fingers clean, apply a coat of the included grease to the Upright Axle (48) and to two Wave Washers (118). Tip: Avoid damaging the Main Wire (60). Insert the Upright Axle (48) through the Upright (5) and center it. Slide a Wave Washer (118) onto each side of the Upright Axle. Next, identify the Right and Left Upper Body Legs (6, 7), which are marked with "Right" and "Left" stickers, and orient them as shown. Slide the Right and Left Upper Body Legs (6, 7) onto the right and left sides of the Upright Axle (48). Tighten an M8 x 16mm Patch Screw (102) and an M8 Washer (95) into each end of the Upright Axle (48) at the same time. 5 102 95 7 60 118 5 Grease Avoid damaging the Main Wire (60) 48 Grease 118 102 95 6 6. Identify the Right Pedal (14), the Right Pedal Pad (104), and the Right Pedal Arm (12) assembly, which are marked with "Right" stickers, and orient them as shown. Set the Right Pedal Pad (104) on the Right Pedal Arm (12). Then, set the Right Pedal (14) on the Right Pedal Pad. Attach the Right Pedal (14) to the Right Pedal Arm (12) with two M6 x 12mm Patch Screws (111) and two M6 Washers (112); do not tighten the Patch Screws yet. Next, tighten two M6 x 50mm Patch Screws (62) and two M6 Washers (112) into the Right Pedal Arm (12) and the Right Pedal (14). Then, tighten the two M6 x 12mm Patch Screws (111). Attach the Left Pedal (not shown) to the Left Pedal Arm (not shown) assembly in the same way. 6 14 104 12 112 111 112 62 8
-
 1
1 -
2
-
 3
3 -
 4
4 -
 5
5 -
 6
6 -
 7
7 -
 8
8 -
 9
9 -
 10
10 -
 11
11 -
 12
12 -
 13
13 -
14
-
15
-
16
-
17
-
18
-
19
-
20
-
21
-
22
-
23
-
24
-
25
-
26
-
27
-
28
-
29
-
30
-
31
-
32
 |
 |