Ricoh Aficio SP 1210N Quick Installation Guide
Ricoh Aficio SP 1210N Manual
 |
View all Ricoh Aficio SP 1210N manuals
Add to My Manuals
Save this manual to your list of manuals |
Ricoh Aficio SP 1210N manual content summary:
- Ricoh Aficio SP 1210N | Quick Installation Guide - Page 1
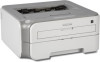
Quick Setup Guide Laser Printer SP 1210N Before you can use the printer, you must set up the hardware and install the driver. Please read this 'Quick Setup Guide' for proper set up and installation instructions. STEP 1 Setting Up the Machine STEP 2 Installing the Printer Driver Setup is Complete! - Ricoh Aficio SP 1210N | Quick Installation Guide - Page 2
are not compatible with the printer. Note Notes tell you how you should respond to a situation that may arise or give tips about how the current operation works with other features. User's Guide Network User's Guide Indicates reference to the User's Guide or Network User's Guide which is on the CD - Ricoh Aficio SP 1210N | Quick Installation Guide - Page 3
unit and toner cartridge assembly 12 Loading paper in the paper tray ...13 Printing a test page ...14 STEP 2 - Installing the Printer Driver For Printer Settings Page...23 Consumables Consumables ...24 Repacking Information Shipment of the printer...25 Troubleshooting Chapter 6 of the User's Guide - Ricoh Aficio SP 1210N | Quick Installation Guide - Page 4
(Front View) Inside the printer (Back View) DO NOT remove or damage the caution labels located on or around the fuser. DO NOT use a vacuum cleaner to clean up scattered toner. Doing this might cause the toner dust to ignite inside the vacuum cleaner, potentially starting a fire. Please carefully - Ricoh Aficio SP 1210N | Quick Installation Guide - Page 5
any type of spray to clean the inside or outside of the machine. Doing this may cause a fire or electrical shock. Refer to the User's Guide for how to clean the machine. Caution Be sure to disconnect the plug from the wall outlet and clean the prongs and the area around - Ricoh Aficio SP 1210N | Quick Installation Guide - Page 6
Ricoh Americas Corporation Address: 5 Dedrick Place, West Caldwell,NJ 07006 USA Telephone number: 973-882-2000 declares, that the products Product Name: Laser Printer Model Number: SP 1210N installed and used in accordance with the instructions, may cause harmful interference to radio - Ricoh Aficio SP 1210N | Quick Installation Guide - Page 7
, adjustments or performance of procedures other than those specified in this manual may result in hazardous invisible radiation exposure. IEC 60825-1 specification (220 to 240 volt model only) This printer is a Class 1 laser product as defined in IEC 60825-1:2007 specifications. The label shown - Ricoh Aficio SP 1210N | Quick Installation Guide - Page 8
to Authorised Service Personnel under the following conditions: „ When the power cord is damaged or frayed. „ If liquid has been spilled into the product. „ If the product has been exposed to rain or water. „ If the product does not operate normally when the operating instructions are followed - Ricoh Aficio SP 1210N | Quick Installation Guide - Page 9
refer servicing to qualified Service Personnel under the following conditions: „ If the power cord is damaged or frayed. „ If liquid has been spilled into the product. „ If the product has been exposed to rain or water. „ If the product does not operate normally when the operating instructions are - Ricoh Aficio SP 1210N | Quick Installation Guide - Page 10
operate normally when the operating instructions are followed. Adjust only those controls that are covered by the operating instructions. Incorrect adjustment of other cables from the wall outlet before servicing, modifying or installing the equipment. Ricoh cannot accept any financial or other - Ricoh Aficio SP 1210N | Quick Installation Guide - Page 11
carton in case for any reason you must ship your printer. 1 10 2 3 4 5 1. Face-down output tray support flap 1 (Support flap 1) 2. Control panel 3. Manual feed paper guide 4. Manual feed slot 5. Manual feed slot cover 9 8 7 6 6. Paper tray 7. Front cover 8. Power switch 9. Ventilation hole - Ricoh Aficio SP 1210N | Quick Installation Guide - Page 12
2 Print Data remaining 2 Ready (Blue) Printer LED Toner low 3 Toner (Yellow) Drum (Yellow) Error (Red) Dimmed Toner life end Drum near Cover open end of life 3 Paper jam 2 No paper Drum Error 2 Service call 2 Ready (Blue) User's Guide Chapter 5 Chapter 5 Chapter 5 Chapter 6 Chapter - Ricoh Aficio SP 1210N | Quick Installation Guide - Page 13
® Install Printer Driver Install the printer driver. Install Other Drivers or Utilities Install Network management tools. Documentation View The Quick Setup Guide,the Printer User's Guide and Network User's Guide in PDF format. The Quick Setup guide, the User's Guide and Network User's Guide in PDF - Ricoh Aficio SP 1210N | Quick Installation Guide - Page 14
. Improper Setup DO NOT connect the interface cable. Connecting the interface cable is done when installing the driver. 1 Open the front cover. 4 Put the drum unit and toner cartridge assembly into the printer. 2 Unpack the drum unit and toner cartridge assembly. 5 Close the front cover of the - Ricoh Aficio SP 1210N | Quick Installation Guide - Page 15
the maximum paper mark (1). 1 2 While pressing the green paper-guide release lever, slide the paper guides to fit the paper size you are using. Make sure that the guides are firmly in the slots. 5 Put the paper tray firmly back into the printer. Make sure that it is completely inserted into the - Ricoh Aficio SP 1210N | Quick Installation Guide - Page 16
is off. Connect the AC power cord to the printer. 1 5 Press the Go button. The printer prints a test page. Check that the test page has printed correctly. 2 Plug the AC power cord into an AC power outlet. Turn on the printer power switch. 3 Unfold support flap 1. Note This function will not be - Ricoh Aficio SP 1210N | Quick Installation Guide - Page 17
Driver Follow the instructions on this page for your operating system and interface. For USB interface cable users 16 For network interface cable users 18 „ For Peer-to-Peer network printer users 18 „ For shared network printer users ...20 The screens for Windows® in this Quick Setup Guide - Ricoh Aficio SP 1210N | Quick Installation Guide - Page 18
to run the start.exe program from the root folder of the CD-ROM. 5 Click Install Printer Driver on the menu screen. Installing the driver and connecting the printer to your computer 1 Turn off the printer power switch. 6 Click USB cable users. 2 Make sure the USB interface cable is NOT connected - Ricoh Aficio SP 1210N | Quick Installation Guide - Page 19
Installing the Printer Driver Note • For Windows Vista®, when the User Account Control screen appears, click Continue. • For Windows® 7, when the User Account Control Dialog box appears on your - Ricoh Aficio SP 1210N | Quick Installation Guide - Page 20
or see the Network User's Guide on the CD-ROM. • If you are using Personal Firewall software (e.g. Windows Firewall), disable it. Once you are sure that you can print, restart your Personal Firewall software. Connecting the printer to your network and installing the driver 1 Connect the network - Ricoh Aficio SP 1210N | Quick Installation Guide - Page 21
the License Agreement. Note You can find your printer's IP address and the node name by printing out the Printer Settings Page. See Print the Printer Settings Page on page 23. 10 Choose your printer, and then click Next. 8 Choose Ricoh Peer-to-Peer Network Printer, and then click Next. 11 Click - Ricoh Aficio SP 1210N | Quick Installation Guide - Page 22
on your network, we recommend that you ask your system administrator about the queue or share name for the printer prior to installation. Installing the driver and choosing the correct printer queue or share name 1 Turn on your computer. (You must be logged on with Administrator rights.) 2 Put the - Ricoh Aficio SP 1210N | Quick Installation Guide - Page 23
Installing the Printer Driver 6 Choose Network Shared Printer, and then click Next. Windows® 7 Choose your printer's queue, and then click OK. Windows® Network Note Contact your administrator if you do not know the location or the name of the printer in the network. 8 Click Finish. Note If you - Ricoh Aficio SP 1210N | Quick Installation Guide - Page 24
SP 1210N on your network, view the status and configure basic network settings, such as IP address. For more information on BRAdmin Light, see the network user guide use BRAdmin Light to change this password. 1 Click Install Other Drivers or Utilities on the menu screen. Note • For Windows Vista®, - Ricoh Aficio SP 1210N | Quick Installation Guide - Page 25
the internal print server to default, follow the steps below. 1 Turn off the printer. 2 Make sure that the front cover is closed and the power cord is turn on the power switch. Keep the Go button pressed down until the Toner, Drum and Error LEDs light up. Release the Go button. Make sure that all the - Ricoh Aficio SP 1210N | Quick Installation Guide - Page 26
error will be indicated by the LED's on the control panel. For more information about the consumables for your printer,contact your sales or service representative. Toner cartridge Drum unit Print Cartridge SP 1200E (for Europe) Print Cartridge SP 1200A (USA and Canada) Print Cartridge SP 1200S - Ricoh Aficio SP 1210N | Quick Installation Guide - Page 27
power cord. 3 Repack the printer. 2 Remove the drum unit and toner cartridge assembly. Put it in a plastic bag and seal the bag completely. Trademarks All brand and product names mentioned in this manual are registered trademarks of their respective companies. Copyright © 2010 Ricoh Co., Ltd. All - Ricoh Aficio SP 1210N | Quick Installation Guide - Page 28
M087-6140 GB
-
 1
1 -
 2
2 -
 3
3 -
 4
4 -
 5
5 -
 6
6 -
 7
7 -
8
-
9
-
10
-
11
-
12
-
13
-
14
-
15
-
16
-
17
-
18
-
19
-
20
-
21
-
22
-
23
-
24
-
25
-
26
-
27
-
28
 |
 |
STEP 1
STEP 2
Setup is Complete!
Quick Setup Guide
How to use the printer, see the User’s Guide on the CD-ROM.
Setting Up the Machine
Installing the Printer Driver
Laser Printer
SP 1210N
Before you can use the printer, you must set up the hardware and install the driver. Please
read this ‘Quick Setup Guide’ for proper set up and installation instructions.
Keep this ‘Quick Setup Guide’ and the supplied CD-ROM in a convenient place for quick and
easy reference at all times.