Ricoh Aficio SP 1210N Quick Installation Guide - Page 19
Windows, User Account, Control, Continue, Set as Default Printer
 |
View all Ricoh Aficio SP 1210N manuals
Add to My Manuals
Save this manual to your list of manuals |
Page 19 highlights
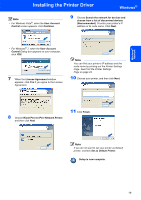
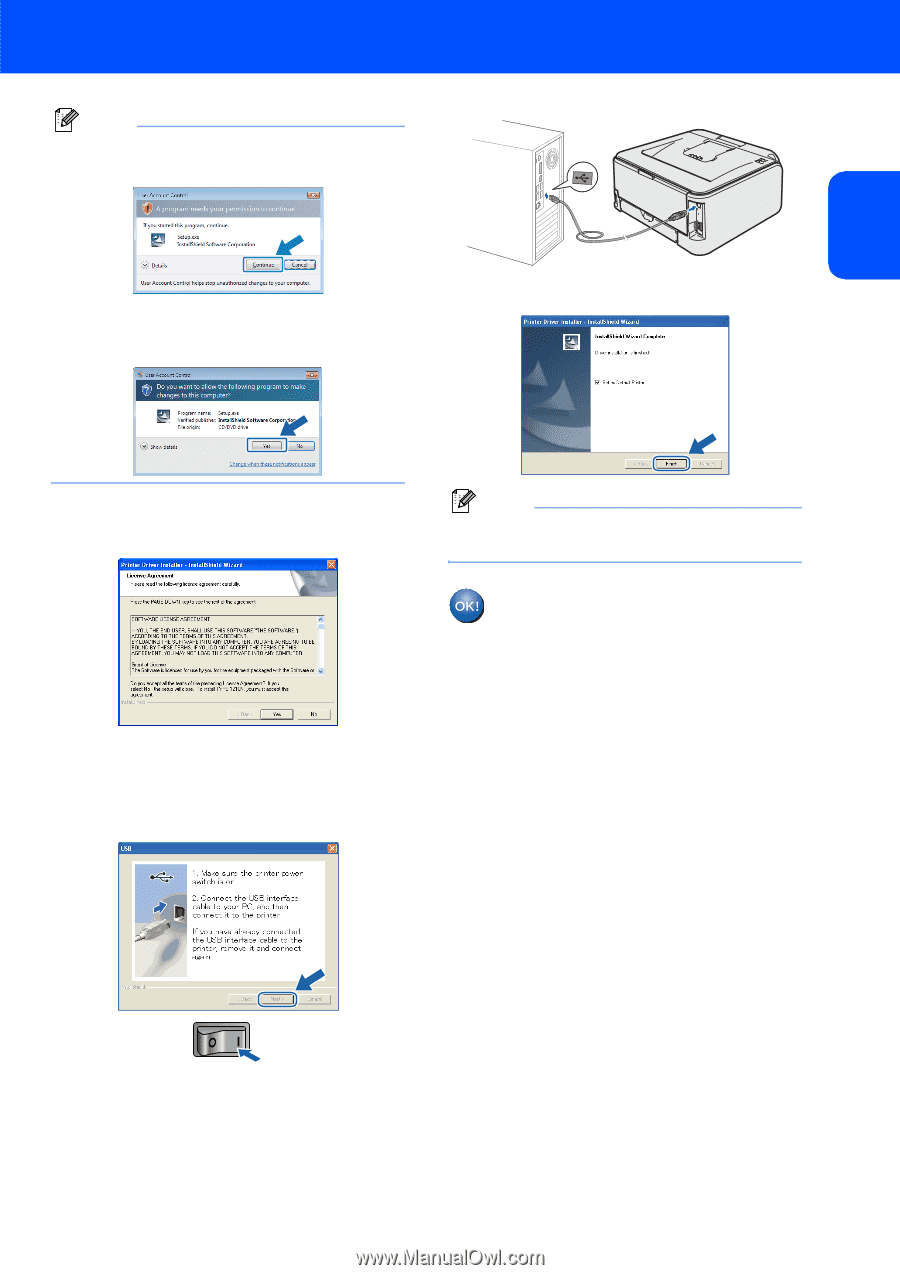
Installing the Printer Driver Note • For Windows Vista®, when the User Account Control screen appears, click Continue. • For Windows® 7, when the User Account Control Dialog box appears on your computer, click YES. 9 Click Finish. Windows® Windows® USB 7 When the License Agreement window appears, click Yes if you agree to the License Agreement. Note If you do not want to set your printer as Default printer, uncheck Set as Default Printer. Setup is now complete. 8 When this screen appears, make sure the printer power switch is on. Connect the USB interface cable to your computer, and then connect it to the printer. Click Next. 17
-
 1
1 -
2
-
3
-
4
-
5
-
6
-
7
-
8
-
9
-
10
-
11
-
12
-
13
-
 14
14 -
 15
15 -
 16
16 -
 17
17 -
 18
18 -
 19
19 -
 20
20 -
 21
21 -
 22
22 -
 23
23 -
 24
24 -
25
-
26
-
27
-
28
 |
 |
Installing the Printer Driver
17
Windows
®
USB
Windows
®
Note
•
For Windows Vista
®
, when the
User Account
Control
screen appears, click
Continue
.
•
For Windows
®
7, when the
User Account
Control
Dialog box appears on your computer,
click
YES
.
7
When the
License Agreement
window
appears, click
Yes
if you agree to the License
Agreement.
8
When this screen appears, make sure the
printer power switch is on.
Connect the USB interface cable to your
computer, and then connect it to the printer.
Click
Next
.
9
Click
Finish
.
Note
If you do not want to set your printer as Default
printer, uncheck
Set as Default Printer
.
Setup is now complete.