Ricoh Aficio SP 5100N User's Guide - Page 47
Tips for avoiding paper jams, Troubleshooting checklist
 |
View all Ricoh Aficio SP 5100N manuals
Add to My Manuals
Save this manual to your list of manuals |
Page 47 highlights
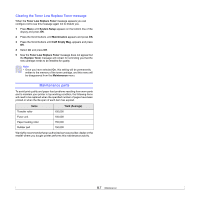
Duplex jam 1 1 Open the rear cover. Troubleshooting checklist If the printer is not working properly, consult the following checklist. If the printer does not pass a step, follow the corresponding suggested solutions. Condition Suggested solutions Make sure that the Status LED on the control panel lights green and Ready is shown on the display. • If the Status LED is off, check the power cord connection. Check the power switch. Check the power source by plugging the power cord into another outlet. • If the Status LED lights red, check the display message. See page 9.6. 2 Gently pull the jammed paper straight up. Print a demo page to verify that the printer is feeding paper correctly. See page 2.7. • If a demo page does not print, check the paper supply in the tray. • If the paper jams in the printer, see page 9.1. • If an error message appears on the display, see page 9.6. 3 Close the rear cover. 4 Open and close the top cover. The printer will resume printing. Tips for avoiding paper jams By selecting the correct media types, most paper jams can be avoided. When a paper jam occurs, follow the steps outlined on page 9.1. • Follow the procedures on page 5.5. Ensure that the adjustable guides are positioned correctly. • Do not overload the tray. Ensure that the paper level is below the paper capacity mark on the inside wall of the tray. • Do not remove paper from the tray while your printer is printing. • Flex, fan, and straighten paper before loading. • Do not use creased, damp, or highly curled paper. • Do not mix paper types in a tray. • Use only recommended print media. See page 5.1. • Ensure that the recommended print side of print media is facing down in the tray, or facing up in the multi-purpose tray. Check the demo page to see if it printed correctly. If there is a print quality problem, see page 9.11. Print a short document from a software application to verify that the computer and printer are connected and are communicating correctly. • If the page does not print, check the cable connection between the printer and the computer. • Check the print queue or print spooler to see if the printer has been paused. • Check the software application to ensure that you are using the proper printer driver and communication port. If the page is interrupted during printing, see page 9.9. If completing the checklist does not resolve the printer problem, check the following troubleshooting sections. • "Understanding the status LED" on page 9.6. • "Understanding display messages" on page 9.6. • "Solving general printing problems" on page 9.9. • "Common Windows problems" on page 9.13. • "Common PostScript problems" on page 9.13. • "Common Macintosh problems" on page 9.14. 9.5
-
 1
1 -
2
-
3
-
4
-
5
-
6
-
7
-
8
-
9
-
10
-
11
-
12
-
13
-
14
-
15
-
16
-
17
-
18
-
19
-
20
-
21
-
22
-
23
-
24
-
25
-
26
-
27
-
28
-
29
-
30
-
31
-
32
-
33
-
34
-
35
-
36
-
37
-
38
-
39
-
40
-
41
-
 42
42 -
 43
43 -
 44
44 -
 45
45 -
 46
46 -
 47
47 -
 48
48 -
 49
49 -
 50
50 -
 51
51 -
 52
52 -
53
-
54
-
55
-
56
-
57
-
58
-
59
-
60
-
61
-
62
-
63
-
64
-
65
-
66
-
67
-
68
-
69
-
70
-
71
-
72
-
73
-
74
-
75
-
76
-
77
-
78
-
79
-
80
-
81
-
82
-
83
-
84
-
85
-
86
-
87
-
88
-
89
-
90
-
91
-
92
-
93
-
94
-
95
-
96
-
97
-
98
-
99
-
100
-
101
-
102
-
103
-
104
-
105
-
106
-
107
-
108
-
109
-
110
-
111
-
112
-
113
-
114
-
115
-
116
-
117
-
118
-
119
-
120
-
121
-
122
-
123
-
124
-
125
-
126
 |
 |
