Ricoh Aficio SP C242DN Hardware Guide - Page 54
Specifying an IP Address for IPv6 (No DHCP), Host Interface, Network Setting, IPv6 Config.
 |
View all Ricoh Aficio SP C242DN manuals
Add to My Manuals
Save this manual to your list of manuals |
Page 54 highlights
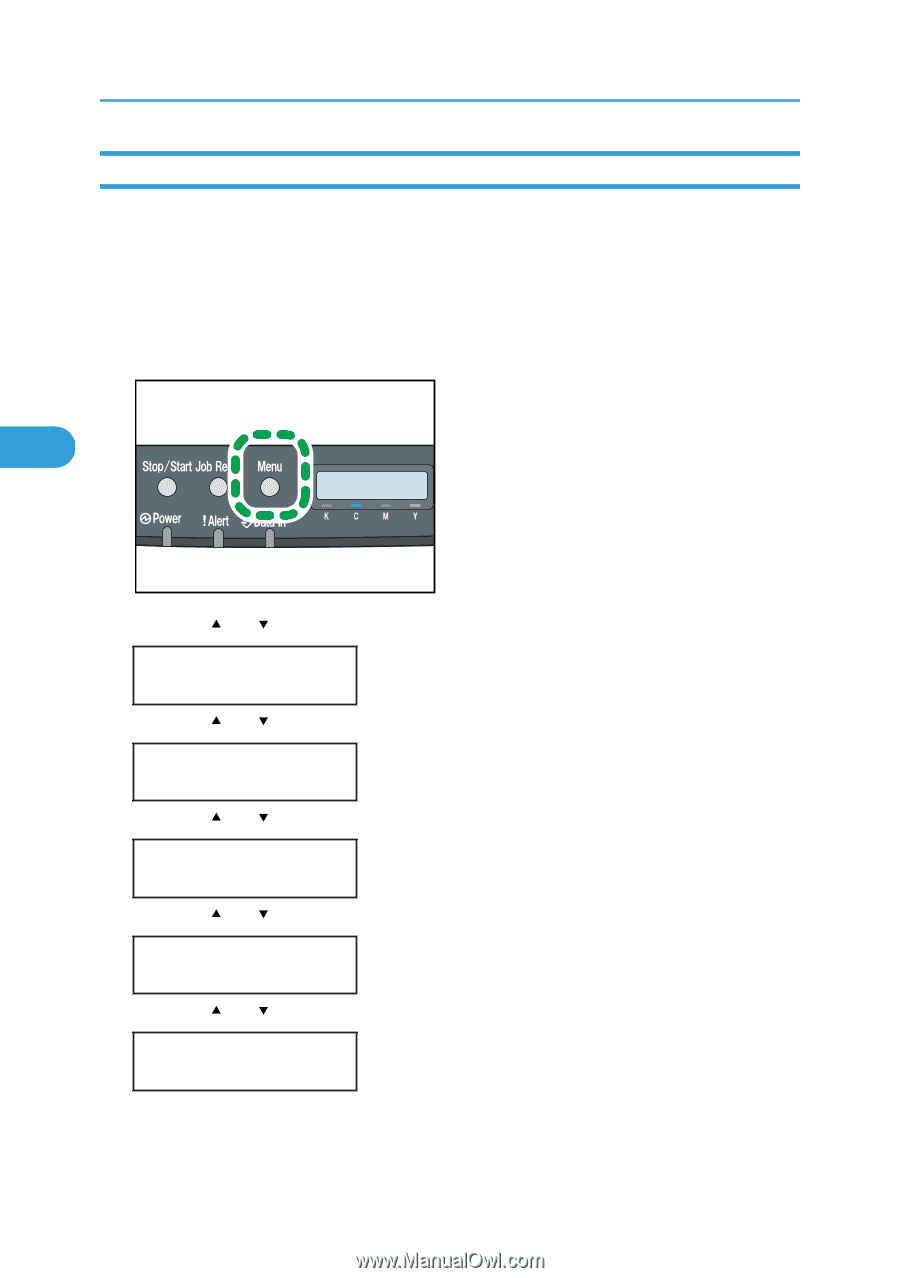
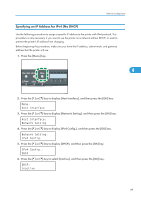
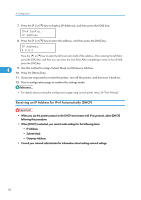
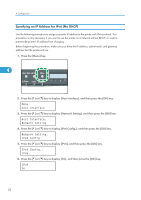
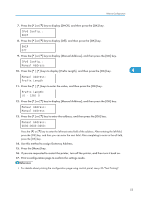
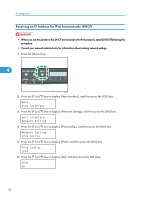
4. Configuration Specifying an IP Address for IPv6 (No DHCP) Use the following procedure to assign a specific IP address to the printer with IPv6 protocol. This procedure is only necessary if you want to use the printer on a network without DHCP, or want to prevent the printer's IP address from changing. Before beginning this procedure, make sure you have the IP address, subnet mask, and gateway address that the printer will use. 1. Press the [Menu] key. 4 CER408 2. Press the [ ] or [ ] key to display [Host Interface], and then press the [OK] key. Menu: Host Interface 3. Press the [ ] or [ ] key to display [Network Setting], and then press the [OK] key. Host Interface: Network Setting 4. Press the [ ] or [ ] key to display [IPv6 Config.], and then press the [OK] key. Network Setting: IPv6 Config. 5. Press the [ ] or [ ] key to display [IPv6], and then press the [OK] key. IPv6 Config.: IPv6 6. Press the [ ] or [ ] key to display [On], and then press the [OK] key. IPv6 On 52
-
 1
1 -
2
-
3
-
4
-
5
-
6
-
7
-
8
-
9
-
10
-
11
-
12
-
13
-
14
-
15
-
16
-
17
-
18
-
19
-
20
-
21
-
22
-
23
-
24
-
25
-
26
-
27
-
28
-
29
-
30
-
31
-
32
-
33
-
34
-
35
-
36
-
37
-
38
-
39
-
40
-
41
-
42
-
43
-
44
-
45
-
46
-
47
-
48
-
 49
49 -
 50
50 -
 51
51 -
 52
52 -
 53
53 -
 54
54 -
 55
55 -
 56
56 -
 57
57 -
 58
58 -
 59
59 -
60
-
61
-
62
-
63
-
64
-
65
-
66
-
67
-
68
-
69
-
70
-
71
-
72
-
73
-
74
-
75
-
76
-
77
-
78
-
79
-
80
-
81
-
82
-
83
-
84
-
85
-
86
-
87
-
88
-
89
-
90
-
91
-
92
-
93
-
94
-
95
-
96
-
97
-
98
-
99
-
100
-
101
-
102
-
103
-
104
-
105
-
106
-
107
-
108
-
109
-
110
-
111
-
112
-
113
-
114
-
115
-
116
-
117
-
118
-
119
-
120
-
121
-
122
-
123
-
124
-
125
-
126
-
127
-
128
-
129
-
130
-
131
-
132
-
133
-
134
-
135
-
136
-
137
-
138
-
139
-
140
-
141
-
142
-
143
-
144
-
145
-
146
-
147
-
148
-
149
-
150
-
151
-
152
-
153
-
154
-
155
-
156
-
157
-
158
-
159
-
160
-
161
-
162
-
163
-
164
-
165
-
166
-
167
-
168
-
169
-
170
-
171
-
172
 |
 |