Ricoh InfoPrint Pro C900AFP InfoPrint Manager - Page 316
PostScript printing, Start, Settings, Printers, Properties, Device Settings
 |
View all Ricoh InfoPrint Pro C900AFP manuals
Add to My Manuals
Save this manual to your list of manuals |
Page 316 highlights
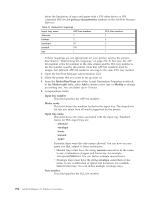
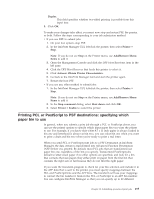
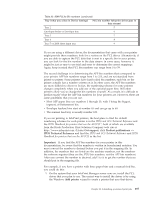
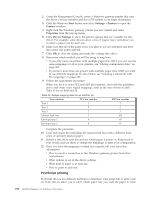
2. Using the Management Console, create a Windows gateway printer that uses the driver you just installed and has a PSF printer as its target destination. 3. Click the Windows Start button and select Settings → Printers to open the Printers window. 4. Right-click the Windows gateway printer you just created and select Properties from the pop-up menu. 5. Click Device Settings to show the printer options that are available for this driver. For example, some drivers show a list of "paper trays" and allow you to select a paper size for each one. 6. Make sure that all of the paper trays you plan to use are activated and have the correct size paper selected. 7. Click OK to close the dialog and make the settings take effect. 8. Determine which method you will be using to map bins: v If you only have one printer with multiple paper bins OR if you can use the same mappings for all of your printers, see "Editing configuration files" on page 302. v If you have more than one printer with multiple paper bins AND you want to use different mappings for all of them, see "Creating a transform with bin mappings" on page 302. 9. Follow the appropriate procedure. When you have to enter PCL and AFP bin numbers, start with the guidelines above and create some logical mappings, such as the ones shown in table Table 33 for an InfoPrint 20. Table 33. Sample mapping table for an InfoPrint 20 Tray selection Tray 1 Tray 2 Tray 3 Manual feed tray Envelope tray 1 Envelope tray 2 PCL bin number 1 5 7 2 6 4 AFP bin number 1 2 3 100 60 61 Complete the procedure. 10. Load each paper bin (including the manual feed bin) with a different kind, color, or specially marked paper. 11. Submit a test job to each bin and see which paper it prints on. Keep track of your results and use them to change the mappings to meet your configuration. 12. Once you have the mappings worked out correctly, tell your users this information: v How to create a connection to this Windows gateway printer from their workstations. v What options to set in the device settings. v What kind of paper is in each bin. v How to print to each bin. PostScript printing PostScript drivers use different methods to determine what paper bin to print a job on. Some drivers allow you to select which paper tray you want the paper to come 298 InfoPrint Manager for Windows: Procedures
-
 1
1 -
2
-
3
-
4
-
5
-
6
-
7
-
8
-
9
-
10
-
11
-
12
-
13
-
14
-
15
-
16
-
17
-
18
-
19
-
20
-
21
-
22
-
23
-
24
-
25
-
26
-
27
-
28
-
29
-
30
-
31
-
32
-
33
-
34
-
35
-
36
-
37
-
38
-
39
-
40
-
41
-
42
-
43
-
44
-
45
-
46
-
47
-
48
-
49
-
50
-
51
-
52
-
53
-
54
-
55
-
56
-
57
-
58
-
59
-
60
-
61
-
62
-
63
-
64
-
65
-
66
-
67
-
68
-
69
-
70
-
71
-
72
-
73
-
74
-
75
-
76
-
77
-
78
-
79
-
80
-
81
-
82
-
83
-
84
-
85
-
86
-
87
-
88
-
89
-
90
-
91
-
92
-
93
-
94
-
95
-
96
-
97
-
98
-
99
-
100
-
101
-
102
-
103
-
104
-
105
-
106
-
107
-
108
-
109
-
110
-
111
-
112
-
113
-
114
-
115
-
116
-
117
-
118
-
119
-
120
-
121
-
122
-
123
-
124
-
125
-
126
-
127
-
128
-
129
-
130
-
131
-
132
-
133
-
134
-
135
-
136
-
137
-
138
-
139
-
140
-
141
-
142
-
143
-
144
-
145
-
146
-
147
-
148
-
149
-
150
-
151
-
152
-
153
-
154
-
155
-
156
-
157
-
158
-
159
-
160
-
161
-
162
-
163
-
164
-
165
-
166
-
167
-
168
-
169
-
170
-
171
-
172
-
173
-
174
-
175
-
176
-
177
-
178
-
179
-
180
-
181
-
182
-
183
-
184
-
185
-
186
-
187
-
188
-
189
-
190
-
191
-
192
-
193
-
194
-
195
-
196
-
197
-
198
-
199
-
200
-
201
-
202
-
203
-
204
-
205
-
206
-
207
-
208
-
209
-
210
-
211
-
212
-
213
-
214
-
215
-
216
-
217
-
218
-
219
-
220
-
221
-
222
-
223
-
224
-
225
-
226
-
227
-
228
-
229
-
230
-
231
-
232
-
233
-
234
-
235
-
236
-
237
-
238
-
239
-
240
-
241
-
242
-
243
-
244
-
245
-
246
-
247
-
248
-
249
-
250
-
251
-
252
-
253
-
254
-
255
-
256
-
257
-
258
-
259
-
260
-
261
-
262
-
263
-
264
-
265
-
266
-
267
-
268
-
269
-
270
-
271
-
272
-
273
-
274
-
275
-
276
-
277
-
278
-
279
-
280
-
281
-
282
-
283
-
284
-
285
-
286
-
287
-
288
-
289
-
290
-
291
-
292
-
293
-
294
-
295
-
296
-
297
-
298
-
299
-
300
-
301
-
302
-
303
-
304
-
305
-
306
-
307
-
308
-
309
-
310
-
 311
311 -
 312
312 -
 313
313 -
 314
314 -
 315
315 -
 316
316 -
 317
317 -
 318
318 -
 319
319 -
 320
320 -
 321
321 -
322
-
323
-
324
-
325
-
326
-
327
-
328
-
329
-
330
-
331
-
332
-
333
-
334
-
335
-
336
-
337
-
338
-
339
-
340
-
341
-
342
-
343
-
344
-
345
-
346
-
347
-
348
-
349
-
350
-
351
-
352
-
353
-
354
-
355
-
356
-
357
-
358
-
359
-
360
-
361
-
362
-
363
-
364
-
365
-
366
-
367
-
368
-
369
-
370
-
371
-
372
-
373
-
374
-
375
-
376
-
377
-
378
-
379
-
380
-
381
-
382
-
383
-
384
-
385
-
386
-
387
-
388
-
389
-
390
-
391
-
392
-
393
-
394
-
395
-
396
-
397
-
398
-
399
-
400
-
401
-
402
-
403
-
404
-
405
-
406
-
407
-
408
-
409
-
410
-
411
-
412
-
413
-
414
-
415
-
416
-
417
-
418
-
419
-
420
-
421
-
422
-
423
-
424
-
425
-
426
 |
 |