Ricoh M C250FWB Google Cloud Print Guide - Page 7
Printing with Google Cloud Print, Register the Machine to Google Cloud Print, Register with Web
 |
View all Ricoh M C250FWB manuals
Add to My Manuals
Save this manual to your list of manuals |
Page 7 highlights
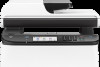
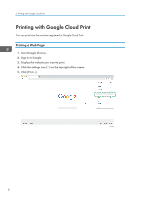
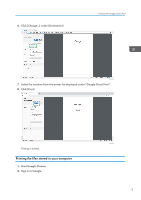
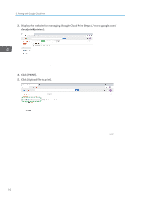
2. Printing with Google Cloud Print You can print with Google Cloud Print by using the following procedure. Register the machine to Google Cloud Print Printing with Google Cloud Print Register the Machine to Google Cloud Print You can register the machine's information that is used for Google Cloud Print. • You need a Google account to register the machine's information. If you do not have a Google account, create one on the Google website (https://accounts.google.com/SignUp). Register with Web Image Monitor When registering with an Android device, follow the procedures below. 1. Start a web browser on your computer or Android device. 2. Enter "http://(machine's IP address or host name)/" in the URL bar. The top page of Web Image Monitor appears. If the machine's host name has been registered to the DNS server, you can enter it. 3. Click or tap [Network Settings]. 4. Click or tap the [Google Cloud] tab. 5. Click or tap [Register]. 6. Click or tap [Google]. 7. Go to the website for Google Cloud Print, and then follow on-screen instructions to register your machine. 8. Update Web Image Monitor. The machine is registered. Register with Windows 1. Start Google Chrome on your computer. 2. Sign in to Google. 5
-
 1
1 -
 2
2 -
 3
3 -
 4
4 -
 5
5 -
 6
6 -
 7
7 -
 8
8 -
 9
9 -
 10
10 -
 11
11 -
 12
12 -
13
-
14
-
15
-
16
-
17
-
18
-
19
-
20
 |
 |
