Ricoh SP 213Nw Setup Guide - Page 19
Appendix
 |
View all Ricoh SP 213Nw manuals
Add to My Manuals
Save this manual to your list of manuals |
Page 19 highlights
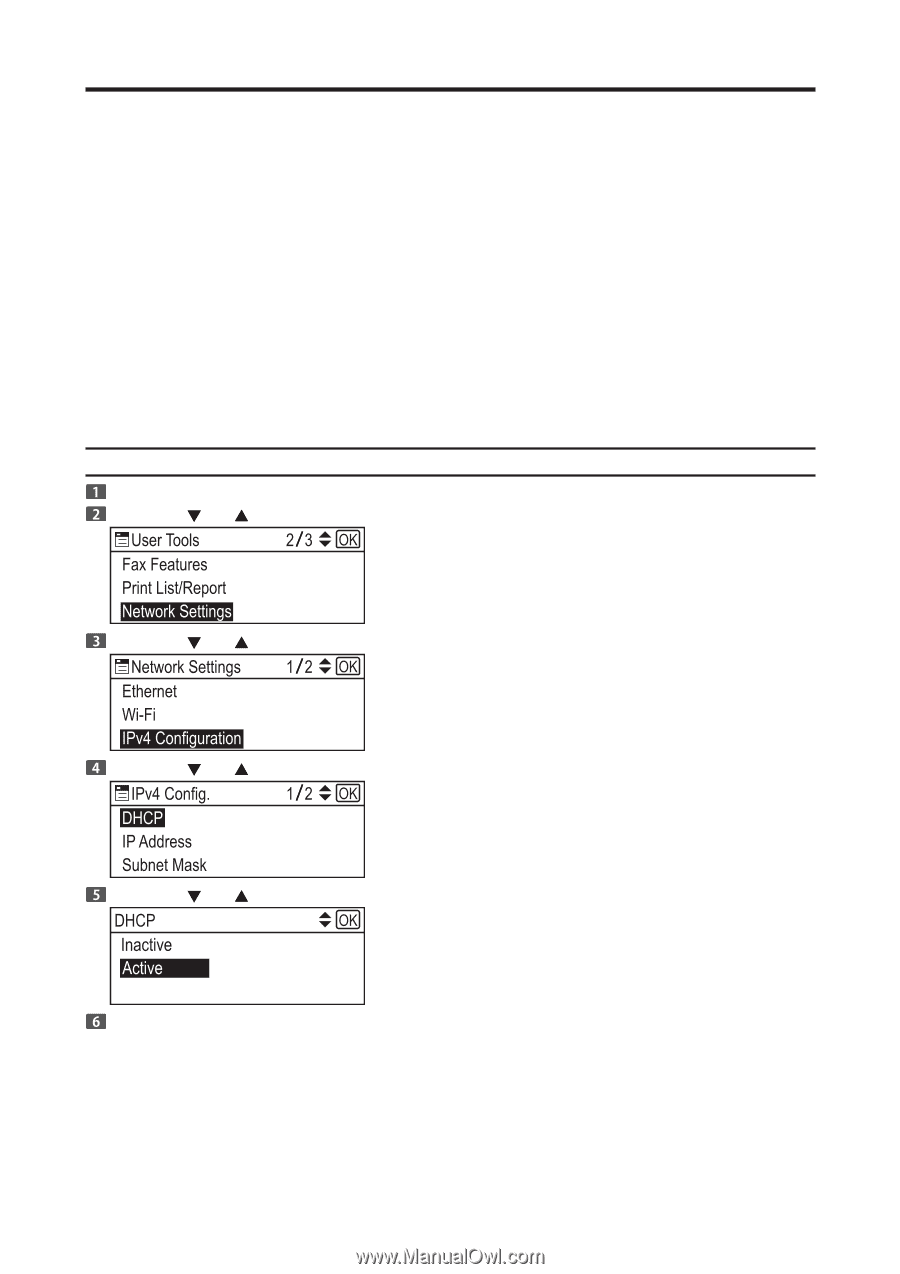
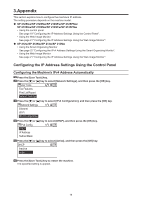
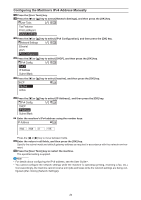
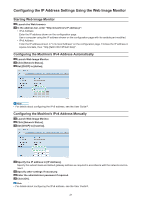
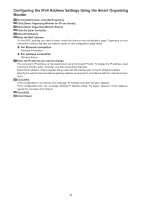
3.Appendix This section explains how to configure the machine's IP address. The setting procedure depends on the machine model. ‹‹ SP 212SUw/SP 212SNw/SP 212SFw/SP 212SFNw/ SP 213SUw/SP 213SNw/SP 213SFw/SP 213SFNw • Using the control panel See page 19 "Configuring the IP Address Settings Using the Control Panel". • Using the Web Image Monitor See page 21 "Configuring the IP Address Settings Using the Web Image Monitor". ‹‹ SP 212w/SP 212Nw/SP 213w/SP 213Nw • Using the Smart Organizing Monitor See page 22 "Configuring the IPv4 Address Settings Using the Smart Organizing Monitor". • Using the Web Image Monitor See page 21 "Configuring the IP Address Settings Using the Web Image Monitor". Configuring the IP Address Settings Using the Control Panel Configuring the Machine's IPv4 Address Automatically Press the [User Tools] key. Press the [ ] or [ ] key to select [Network Settings], and then press the [OK] key. Press the [ ] or [ ] key to select [IPv4 Configuration], and then press the [OK] key. Press the [ ] or [ ] key to select [DHCP], and then press the [OK] key. Press the [ ] or [ ] key to select [Active], and then press the [OK] key. Press the [User Tools] key to restart the machine. The specified setting is applied. 19
-
 1
1 -
2
-
3
-
4
-
5
-
6
-
7
-
8
-
9
-
10
-
11
-
12
-
13
-
 14
14 -
 15
15 -
 16
16 -
 17
17 -
 18
18 -
 19
19 -
 20
20 -
 21
21 -
 22
22 -
 23
23 -
 24
24
 |
 |