Ricoh SP 3710DN Setup Guide - Page 10
Connecting the Machine via Wireless (Wi-Fi), Windows - manual
 |
View all Ricoh SP 3710DN manuals
Add to My Manuals
Save this manual to your list of manuals |
Page 10 highlights
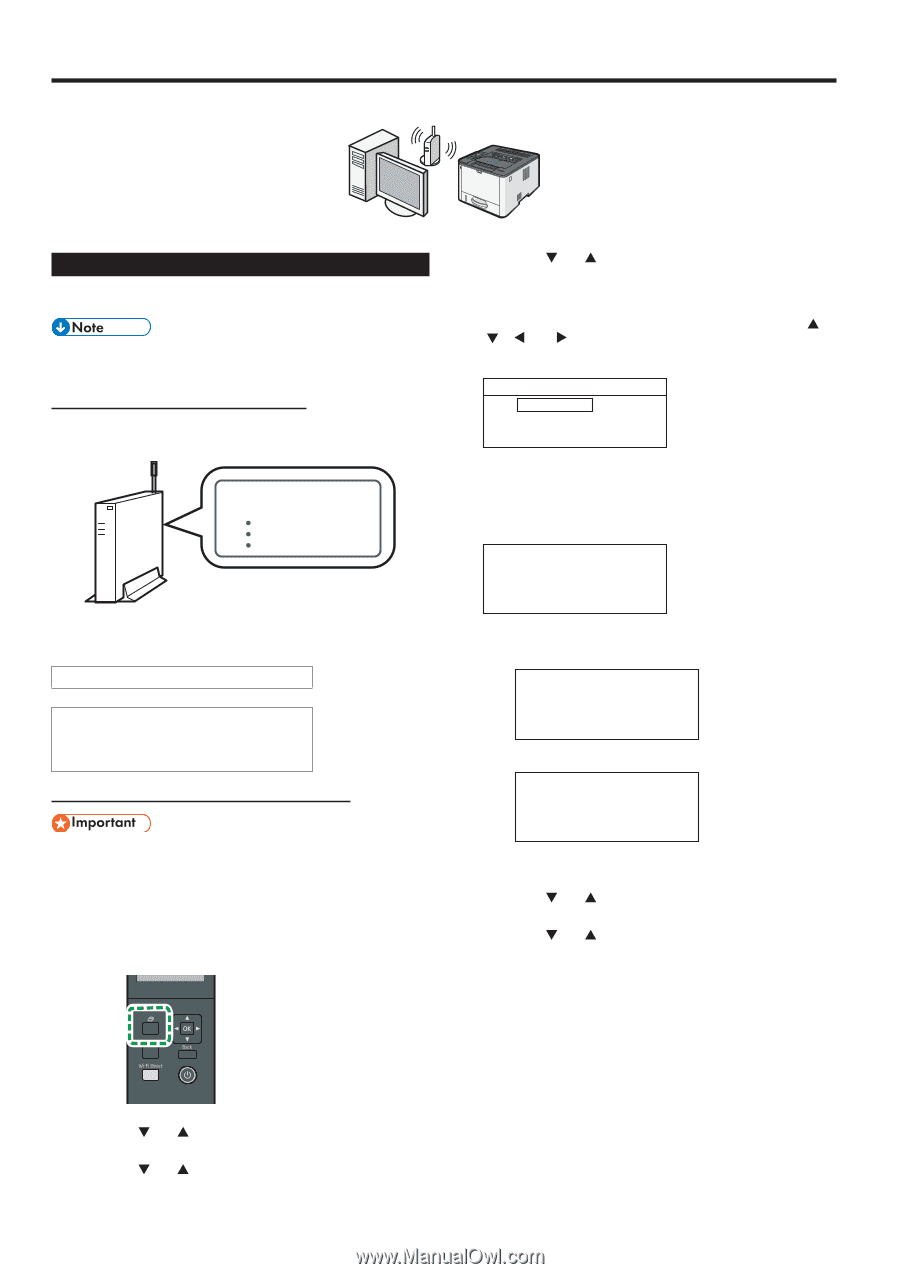
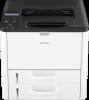
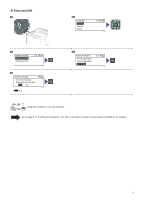
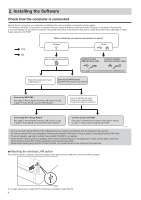
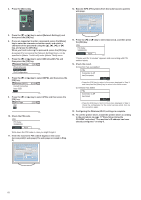
Connecting the Machine via Wireless (Wi-Fi) Windows To use the machine with a Wireless (Wi-Fi) connection, we recommend setting up the Wireless (Wi-Fi) settings of the machine first, and then installing the printer driver. Easy Setup Using the Wi-Fi Setup Wizard From the control panel of this machine, you can also configure the Wireless (Wi-Fi) settings for the machine. The following item is necessary to set up a Wireless (Wi-Fi) connection. ●● Router (access point) Checking the SSID and Encryption key The SSID and Encryption key for the router (access point) may be printed on a label affixed to the router (access point). For details about the SSID and Encryption key, refer to the router (access point) manual. SSID :XXXXXXXXXXXXX Encryption key :XXXXXXXXXXXXX DSG099 Confirm the SSID and Encryption key, and write them down on the blank space as shown below. SSID: DYG049 6. Press the [ ] or [ ] key to select SSID of the router (access point) from the searched SSID list, and then press the [OK] key. 7. Press the [Menu] key to enter the character-selection mode, and select a character of the encryption key using the or [ ] key, and press the [OK] Key. When you finish entering the encryption key, press the [OK] key. Password Key : (8-63 chars/64 hex) WPA2-PSK DSG353 •• As the passphrase, you can enter either 8 to 63 ASCII characters (0x20-0x7e) or 64 hexadecimal digits (0-9, A-F, a-f). •• For details about checking the encryption key, see "Checking the SSID and Encryption key". 8. Press the [OK] key. Are you sure to connect? (OK/Back) DSG354 9. Check the result. Connection has succeeded: Encryption key: Connect succeed! Configuring Settings Using the Control Panel ●● Make sure the Ethernet cable is not connected to the machine. 1. Check that the router (access point) is working correctly. 2. Make sure the wireless LAN option is attached to the machine and the wireless (Wi-Fi) connection is enabled. For details, see page 6 "Attaching the wireless LAN option". 3. Press the [Menu] key. DSG355 Connection has failed: Connect failed! DSG356 •• Check the configuration for the router (access point), and then try the connection again. 10. Press the [ ] or [ ] key to select [Quit Setup], and then press the [OK] key. 11. Press the [ ] or [ ] key to select to display [Network Wizard] menu or not when you turn on the machine, then press the [OK] key. 12. Configuring the Wireless (Wi-Fi) settings is complete. 13. To use the printer driver, install the printer driver according to the procedure on page 11 "Easy Setup Using the CD-ROM" and select "The machine's IP address has been already configured." on step 6. DYG052 4. Press the [ ] or [ ] key to select [Network Wizard], and then press the [OK] key. 5. Press the [ ] or [ ] key to select [Wireless (Wi-Fi)], and then press the [OK] key. 8
-
 1
1 -
2
-
3
-
4
-
 5
5 -
 6
6 -
 7
7 -
 8
8 -
 9
9 -
 10
10 -
 11
11 -
 12
12 -
 13
13 -
 14
14 -
 15
15 -
16
-
17
 |
 |