Ridgid K-375R Owners Manual - Page 8
Machine Set-Up
 |
View all Ridgid K-375R manuals
Add to My Manuals
Save this manual to your list of manuals |
Page 8 highlights
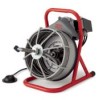
Kollmann K-375R 1/2″ Cage Machine missing, misaligned or binding parts as well as any other conditions which may affect the safe and normal operation of the machine. If any of these conditions are present, do not use the Drain Cleaning Machine until any problem has been repaired. 5. Lubricate the Drain Cleaning Machine, if necessary, according to the Maintenance Instructions. 6. Use tools and accessories that are designed for your drain cleaner and meet the needs of your application. The correct tools and accessories allow you to do the job successfully and safely. Accessories suitable for use with other equipment may be hazardous when used with this drain cleaner. 7. Clean any oil, grease or dirt from all equipment handles and controls. This reduces the risk of injury due to a tool or control slipping from your grip. 8. Inspect the cutting edges of your tools. If necessary, have them sharpened or replaced prior to using the Drain Cleaning Machine. Dull or damaged cutting tools can lead to binding and cable breakage. 9. Inspect cables and couplings for wear and damage. Cables should be replaced when they become severely worn or corroded. A worn cable can be identified when the outside coils become flat. WARNING Worn or damaged cables can break caus- ing serious injury. Machine Set-Up WARNING To prevent serious injury, proper set-up of the machine and work area is required. The following procedures should be followed to set-up the machine: 1. Check work area for: • Adequate lighting • Grounded electrical outlet • Clear path to the electrical outlet that does not contain any sources of heat or oil, sharp edges or moving parts that may damage electrical cord. • Dry place for machine and operator. Do not use the machine while standing in water. • Flammable liquids, vapors or dust that may ignite. 2. Position the Drain Cleaning Machine within 2′ of sewer inlet. Greater distance can result in cable twisting or kinking. 3. Position the air foot switch pedal for easy operator accessibility. Machine is designed for one person operation. 4. Make sure FOR/OFF/REV switch is in the OFF position. 5. Select and install the proper tool to the end of the cable. The T-Slot Coupler allows the tool to be snapped into the cable coupler (Figure 7). To remove tool, use the pin key to depress the plunger and slide the coupling apart. To Couple Cable and Tools To Uncouple Cable and Tools Snap Together Insert Pin Slide Apart Figure 7 - Coupling and Uncoupling Tools NOTE! Proper Tool Selection The tools provided with this drain cleaner along with a description of their intended use are shown in Figures 2, 3 and 4. A good rule of thumb is to use a tool at least 1″ smaller than the line to be cleaned. The style of the tool is determined by the nature of the job and is left up to the operator. 6. Plug the Drain Cleaning Machine into the electrical outlet, making sure to position the power cord along the clear path selected earlier. If the power cord does not reach the outlet, use an extension cord in good condition. WARNING To avoid electric shock and electrical fires, never use an extension cord that is damaged or does not meet the following requirements: • The cord has a three-prong plug similar to shown in Electrical Safety section. • The cord is rated as "W" or "W-A" if being used outdoors. • The cord has sufficient wire thickness (16 AWG below 50′/14 AWG 50′ - 100′). If the wire thickness is too small, the cord may overheat, melting the cord's insulation or causing nearby objects to ignite. 6 Ridge Tool Company
-
 1
1 -
2
-
 3
3 -
 4
4 -
 5
5 -
 6
6 -
 7
7 -
 8
8 -
 9
9 -
 10
10 -
 11
11 -
 12
12 -
 13
13 -
14
-
15
-
16
-
17
-
18
-
19
-
20
-
21
-
22
-
23
-
24
-
25
-
26
-
27
-
28
-
29
-
30
-
31
-
32
-
33
-
34
-
35
-
36
-
37
-
38
-
39
-
40
-
41
-
42
-
43
 |
 |
