Rocketfish RF-SBM101 User Manual (English) - Page 18
STEP 5, obstructed ba, Option 2: Attaching the mounting hardware to, TVs with irregular or
 |
View all Rocketfish RF-SBM101 manuals
Add to My Manuals
Save this manual to your list of manuals |
Page 18 highlights
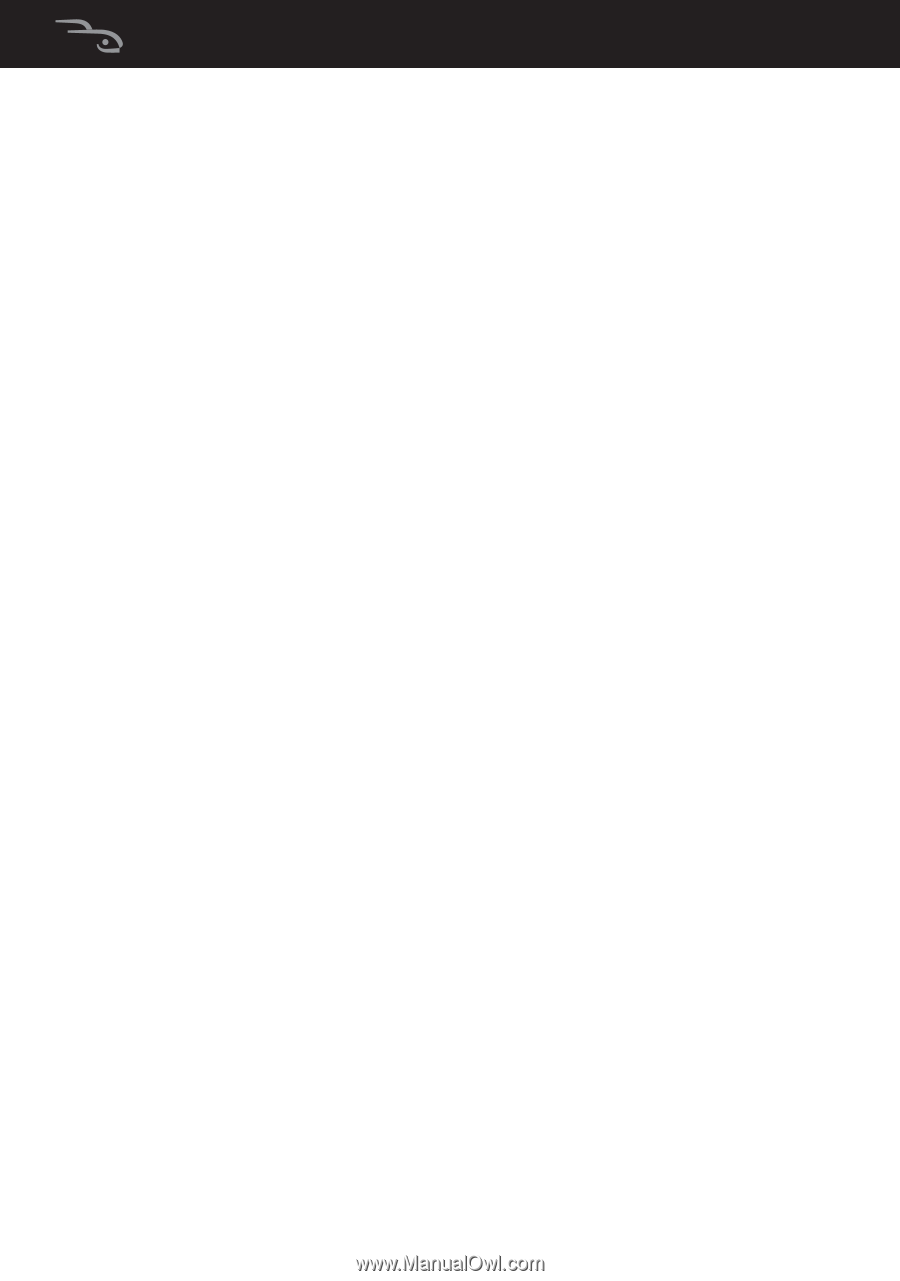
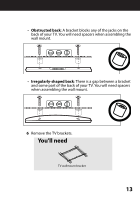
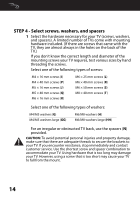
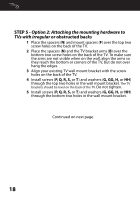
STEP 5 - Option 2: Attaching the mounting hardware to TVs with irregular or obstructed backs 1 Place the spacers (N) and mount spacers (F) over the top two screw holes on the back of the TV. 2 Place the spacers (N) and the TV bracket arms (B) over the bottom two screw holes on the back of the TV. To make sure the arms are not visible when on the wall, align the arms so they reach the bottom or corners of the TV, but do not over hang the edges. 3 Align your existing TV wall mount bracket with the screw holes on the back of the TV. 4 Install screws (P, Q, R, S, or T) and washers (G, GG, H, or HH) through the top two holes in the wall mount bracket. The TV brackets should be level on the back of the TV. Do not tighten. 5 Install screws (P, Q, R, S, or T) and washers (G, GG, H, or HH) through the bottom two holes in the wall mount bracket. Continued on next page. 18
-
 1
1 -
2
-
3
-
4
-
5
-
6
-
7
-
8
-
9
-
10
-
11
-
12
-
 13
13 -
 14
14 -
 15
15 -
 16
16 -
 17
17 -
 18
18 -
 19
19 -
 20
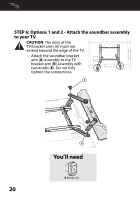
20 -
 21
21 -
 22
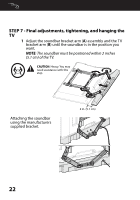
22 -
 23
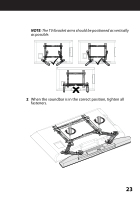
23 -
24
-
25
 |
 |